Basic Image Operations
- Python Pillow - Working with Images
- Python Pillow - Resizing an Image
- Python Pillow - Flip and Rotate Images
- Python Pillow - Cropping an Image
- Python Pillow - Adding Borders to Images
- Python Pillow - Identifying Image Files
- Python Pillow - Merging Images
- Python Pillow - Cutting and Pasting Images
- Python Pillow - Rolling an Image
- Python Pillow - Writing text on image
- Python Pillow - ImageDraw Module
- Python Pillow - Concatenating two Images
- Python Pillow - Creating Thumbnails
- Python Pillow - Creating a Watermark
- Python Pillow - Image Sequences
Python Pillow Color Conversions
- Python Pillow - Colors on an Image
- Python Pillow - Creating Images With Colors
- Python Pillow - Converting Color String to RGB Color Values
- Python Pillow - Converting Color String to Grayscale Values
- Python Pillow - Change the Color by Changing the Pixel Values
Image Manipulation
- Python Pillow - Reducing Noise
- Python Pillow - Changing Image Modes
- Python Pillow - Compositing Images
- Python Pillow - Working with Alpha Channels
- Python Pillow - Applying Perspective Transforms
Image Filtering
- Python Pillow - Adding Filters to an Image
- Python Pillow - Convolution Filters
- Python Pillow - Blur an Image
- Python Pillow - Edge Detection
- Python Pillow - Embossing Images
- Python Pillow - Enhancing Edges
- Python Pillow - Unsharp Mask Filter
Image Enhancement and Correction
- Python Pillow - Enhancing Contrast
- Python Pillow - Enhancing Sharpness
- Python Pillow - Enhancing Color
- Python Pillow - Correcting Color Balance
- Python Pillow - Removing Noise
Image Analysis
Advanced Topics
- Python Pillow - Creating Animated GIFs
- Python Pillow - Batch Processing Images
- Python Pillow - Converting Image File Formats
- Python Pillow - Adding Padding to an Image
- Python Pillow - Color Inversion
- Python Pillow - M L with Numpy
- Python Pillow with Tkinter BitmapImage and PhotoImage objects
Python Pillow Useful Resources
- Python Pillow - Quick Guide
- Python Pillow - Function Reference
- Python Pillow - Useful Resources
- Python Pillow - Discussion
Python Pillow - Quick Guide
Python Pillow - Overview
In todays digital world, we come across lots of digital images. In case, we are working with Python programming language, it provides lot of image processing libraries to add image processing capabilities to digital images.
Some of the most common image processing libraries are: OpenCV, Scikit-image, Pillow, Mahotas and more. However, in this tutorial, we are only focusing on Pillow library and will try to explore various capabilities of this module.
What is Pillow?
Pillow or the Python Imaging Library (PIL) fork by Jeffrey A.Clark and contributors, is a powerful Python library for working with digital images and Image processing. It's built on top of the Python Image Library (PIL) and offers a wide range of functionalities for working with images. It provides extensive functionality for opening, manipulating and saving images in various formats. Pillow is a widely used tool in applications involving image processing, computer vision, web development, graphic design and more.
Pillow offers a wide range of tools and functions for image processing, allowing you to perform tasks such as −
- Opening and Loading Images − Pillow allows us to open and load images in various formats making them available for processing.
- Resizing and Scaling − We can resize images to specific dimensions, scale them up or down and generate thumbnails.
- Cropping − Image cropping involves removing unwanted portions of an image to focus on a specific region.
- Rotation and Flipping − Images can be rotated to correct orientation or for creative purposes. We can also flip images horizontally or vertically.
- Color Adjustment − Pillow provides functions to adjust image properties, including brightness, contrast and color balance.
- Filtering and Effects − Image filtering involves applying filters like blurring, sharpening, edge detection and various effects to enhance or modify the appearance of images.
- Text and Drawing − We can add text, shapes and drawings to images which is useful for annotation and labeling.
- Color Mode Conversion − Pillow supports converting images between different color modes such as RGB, grayscale and CMYK.
- Histogram Equalization − This is a technique for enhancing the contrast of an image by redistributing pixel values.
- Image Filtering − We can apply custom convolution filters to images allowing for advanced image processing operations.
- Geometric Transformations − Pillow supports geometric transformations like affine and perspective transformations which are used for tasks such as correcting image distortion.
- Merging and Compositing − We can merge multiple images or overlay images to create composite images or visual effects.
- Metadata Handling − Pillow allows us to access and modify image metadata such as EXIF and ICC profiles which can be useful for data extraction and management.
- Data Access and Analysis − We can access and manipulate pixel data at a low level enabling more advanced image processing and analysis tasks.
Why Pillow?
Pillow is a preferred choice for image processing in Python due to its −
- Image Processing Capabilities − Pillow provides a comprehensive set of tools for image manipulation such as opening, editing, enhancing and saving images. It supports various image formats for making it versatile for handling different types of image data.
- Ease of Use − Python as a high-level programming language is known for its readability and simplicity. Pillow inherits these characteristics and making it easy for developers to work with images even if they have minimal experience in image processing.
- Platform Independence − Python is platform-independent and so is Pillow. This means we can use Pillow to process images on different operating systems without worrying about compatibility issues.
- Abundance of Documentation − Python and Pillow have extensive documentation, tutorials and a supportive community which simplifies the learning curve for newcomers and provides a wealth of resources for experienced developers.
- Integration with Other Libraries − Python can seamlessly integrate Pillow with other popular libraries and frameworks such as NumPy and OpenCV for advanced image processing and computer vision tasks.
- Open Source − Both Python and Pillow are open-source which means they are free to use and continually improved by a large community of contributors.
Example - Opening and Displaying an Image
Here is a basic example to get you started with Pillow.
This example demonstrates how to open and display an image in Python Pillow.
main.py
from PIL import Image

#Load an image
loaded_image = Image.open("Images/logo-w.png")

# Display the image
loaded_image.show()
Output
The above code will load an image from the specified path and display it using the default image viewer on your system.
Python Pillow - Environment Setup
To set up the environment for Pillow, it is recommended to use the pip package manager, as it simplifies downloading and installing Python packages. In this chapter, we will cover how to install the Pillow package on your computer.
Installing Pillow using pip
To install pillow using pip3, just run the below command in your command prompt −
pip3 install pillow
In case, if pip and pillow are already installed in your computer, above commands will simply mention the requirement already satisfied as shown below −
Requirement already satisfied: pillow in .\Lib\site-packages (12.0.0)
How to Install Pillow on MacOS?
Installing Pillow in a Python environment on macOS is straightforward and can be done using package management tools like pip or conda.
Follow the below steps to set up Pillow on macOS −
Open Terminal: We can access the Terminal application on macOS from the Applications folder under Utilities.
Check Python Version: It's a good practice to ensure we have Python installed. To check our Python version to run the following command −
py --version
python 3.14.2
Install 'pip' (if not already installed): Most recent versions of Python come with pip pre-installed. To check if pip is installed we can run −
pip --version
pip 26.0
If it's not installed, we can install it by downloading the get-pip.py script and running it with Python. Download the script using curl −
curl https://bootstrap.pypa.io/get-pip.py -o get-pip.py
Then run the following script.
py get-pip.py
Install Pillow: And finally install Pillow using pip by simply run the following command.
pip3 install Pillow
This command will download and install Pillow and its dependencies.
Now we have successfully set up the Pillow library in our macOS Python environment. We can now start using Pillow for image processing and manipulation tasks.
How to Install Pillow on Windows?
To install the Python Imaging Library (PIL) or its more up-to-date fork on Windows we can follow these steps −
Install Python: If we haven't already installed Python on our Windows system we can do so by following these steps −
Download the latest Python installer for Windows from the official Python website (https://www.python.org/downloads/windows/).
Run the installer and during installation and make sure to check the option Add Python X.Y to PATH (replace X.Y with the Python version we are installing).
Verify Python Installation: Open a command prompt and check that Python has been installed successfully by running the below code −
py --version
Install Pillow (Recommended): Pillow is the modern fork of PIL and is more actively maintained. To install Pillow open a command prompt and run the following command −
pip3 install Pillow
This command will download and install Pillow and its dependencies on our Windows system.
How to Install Pillow on Linux?
Setting up the Pillow library in a Python environment on a Linux-based operating system is similar to the process on macOS. Here are the steps for setting up the environment for Pillow on Linux.
Check Python Installation: Most Linux distributions come with Python pre-installed. To check if Python is installed first open the terminal and run the following code.
py --version
Make sure we have Python 3.x installed as Python 2 is no longer supported.
Install 'pip' (if not already installed): Most recent versions of Python come with pip pre-installed. To check if pip is installed, run the following code.
pip3 --version
If it's not installed we can install it using the package manager specific to our Linux distribution. For example on Debian/Ubuntu-based systems run the following commands based on the OS.
sudo apt-get install python3-pip
On Red Hat/CentOS-based systems
sudo yum install python3-pip
Install Pillow: To install Pillow using pip and run the below command −
pip3 install Pillow
This command will download and install Pillow and its dependencies.
Example - Verifying Installation
To verify that Pillow has been successfully installed in our system, we can create a Python script and import the library −
main.py
from PIL import Image

#Create an Image object
img = Image.new('RGB', (100, 100), color='blue')

#Display the image
img.show()
Output
Save the script with a .py extension and execute it using Python. If Pillow is installed correctly an image window displaying a red square should appear.
Virtual Environment (Optional but Recommended)
It's a good practice to create a virtual environment for our Python projects to keep dependencies isolated. We can create a virtual environment using the following command −
py -m venv myenv
Replace myenv with the name we want for our virtual environment. To activate the virtual environment run the below code −
source myenv/bin/activate
Now we can use our virtual environment to work on Python projects that require Pillow.
Python Pillow - Working With Images
Opening, writing, displaying and saving images are the fundamental operations while working with images using python pillow library. The Python Pillow library provides a wide range of tools for image processing tasks, providing straightforward methods and customizable options for these basic operations.
In this tutorial, you will lean essential aspects of working with images using the Pillow library including reading, displaying,writting, and saving images.
Reading Images
Reading images, refers to the process of opening and reading image files and making them accessible for manipulation and processing within a Python program.
In Pillow the Image module provides the function open() to perform loading of the given input image. When we call Image.open() it reads the specified image file, decodes the image and creates a Pillow Image object representing the image. This object can then be used for various image processing tasks.
Reading images using open() function
The Image.open() function is capable of loading different image formats such as JPEG, PNG, GIF, BMP, TIFF, ICO and so on.
The below is the syntax and parameters of this function.
PIL.Image.open(fp, mode='r', formats = None)
Where,
fp − A filename or path or URL of an image within the string format.
mode (optional) − The mode parameter is used to set the image into open mode and it should be assigned as r.
formats (optional) − A list or tuple of formats which to be loaded. This can be used as the restriction of the file formats to be loaded.
This function returns the image as the output. Here for displaying the image we have to use the show() function of the Image module.
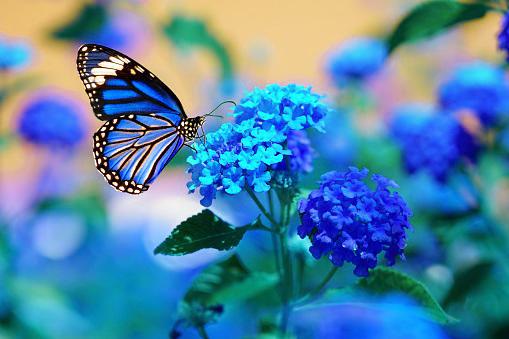
Example - Loading an Image
In this example we are loading an image by specifying the path of the image in the string format and defining the mode as r.
main.py
from PIL import Image

#Load an image
loaded_image = Image.open("Images/butterfly.jpg", mode = 'r')
loaded_image.show()

#Saving the image
loaded_image.save("Output_Images/reading.png")
Image to be used

Output

Example - Loading Image using URL
In this example we are loading the image from the image url. So to perform that we have to use urllib.request() module for reading the image url.
We use the urlretrieve() function of the urllib.request module to download the image from the URL and save it to the local filesystem with the specified filename.
main.py
import urllib.request
from PIL import Image
url = "https://www.tutorialspoint.com/images/logo.png"

#Download the image using urllib
urllib.request.urlretrieve(url, "image.png")

#Open the downloaded image in PIL
loading_image = Image.open("image.png", mode = 'r')

#Show the image
loading_image.show()
Output
Example - Loading Image without format
In this example we are passing the image name and the formats = None as the input parameters.
from PIL import Image

#load the image
loading_image = Image.open("Images/pillow.jpg", formats = None)

#Show the image
loading_image.show()
Output
Writing Images
Writing images are nothing but creating new image files from scratch or modifying existing ones such as drawing, pixel manipulation and compositing. The resulting image can then be further processed or saved to disk using other Pillow functions and methods.
Writing images using new() method
You can use the new() method from the Image module to create a blank image with a specified mode and size. It's a way to generate a blank or uninitialized image with the desired characteristics.
The following is the syntax for Image.new() −
PIL.Image.new(mode, size, color)
Where,
mode − This parameter specifies the color mode for the image such as "RGB" for full-color images or "L" for grayscale. The available modes depend on the version of Pillow and the capabilities of the underlying image libraries (e.g., "RGB," "RGBA," "L," "CMYK," etc.).
size − This parameter is a tuple specifying the width and height of the image in pixels. For example to create a 300x200-pixel image we can use '(300, 200)'.
color' (optional) − This parameter specifies the initial color of the image. It's an optional parameter and can be a single color value or a tuple for multi-channel images. The default color is black for most modes.
Example - Creating Image
In this example we are creating a new image with black using the new() method in Image module in pillow library.
from PIL import Image

#Create a new 300x200 pixel RGB image filled with white
img = Image.new('RGB', (300, 200), color='black')
img.show()
Output

Example - Creating Blue Box
Here, in this example we are creating a new image with blue color of width 600 and height 600 using the new() method in Image module of the pillow.
main.py
from PIL import Image

#Create a new 300x200 pixel RGB image filled with white
img = Image.new('RGB', (500, 200), color='blue')
img.show()
Output

Displaying Image
Displaying images is about rendering the image on the screen so you can view it. Pillow provides the show() method to display an image using the default image viewer of the system.
Displaying images using the show() method
The show() method in Image module does not require any parameters or arguments. This is a straightforward.
Syntax
The below is the syntax of show() function −
PIL.Image.show()
Example - Displaying Image
In this example we are displaying the output of the open() function using the show() function of Image module.
main.py
from PIL import Image

#Open an image
image = Image.open("Images/handwriting.jpg")

#Display the image using the default image viewer
image.show()
Output

Example - Displaying Images in the Jupyter Notebook Environment
If we are working in a Jupyter Notebook environment then we can display images directly in the notebook using the IPython display() function.
The following is the syntax and parameters of the display() function −
IPython.display.display(image_name)
Where,
image_name − This is the name of the image to be displayed.
Example - Displaying Image in Notebook
In this example we are displaying the image using the display() function of the IPython.display module.
from PIL import Image
from IPython.display import display

#Load the image
loading_image = Image.open("Images/tutorialspoint.png")

#Show the image
display(loading_image)
Output
Example - Displaying in a GUI Application
If we are building a graphical user interface (GUI) application then we can use a GUI toolkit like Tkinter for desktop applications or a web framework like Flask or Django for web applications to display images in the user interface.
main.py
In this example we are using the ImageTk method of the PIL module to display the image output.
import tkinter as tk
from PIL import Image, ImageTk

def display_image(image_path):
   root = tk.Tk()
   root.title("Image Viewer")

   image = Image.open(image_path)
   photo = ImageTk.PhotoImage(image)

   label = tk.Label(root, image=photo)
   label.image = photo
   label.pack()

   root.mainloop()

display_image("Images/tutorialspoint.png")
Output

Saving Images
Saving images in pillow refers to save the opened image into the memory and making them accessible for manipulation and processing within a Python program.
The Image module of the pillow library provides the save() method, allowing you to to save the specified image object into the specified location of the memory or local system.
Saving images using save() function
The save() method allow us to save the opened image in different file formats such as JPG, PNG, PDF and so on. This function specifies various options for saving the image including the format, quality and other parameters.
The following is the syntax and parameters of this function.
PIL.Image.save(file, format=None, **params)
Where,
file − The file path or a file-like object to which the image will be saved.
format(optional) − The format to save the image in. If not specified Pillow will try to determine the format from the file extension.
params(optional) − Additional parameters that depend on the format we are saving the image in.
This function saves the image in the specified location with the specified file name.
Example - Saving Image
In this example we are opening the specified image using the open() function of the Image module of pillow library. Then saving the opened image in the specified location by passing the path as the input parameter to the save() function.
main.py
from PIL import Image
loading_image = Image.open("pillow.jpg")

#Show the image
loading_image.show()

#Save the image
loading_image.save("Images/saved_image.jpg")
print("Image saved")
Output
Loaded Image −
Saved Image −
Example - Using various parameters
Here in this example are using the other optional parameters for saving the image in the specified location.
main.py
from PIL import Image
#Load the image
loading_image = Image.open("Images/tutorialspoint.png")

#Show the image
loading_image.show()

#Save the image
loading_image.save("Output_Images/save_outputimg.png", format = "PNG", quality = 200)
print("Image saved")
Output
Loaded Image −

Saved Image −
We can use the save() method to save images in various formats and control the quality and other format-specific options as needed for our specific use case.
Python Pillow - Resizing an Image
Resizing an image in Pillow Library involves changing the dimensions i.e. width and height of the image. This operation can be used to make an image larger or smaller and it can serve various purposes such as preparing images for display on a website, reducing file size or generating thumbnails.
Resizing an Image using the resize() method
In Pillow the resize() method is used to change the dimensions of an image. This function allows us to resize an image in the following ways.
Absolute Dimensions − We can specify the new width and height in pixels to which the image should be resized.
Maintaining Aspect Ratio − If We only specify one dimension either width or height then Pillow can automatically calculate the other dimension to maintain the image's aspect ratio.
Scaling − We can resize the image by a scale factor which uniformly resizes both width and height while preserving the aspect ratio.
Here's the basic syntax for the resize() method −
PIL.Image.resize(size, resample=3)
Where,
size − This can be either a tuple specifying the new width and height in pixels i.e. a single integer specifying the new size (width or height) or a float specifying a scaling factor.
resample(optional) − The default value is 3 which corresponds to the anti-aliased high-quality filter. We can choose from various resampling filters such as Image.NEAREST, Image.BOX, Image.BILINEAR, Image.HAMMING, Image.BICUBIC, Image.LANCZOS, etc.
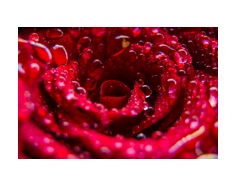
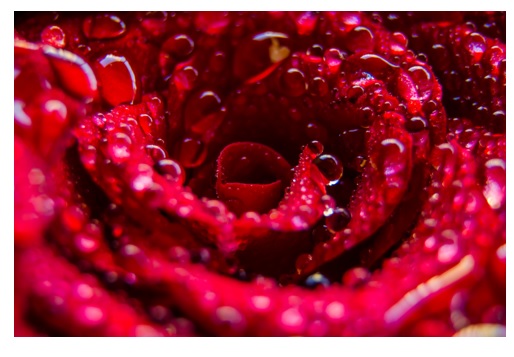
Following is the input image used in all the examples of this chapter.
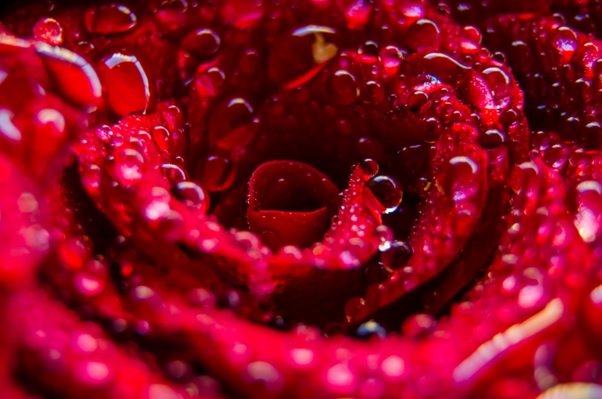
Example - Resizing an Image
In this example we are using the resize() function for adjusting the width and height of the image by passing a tuple as input parameter.
main.py
from PIL import Image
#Open an image
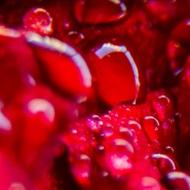
image = Image.open("Images/rose.jpg")
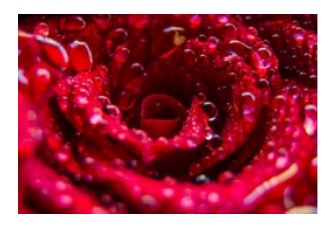
#Resize to specific dimensions (e.g., 300x200 pixels)
new_size = (300, 200)
resized_image = image.resize(new_size)
#Display resized image
resized_image.show()
Output
Example - Resizing an Image with maintaining Aspect Ratio
Here in this example we are resizing the image by maintaining the same aspect ratio of the original input image.
from PIL import Image

#Open an image
image = Image.open("Images/rose.jpg")

#Resize by maintaining aspect ratio (e.g., specify the width)
new_width = 200
aspect_ratio_preserved = image.resize((new_width, int(image.height * (new_width / image.width))))
aspect_ratio_preserved.show()
Output
Example - Resizing with Scale Factor
In this example we are resizing the image with the scale by factor.
main.py
from PIL import Image

#Open an image
image = Image.open("Images/rose.jpg")

#Scale the image by a factor (e.g., 10% of the original size)
scaling_factor = 0.1
scaled_image = image.resize((int(image.width * scaling_factor), int(image.height * scaling_factor)))
scaled_image.show()
Output
Python Pillow - Flip and Rotate an Image
Flipping and rotating images are basic image processing tasks often used to enhance visibility, correct orientation, or achieve specific effects. The Python Pillow library provides simple methods to perform these operations on images.
Flipping images
Flipping an image is an image processing operation that involves reversing the orientation of the image along a specified axis. This operation can be performed either horizontally i.e. left to right or vertically i.e. top to bottom. In digital image processing flipping is often used for various purposes such as mirroring, correcting for camera orientation or achieving artistic effects.
In the context of image flipping there are two primary types, one is horizontal flip and other is vertical flip.
Horizontal Flip (Left to Right) − In a horizontal flip each row of pixels is reversed effectively mirroring the image from left to right.
Vertical Flip (Top to Bottom) − In a vertical flip each column of pixels is reversed effectively mirroring the image from top to bottom.
These can be achieved by using the transpose() method of the Image module of the pillow library.
Flipping images using the transpose() method
The transpose() method in Pillow is used to manipulate the orientation of an image. It allows us to perform various transformations on the image such as rotating and mirroring by specifying the type of transpose operation we want to apply.
The following is the syntax and parameters of the transpose() method.
PIL.Image.transpose(method)
Where,
method − The transpose method to be applied. It can take one of the following values −
Image.Transpose.ROTATE_90 − Rotate the image 90 degrees counterclockwise.
Image.Transpose.ROTATE_180 − Rotate the image 180 degrees.
Image.Transpose.ROTATE_270 − Rotate the image 90 degrees clockwise.
Image.Transpose.FLIP_LEFT_RIGHT − Flip the image horizontally i.e. left to right.
Image.Transpose.FLIP_TOP_BOTTOM − Flip the image vertically i.e. top to bottom.
Following is the input image used in all the examples of this chapter.

Example - Rotating Image
In this example we are using the transpose() method to flip the input image by 90 degrees counterclockwise.
from PIL import Image

#Open an image
image = Image.open("Images/python_programming.jpg")

#Rotate the image 90 degrees counterclockwise
rotated_image = image.transpose(Image.Transpose.ROTATE_90)

#Save or display the rotated image
rotated_image.save("Output_images/rotated_image.jpg")
open_rotated_image = Image.open("Output_images/rotated_image.jpg")
open_rotated_image.show()
Output
Example - Flipping Image
In this example we are using the transpose() method to flip the input image by horizontally.
from PIL import Image

#Open an image
image = Image.open("Images/python_programming.jpg")

#Flip the image horizontally (left to right)
flipped_image = image.transpose(Image.Transpose.FLIP_LEFT_RIGHT)

#Save or display the rotated image
flipped_image.save("Output_images/flipped_image.jpg")
open_flipped_image = Image.open("Output_images/flipped_image.jpg")
open_flipped_image.show()
Output

Example - Flipping Top Bottom
In this example we are using the transpose() method by using FLIP_TOP_BOTTOM parameter to flip the input image by vertically.
from PIL import Image

#Open an image
image = Image.open("Images/python_programming.jpg")

#Flip the image horizontally (left to right)
vflipped_image = image.transpose(Image.Transpose.FLIP_TOP_BOTTOM)

#Save or display the rotated image
vflipped_image.save("Output_images/vflipped_image.jpg")
open_flipped_image = Image.open("Output_images/vflipped_image.jpg")
open_flipped_image.show()
Output

Rotating Images
Rotating an image in Pillow (Python Imaging Library) refers to the process of changing the orientation of an image by a specific angle. This can be useful for various purposes such as correcting the orientation of photos, creating special effects or aligning images.
Pillow provides the rotate() method to perform this operation. The below are the points we need to know about rotating images in Pillow.
Rotate by Angle − The rotate() method allows us to specify the angle in degrees by which we want to rotate the image. A positive angle rotates the image counterclockwise and a negative angle rotates it clockwise.
Canvas Expansion − By default when we rotate an image it may not fit entirely within the original image canvas and which can lead to cropping. Then we can use the expand parameter to ensure that the rotated image fits within the canvas without being cropped.
Rotating images using the rotate() method
The rotate() method in Image module is used to perform rotation of the given input image.
Here the following is the basic syntax of the rotate() method.
PIL.Image.rotate(angle, expand=False, resample=3)
Where,
angle − This parameter specifies the angle of rotation in degrees. Positive values rotate the image counterclockwise while negative values rotate it clockwise.
expand (optional) − If it is set to True it allows the image canvas to be expanded to ensure that the entire rotated image fits within it. If it is set to 'False' (the default) the image is cropped to fit within the original canvas.
resample (optional) − An optional resampling filter. The default value is '3' which corresponds to the anti-aliased high-quality filter. We can choose from various resampling filters such as 'Image.NEAREST', 'Image.BOX', 'Image.BILINEAR', 'Image.HAMMING', 'Image.BICUBIC', 'Image.LANCZOS', etc.
Following is the input image used in all the examples of this chapter.

Example - Rotating Image
In this example we are using the rotate() method for rotating the given input image by 45 degrees.
from PIL import Image

#Open an image
image = Image.open("Images/rose.jpg")

#Rotate the image by 45 degrees counterclockwise
rotated_image = image.rotate(45)

#Save the rotated image
rotated_image.save("Output_images/output.jpg")
rotated_image.show()
Output
Example - Rotating Image without cropping
Here in this example we are rotating the input image by ensuring the rotated image fits within the canvas without cropping. This can be achieved by setting the expand parameter to True.
from PIL import Image

#Open an image
image = Image.open("Images/rose.jpg")

#Rotate the image by 45 degrees and expand the canvas to fit the entire rotated image
rotated_image = image.rotate(45, expand=True)
rotated_image.show()
Output
Example - Rotating Anticlockwise
In this example we are rotating the image into anticlockwise by passing negative value -45 degrees as parameter to the rotate() method.
from PIL import Image

#Open an image
image = Image.open("Images/rose.jpg")

#Rotate the image by 45 degrees and expand the canvas to fit the entire rotated image
rotated_image = image.rotate(-45, expand=True)
rotated_image.show()
Output
Python Pillow - Cropping an Image
Cropping an image in Pillow (Python Imaging Library) involves selecting a specific region or subarea of an image and creating a new image from that region. This operation is useful for removing unwanted parts of an image and focusing on a particular subject or resizing an image to specific dimensions.
The Image module of the pillow library provides the crop() method to perform the crop operation on the images.
Cropping an Image using the crop() method
Cropping an image can be done by using the crop() method, which allows us to define a box specifying the coordinates of the left, upper, right and lower corners of the region that we want to retain and then it creates a new image with only that portion of the original image.
Here is the basic syntax for the crop() method in Pillow library −
PIL.Image.crop(box)
Where,
box − A tuple specifying the coordinates of the cropping box in the format (left, upper, right, lower). These coordinates represent the left, upper, right and lower edges of the rectangular region we want to retain.
Example - Cropping an Image
In this example we are cropping the image by using the crop() method by passing the left, upper, right and lower corners of the image region that we want.
main.py
from PIL import Image

#Open an image
image = Image.open("Images/saved_image.jpg")

# Display the inaput image
image.show()

#Define the coordinates for the region to be cropped (left, upper, right, lower)
left = 100
upper = 50
right = 300
lower = 250

#Crop the image using the coordinates
cropped_image = image.crop((left, upper, right, lower))

#Display the cropped image as a new file
cropped_image.show()
Output
The above code will generate the following output −
Input image:

Output image cropped image:
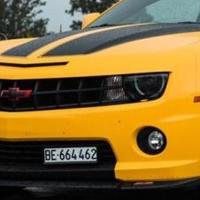
Example - Cropping a Specific Portion of an Image
Here this is another example of performing the crop operation of the specified portion of the input image using the crop() method.
main.py
from PIL import Image

#Open an image
image = Image.open("Images/yellow_car.jpg")

# Display the inaput image
image.show()

#Define the coordinates for the region to be cropped (left, upper, right, lower)
left = 100
upper = 100
right = 300
lower = 300

#Crop the image using the coordinates
cropped_image = image.crop((left, upper, right, lower))

#Display the cropped image
cropped_image.show()
Output
On executing the above code you will get the following output −
Input image:
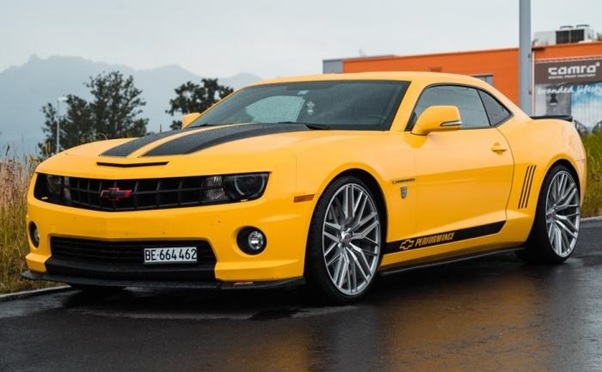
Output cropped image:
Python Pillow - Adding Borders to an Image
Adding borders to images is one of the common task in image processing. Borders can help to frame the content, draw attention to specific areas, or add a decorative element. In Pillow (PIL) the expand() method of the ImageOps module is used to increase the dimensions of an image by adding a border or padding around it. This can be helpful for various purposes such as adding a border, creating a canvas of a specific size or resizing the image to fit a particular aspect ratio.
The expand() method
The expand() method is useful for adding borders to images and adjusting their dimensions while maintaining the aspect ratio. We can customize the size and border color to suit our specific requirements.
Here's the basic syntax for the expand() method −
PIL.Image.expand(size, fill=None)
Where,
size − A tuple specifying the new dimensions i.e. width and height for the expanded image.
fill (optional) − An optional color value to fill the border area. It should be specified as a color tuple (R, G, B) or an integer value representing the color.
Following is the input image used in all the examples of this chapter.

Example - Expanded Image with Border
In this example we are using the expand() method to create the expanded image with the border.
from PIL import Image, ImageOps

#Open an image
image = Image.open("Images/handwriting.jpg")

#Define the new dimensions for the expanded image
new_width = image.width + 40
#Add 40 pixels to the width
new_height = image.height + 40
#Add 40 pixels to the height

#Expand the image with a white border
expanded_image = ImageOps.expand(image, border=20, fill="red")

#Save or display the expanded image
expanded_image.save("Output_Images/expanded_output.jpg")
open_expand = Image.open("Output_Images/expanded_output.jpg")
open_expand.show()
Output

Example - Expanding Image with Blue Border
Here this is another example we are expanding the image border with blue color by using the expand() method of the Image module.
main.py
from PIL import Image, ImageOps

#Open an image
image = Image.open("Images/handwriting.jpg")

#Define the new dimensions for the expanded image
new_width = image.width + 40
#Add 40 pixels to the width
new_height = image.height + 40
#Add 40 pixels to the height

#Expand the image with a white border
expanded_image = ImageOps.expand(image, border=100, fill="blue")

#Save or display the expanded image
expanded_image.save("Output_Images/expanded_output.jpg")
open_expand = Image.open("Output_Images/expanded_output.jpg")
open_expand.show()
Output

Python Pillow - Identifying an Image File
Identifying image files using the Python Pillow (PIL) library involves checking file extensions to determine if a file is likely an image or not. While Pillow itself doesn't have a built-in method to identify image files and we can use functions of os module such as listdir(), path.splitext(), path.is_image_file(), path.join() to filter files based on their extensions as per our user requirements.
Python's os.path module does not provide a direct is_image_file() function for identifying image files. Instead we can typically use the Pillow library (PIL) to check if a file is an image.
However we can create a custom is_image_file() function using os.path in combination with Pillow to check if a file appears to be an image based on its extension.
Here's an example of how we can use os.path to check file extensions and determine if a file is likely an image file −
We define the is_image_file() function which first checks if the file's extension appears to be a common image format (defined in 'image_extensions'). If the file extension is not recognized, it's assumed not to be an image file.
For recognized image file extensions the function attempts to open the file as an image using Pillow's Image.open(). If this operation succeeds without errors then the function returns True indicating that the file is a valid image.
If there is an issue opening the file the function returns False.
This approach combines os.path for extracting file extensions and Pillow for checking whether the file is a valid image.
Example - Idetifying an Image file
main.py
import os
from PIL import Image

def is_image_file(file_path):
   image_extensions = {".jpg", ".jpeg", ".png", ".gif", ".bmp", ".tiff", ".ico"}
   #Add more extensions as needed
   _, file_extension = os.path.splitext(file_path)

   #Check if the file extension is in the set of image extensions
   return file_extension.lower() in image_extensions

file_path = "Images/butterfly.jpg"
if is_image_file(file_path):
   print("This is an image file.")
   Image.open(file_path)
else:
   print("This is not an image file.")
Output
This is an image file.
Example - Checking PDF file as Image File
In this example we are passing the file extension as pdf, as it is not a image file extension the result will be not a image file.
main.py
import os
from PIL import Image

def is_image_file(file_path):
   image_extensions = {".jpg", ".jpeg", ".png", ".gif", ".bmp", ".tiff", ".ico"}
   #Add more extensions as needed
   _, file_extension = os.path.splitext(file_path)

   #Check if the file extension is in the set of image extensions
   return file_extension.lower() in image_extensions

file_path = "Images/butterfly.pdf"
if is_image_file(file_path):
   print("This is an image file.")
   Image.open(file_path)
else:
   print("This is not an image file.")
Output
This is not an image file.
Python Pillow - Merging Images
Pillow (PIL) library is used for merging or combining individual bands of an image to create a new multiband image. It's particularly useful when working with multispectral or multichannel images such as RGB or CMYK images and we want to create a new image by merging specific bands.
In pillow we have the merge() method which belongs to the Image module which is used to merge the given input images.
This method is useful for tasks like combining multiple channels of satellite or medical images, creating custom color images or working with images that have separate channels that need to be combined into a single image.
Syntax
Here's the syntax and usage of the Image.merge() method −
Image.merge(mode, bands)
Where,
mode − This parameter specifies the mode of the new multiband image. It should match the mode of the individual bands we want to merge. Common modes include "RGB" for color images, "RGBA" for images with an alpha channel, and "CMYK" for cyan, magenta, yellow and black color spaces.
bands − This parameter is a tuple of individual image bands that we want to merge. Each band should be a single-channel image or a grayscale image.
Example - Merging Image with RGB Bands
Here is an example of how to use the Image.merge() method to merge the red, green and blue bands of an image to create a new RGB image.
main.py
from PIL import Image

image = Image.open("Images/butterfly.jpg")
r, g, b = image.split()
image = Image.merge("RGB", (b, g, r))
image.show()
Image to be used

Output
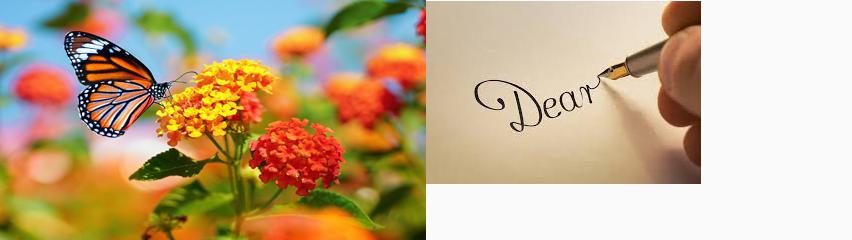
Example - Merging Images
Here, in this example we are merging two input images by using the merge() method of the Image module of pillow library.
from PIL import Image
image1 = Image.open("Images/butterfly.jpg")
image2 = Image.open("Images/handwriting.jpg")

#resize, first image
image1 = image1.resize((426, 240))
image1_size = image1.size
image2_size = image2.size
new_image = Image.new("RGB",(2*image1_size[0], image1_size[1]), (250,250,250))
new_image.paste(image1,(0,0))
new_image.paste(image2,(image1_size[0],1))
new_image.save("Output_Images/merged.jpg")
new_image.show()
The two images to be merged
Output
Python Pillow - Cut and Paste Image
Cutting Images
Pillow (Python Imaging Library) allows us to extract a rectangular region from an image. The extracted region of the image is also known as a bounding box from an image. In The crop() method of the Image module creates a new image that represents the specified region of the original image. This method allows us to specify the coordinates of the bounding box for the region we want to crop.
Here is the syntax and usage of the 'crop()' method in Pillow −
Image.crop(box)
Where,
box − This is a tuple specifying the rectangular region we want to extract. The box parameter should be a tuple of four values: (left, upper, right, lower).
left is the x-coordinate of the left edge of the bounding box.
upper is the y-coordinate of the upper edge of the bounding box.
right is the x-coordinate of the right edge of the bounding box.
lower is the y-coordinate of the lower edge of the bounding box.
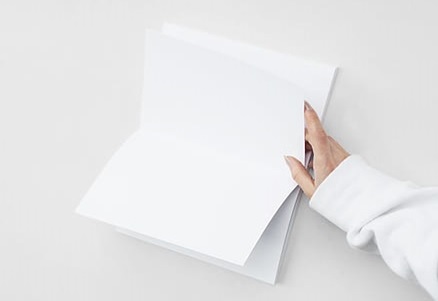
Example - Cutting a Rectangular Portion from an Image
In this example we are cropping a rectangular portion as per our requirement using the crop() method of the Image module.
main.py
from PIL import Image

#Open the image
image = Image.open("Images/book.jpg")

#Define the bounding box for cropping
box = (100, 100, 200, 200)
#(left, upper, right, lower)

#Crop the image using the defined bounding box
cropped_image = image.crop(box)

#Save or display the cropped image
cropped_image.save("Output_Images/cropped_image.jpg")
cropped_image.show()
Image to be cropped
Output

Example - Cutting another Image
Here this is another example for cropping a rectangular part of the image by using the crop() method.
main.py
from PIL import Image

#Open the image
image = Image.open("Images/rose.jpg")

#Define the bounding box for cropping
box = (10, 10, 200, 200)
#(left, upper, right, lower)

#Crop the image using the defined bounding box
cropped_image = image.crop(box)

#Save or display the cropped image
cropped_image.save("Output_Images/cropped_image.jpg")
cropped_image.show()
Input Image
Output
Pasting Images
Pasting images using Python Pillow allows us to extract a region of interest from one image and paste it onto another. This process is useful for tasks like image cropping, object extraction and compositing.
The paste() method in Pillow (Python Imaging Library) allows us to paste one image onto another at a specified position. It's a commonly used method for compositing images, adding watermarks or overlaying one image on top of another.
The below is the syntax and parameters of the paste() function −
PIL.Image.paste(im, box, mask=None)
im − This is the source image i.e., the image we want to paste onto the current image.
box − This parameter specifies the position where we want to paste the source image. It can be a tuple of coordinates '(left, upper, right, lower)'. The source image will be pasted inside the bounding box defined by these coordinates.
mask (optional) − If this parameter provided then it can be an image that defines a transparency mask. The pasted image will be masked according to the transparency values in the mask image.
Example - Pasting an Image
Here is an example of how to use the paste() method to paste one image onto another.
main.py
from PIL import Image

#Open the background image
background = Image.open("Images/black_white.jpg")

#Open the image to be pasted
image_to_paste = Image.open("Images/tutorialspoint.jpg")

#Define the position where the image should be pasted
position = (100, 100)

#Paste the image onto the background
background.paste(image_to_paste, position)

#Save the modified image
background.save("Output_Images/paste1.jpg")
background.show()
Images to be used
Output

Python Pillow - Rolling an Image
Pillow (Python Imaging Library) allows us to roll or shift the image's pixel data within the image. This operation moves the pixel data either horizontally (left or right) or vertically (up or down) to create a rolling effect.
There is no direct method in pillow to roll or shift the image pixel data but it can be performed by using the copy and paste operations on the image. The below are the steps to be followed to perform rolling of the image.
Import the necessary modules.
Next load the image that we want to roll.
Define the rolling offset −
The rolling offset determines how much we want to shift the image. A positive value for the offset will shift the image right i.e. horizontal rolling or down i.e. vertical rolling and a negative value will shift the image left or up. We can choose the offset value based on our desired rolling effect.
Create a new image with the same size as the original. This new image will serve as the canvas for the rolled result.
Perform the rolling operations i.e. either horizontal rolling or vertical rolling.
Save the rolled image to a file.
Optionally display the rolled image. This step is useful for visualizing the result but it's not necessary.
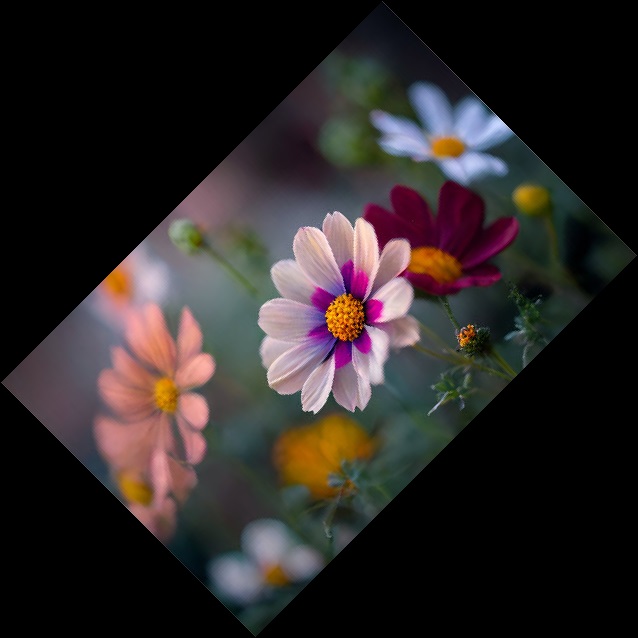
Following is the input image used in all the examples of this chapter.
Example - Horizontally Rolling an Image
In this example we are performing the horizontal rolling on the input image by specifying the horizontal offset as 50.
main.py
from PIL import Image
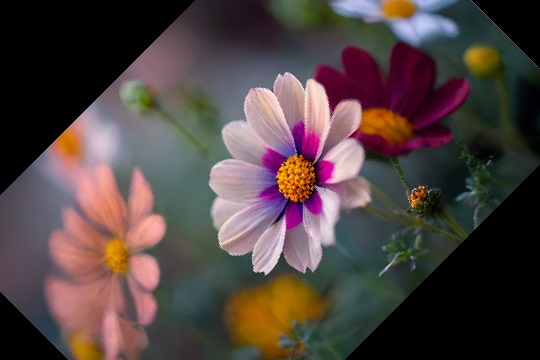
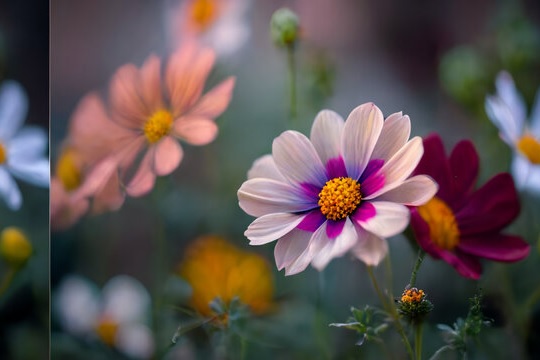
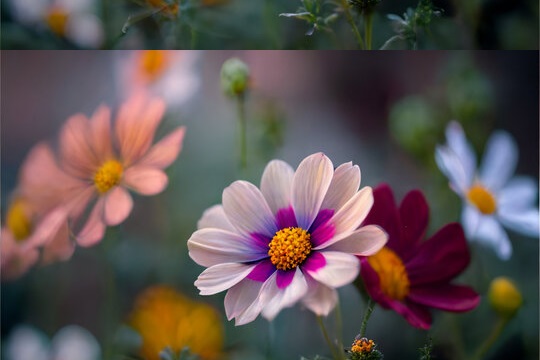
image = Image.open("Images/flowers.jpg")
horizontal_offset = 50
#Change this value as needed
rolled_image = Image.new("RGB", image.size)
for y in range(image.height):
for x in range(image.width):
new_x = (x + horizontal_offset) % image.width
pixel = image.getpixel((x, y))
rolled_image.putpixel((new_x, y), pixel)
rolled_image.save("Output_Images/horizontal_rolled_image.jpg")
rolled_image.show()
Output
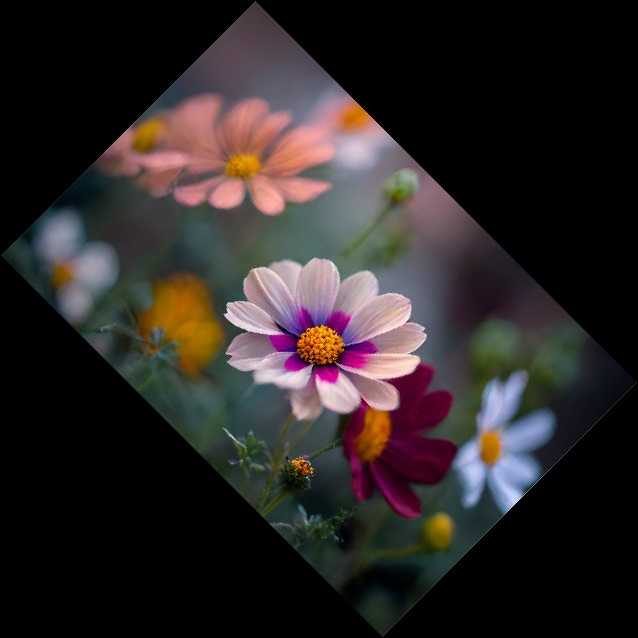
Example - Vertically Rolling an Image
In this example we are rolling the image vertically by specifying the offset value as 50.
main.py
from PIL import Image
image = Image.open("Images/flowers.jpg")
vertical_offset = 50
#Change this value as needed
rolled_image = Image.new("RGB", image.size)
for x in range(image.width):
   for y in range(image.height):
      new_y = (y + vertical_offset) % image.height
      pixel = image.getpixel((x, y))
      rolled_image.putpixel((x, new_y), pixel)
rolled_image.save("Output_Images/vertical_rolled_image.jpg")
rolled_image.show()
Output
Python Pillow - Writing Text to an Image
Adding text to images is a common image processing task that involves overlaying text onto an image. This can be done for various purposes such as adding captions, labels, watermarks or annotations to images. When adding text to images we can typically specify the text content, font, size, color and position.
In Pillow (PIL) We can use the text() method from the ImageDraw module to add text to an image.
The text() method
The text() method allows us to specify the position, text content, font and color of the text we want to add.
Syntax
The below is the basic syntax and parameters for using the text() method −
PIL.ImageDraw.Draw.text(xy, text, fill=None, font=None, anchor=None, spacing=0, align="left")
xy − The position where the text should be placed. It should be a tuple '(x, y)' representing the coordinates.
text − The text content that we want to add to the image.
fill (optional) − The color of the text. It can be specified as a tuple '(R, G, B)' for RGB colors a single integer for grayscale colors or as a named color.
font (optional) − The font to use for the text. We can specify the font using 'ImageFont.truetype()' or 'ImageFont.load()'.
anchor (optional) − Specifies how the text should be anchored. Options include "left", "center", "right", "top", "middle" and "bottom".
spacing (optional) − Specifies the spacing between lines of text. Use positive values to increase spacing or negative values to reduce spacing.
align (optional) − Specifies the horizontal alignment of the text within the bounding box. Options include "left", "center" and "right".
Following is the input image used in all the examples of this chapter.
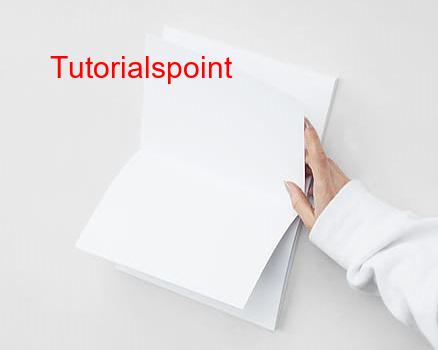
Example - Writing a Text to an Image
In this example we are adding the text Tutorialspointto the input image using the text() method of the Image module.
main.py
from PIL import Image, ImageDraw, ImageFont

#Open an image
image = Image.open("Images/book.jpg")

#Create a drawing object
draw = ImageDraw.Draw(image)

#Define text attributes
text = "Tutorialspoint"
font = ImageFont.truetype("arial.ttf", size=30)
text_color = (255, 0, 0)
#Red
position = (50, 50)

#Add text to the image
draw.text(position, text, fill=text_color, font=font)

#Save or display the image with the added text
image.save("Output_Images/textoutput.jpg")
opentext = Image.open("Output_Images/textoutput.jpg")
opentext.show()
Output
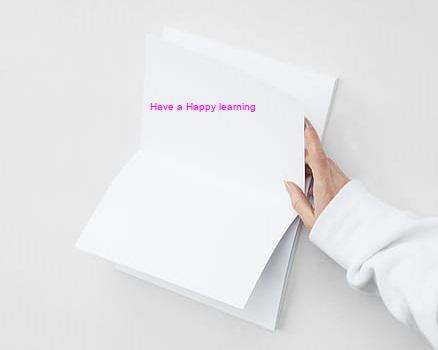
Example - Writing another text to an Image
Here this is another example of adding text to the image by using the text() method of the ImageDraw module.
main.py
from PIL import Image, ImageDraw, ImageFont

#Open an image
image = Image.open("Images/book.jpg")

#Create a drawing object
draw = ImageDraw.Draw(image)

#Define text attributes
text = "Have a Happy learning"
font = ImageFont.truetype("arial.ttf", size=10)
text_color = (255, 0, 255)
position = (150, 100)

#Add text to the image
draw.text(position, text, fill=text_color, font=font)

#Save or display the image with the added text
image.save("Output_Images/textoutput.jpg")
opentext = Image.open("Output_Images/textoutput.jpg")
opentext.show()
Output
Python Pillow - ImageDraw Module
Drawing on images in Pillow involves using the Pillow library (Python Imaging Library) to add various visual elements such as lines, shapes, text and more to an existing image. This is a common image processing task used for tasks like image annotation, creating visualizations, adding labels or captions highlighting areas of interest and more.
We can use the ImageDraw module in Pillow to create a drawing object and then use various methods of this object to draw on the image. We can use the line(), rectangle(), ellipse(), text() and other methods to draw various elements on the image.
Drawing Text on the Image
To draw or write text on an image we can use the ImageDraw.Draw() function in the Pillow library, this method creates a drawing object that allows us to perform drawing operations on images.
Syntax
The following is the syntax and parameters of the Draw() method −
PIL.ImageDraw.Draw(image, mode=None)
Where,
image − This parameter represents the image on which we want to perform drawing operations. It's an instance of a Pillow Image object.
mode (optional) − This parameter specifies the mode in which drawing will occur. The available modes are −
- 1 − 1-bit pixels (monochrome)
- L − 8-bit pixels, black and white
- RGB − 3x8-bit pixels, true color
- RGBA − 4x8-bit pixels with transparency
- CMYK − 4x8-bit pixels in the CMYK color space
- HSV − 3x8-bit pixels in the HSV color space
Input image to be used for the below two examples.
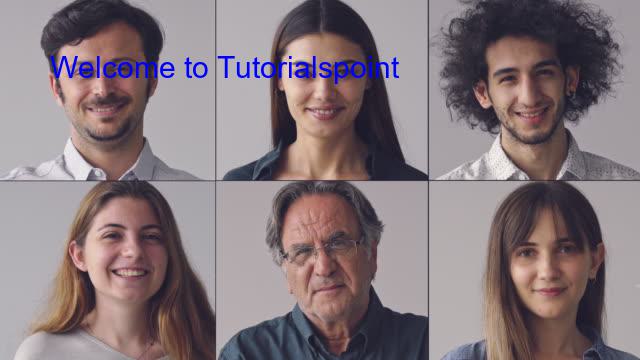
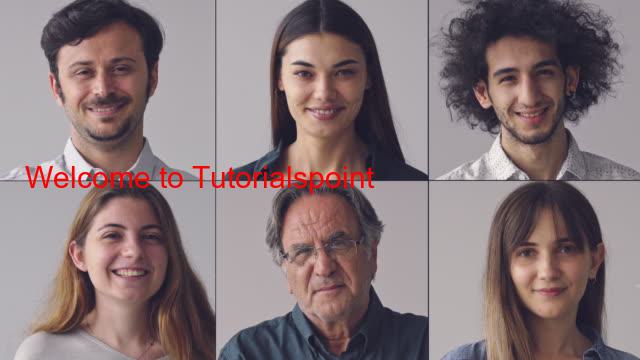
Example - Using Draw() method to add Text to Image
In this example we are using the Draw() method of the ImageDraw module to add text on the image.
main.py
from PIL import Image, ImageDraw, ImageFont

#Open an image
image = Image.open("Images/faces.jpg")

#Create a drawing object
draw = ImageDraw.Draw(image)

#Define text attributes
text = "Welcome to Tutorialspoint"
font = ImageFont.truetype("arial.ttf", size=30)
text_color = (0, 0, 255)

#Blue
text_position = (50, 50)

#Add text to the image
draw.text(text_position, text, fill=text_color, font=font)

#Save or display the image with the added drawing elements
image.save("Output_Images/drawnimage.jpg")

#Open the output drawn image
opendraw = Image.open("Output_Images/drawnimage.jpg")
opendraw.show()
Output
Example - Adding Blue Text to an Image
Here this is another example using the Draw() method for adding text at the middle of the image.
main.py
from PIL import Image, ImageDraw, ImageFont

#Open an image
image = Image.open("Images/faces.jpg")

#Create a drawing object
draw = ImageDraw.Draw(image)

#Define text attributes
text = "Welcome to Tutorialspoint"
font = ImageFont.truetype("arial.ttf", size=30)
text_color = (255, 0, 0)

#Add text to the image
draw.text(xy=(50, 50),
   text = text,
   font = font,
   fill= text_color)

#Save or display the image with the added drawing elements
image.save("Output_Images/drawnimage.jpg")

#Open the output drawn image
opendraw = Image.open("Output_Images/drawnimage.jpg")
opendraw.show()
Output
Drawing Rectangle on the Image
In the Pillow library (PIL) the PIL.ImageDraw.Draw.rectangle() method is used to draw a rectangle on an image using a specified outline and fill color. This method is part of the ImageDraw module and is typically called on an ImageDraw object created using PIL.ImageDraw.Draw().
Syntax
The following is the syntax and parameters of the PIL.ImageDraw.Draw.rectangle() method −
ImageDraw.Draw.rectangle(xy, outline=None, fill=None, width=0)
Where,
xy − This parameter specifies the coordinates of the rectangle as a tuple of two points. Each point is represented as (x1, y1) and (x2, y2) in which (x1, y1) is the upper-left corner and (x2, y2) is the lower-right corner of the rectangle.
outline − This parameter is optional and specifies the color of the outline of the rectangle. We can provide a color as a string e.g., "red" or "#FF0000" or as a tuple representing an RGB color (e.g., (255, 0, 0)). If set to None no outline will be drawn.
fill − This parameter is optional and specifies the color to fill the rectangle. Like the outline parameter we can specify the fill color as a string or an RGB tuple. If set to None the rectangle will not be filled.
width − This is an optional parameter to specify the width of the outline of the rectangle. By default it is 0 which means the rectangle will be filled without an outline.
Input image to be used for the below two examples.
Example - Drawing a Rectangle over an Image
In this example we are drawing a rectangle on the given input image by using the PIL.ImageDraw.Draw.rectangle() method.
main.py
from PIL import Image, ImageDraw

#Open an image
image = Image.open("Images/black_white.jpg")

#Create a drawing object
draw = ImageDraw.Draw(image)

#Define the coordinates for the rectangle
xy = [(100, 100), (200, 200)]

#Draw a filled red rectangle
draw.rectangle(xy, outline="blue", fill="red", width = 3)

#Save or display the modified image
image.save("Output_Images/output.jpg")
image.show()
Output

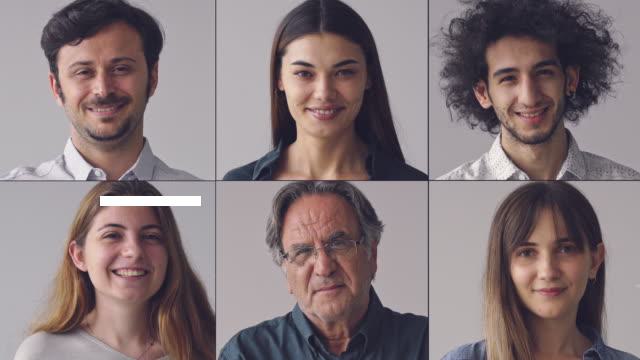
Example - Drawing an Empty Rectangle Over an Image
Here this is another example of drawing the rectangle with the specifying the outline as Blue and fill parameter as None.
from PIL import Image, ImageDraw

#Open an image
image = Image.open("Images/black_white.jpg")

#Create a drawing object
draw = ImageDraw.Draw(image)

#Define the coordinates for the rectangle
xy = [(100, 100), (200, 200)]

#Draw a filled red rectangle
draw.rectangle(xy, outline= "Blue", fill= None, width = 2)

#Save or display the modified image
image.save("Output_Images/output.jpg")
image.show()
Output
Drawing Line on the Image
PIL.ImageDraw.Draw.line() is a method provided by the Python Imaging Library (PIL) or the Pillow library. Pillow is a more modern and actively maintained fork of PIL that is used to draw a line on an image. This method is part of the ImageDraw module within PIL/Pillow which is used for drawing shapes, text, and other graphics on images.
Syntax
Here the below is the syntax of the PIL.ImageDraw.Draw.line() method −
PIL.ImageDraw.Draw.line(xy, fill=None, width=0, joint=None)
Where,
xy − A sequence of (x, y) coordinates specifying the endpoints of the line.
fill − This parameter is optional and specifies the color of the line. It can be a string specifying a color name a (R, G, B) tuple or an integer value. If not specified, the line will be black.
width − This parameter is optional and specifies the line's width in pixels. The default value is 0 which means the line will be 1 pixel wide.
joint − This parameter is optional and can be used to specify the joint style for the line. It can be one of the following values −
None (default) − The line has regular joints.
curve − The line has rounded joints.
miter − The line has pointed joints.
Input image to be used for the below two examples.
Example - Drawing a Line over an Image
In this example we are drawing a line on the input image by using PIL.ImageDraw.Draw.line() method.
main.py
from PIL import Image, ImageDraw, ImageFont

#Open an image
image = Image.open("Images/faces.jpg")

#Create a drawing object
draw = ImageDraw.Draw(image)

#Draw a line
line_coordinates = [(100, 200), (200, 200)]
draw.line(line_coordinates,width=10)

#Save or display the image with the added drawing elements
image.save("Output_Images/drawnimage.jpg")

#Open the output drawn image
opendraw = Image.open("Output_Images/drawnimage.jpg")
opendraw.show()
Output
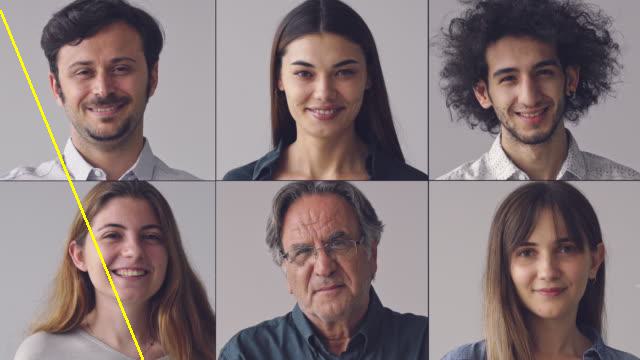
Example - Adding Curved Line to an Image
This is another example of the PIL.ImageDraw.Draw.line() method by specifying the joint parameter as curve.
main.py
from PIL import Image, ImageDraw

#Open an image
image = Image.open("Images/faces.jpg")

#Create a drawing object
draw = ImageDraw.Draw(image)

#Define the endpoints and draw a red line
line_color = "Yellow"
#Red color
start_point = (0, 10)
end_point = (200, 500)
line_width = 3
draw.line([start_point, end_point], fill=line_color, width=line_width, joint = "curve")

#Save or display the modified image
image.save("output.jpg")
image.show()
Output
Drawing Polygon on the Image
PIL.ImageDraw.Draw.polygon() is a method provided by the ImageDraw object in the Pillow library. It allows us to draw a polygon on an image. A polygon is a closed shape with multiple sides so we can specify the coordinates of the vertices to define the shape of the polygon.
This method is part of the ImageDraw.Draw object and is used to create and fill a polygon shape with a specified color.
Syntax
The following is the syntax of the PIL.ImageDraw.Draw.polygon() method −
PIL.ImageDraw.Draw.polygon(xy, fill=None, outline=None)
Where,
xy − This is a list of tuples or a flat list of coordinates specifying the vertices of the polygon. Each tuple or pair of coordinates represents a vertex of the polygon.
fill − This parameter is optional and specifies the fill color for the interior of the polygon. If we want the polygon to have no fill and we can set this to None.
outline − This parameter is optional and specifies the color of the outline or border of the polygon. If we don't want an outline then we can set this to None.
Input image to be used for the below two examples.
Example - Drawing a Polygon over Image
In this example we are drawing a polygon on the image by using the PIL.ImageDraw.Draw.polygon() method and specifying the parameters xy, fill and outline.
main.py
from PIL import Image, ImageDraw

#Open an image
image = Image.open("Images/black_white.jpg")

#Create a drawing object
draw = ImageDraw.Draw(image)

#Define the vertices of the polygon
polygon_vertices = [(100, 100), (200, 100), (150, 200)]

#Draw a filled polygon with a blue interior and a red outline
draw.polygon(polygon_vertices, fill="blue", outline="red")

#Save or display the modified image
image.save("Output_Images/output.jpg")
image.show()
Output
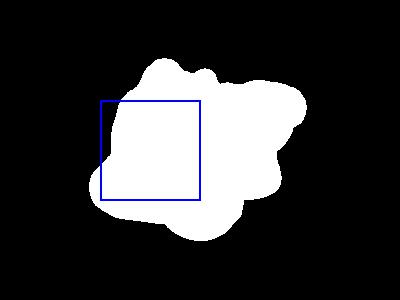
Example - Drawing Overlay Polygon on an Image
Here this is another example in which we are passing the fill parameter of PIL.ImageDraw.Draw.polygon() method as None to avoid filling the polygon.
main.py
from PIL import Image, ImageDraw

#Open an image
image = Image.open("Images/bw.png")

#Create a drawing object
draw = ImageDraw.Draw(image)

#Define the vertices of the polygon
polygon_vertices = [(100, 100), (200, 100), (150, 200),(100,150),(90,100)]

#Draw a filled polygon with a blue interior and a red outline
draw.polygon(polygon_vertices, fill= None, outline="red")

#Save or display the modified image
image.save("Output_Images/output.jpg")
image.show()
Output

ImageDraw Module Methods
In addition to the above methods, This module offers many other specific methods that can be used for specific conditions. Let's explore and understand the basic fuctionality of each method −
| Sr.No. | Methods with Description |
|---|---|
| 1 |
Draws an arc inside a specified bounding box. |
| 2 |
Draws a chord (a segment of a circle) inside a bounding box. |
| 3 |
Draws a filled pie slice inside a bounding box. |
| 4 |
Draws points (single pixels) at specified coordinates on an image. |
| 5 |
Draws a regular polygon with a given bounding circle. |
| 6 |
Draws a rounded rectangle. |
| 7 |
Draws multiline text at a specified position on an image. |
Python Pillow - Concatenating Images
Concatenating two images with Pillow typically refers to combining or joining two separate images to create a single image either horizontally or vertically. This process allows us to merge the content of the two images into a larger image.
Pillow is a Python Imaging Library (PIL) which provides various methods and functions to perform image manipulation including image concatenation. When concatenating images we can choose to stack them on top of each other vertical concatenation or place them side by side horizontal concatenation.
There are no direct methods in pillow to concatenate the images but we can perform that by using the paste() method in python.
Here is a step-by-step guide on how to perform concatenation of two Images.
Import the necessary modules.
Load the two images that we want to concatenate.
Decide whether we want to concatenate the images horizontally or vertically.
Save the concatenated image to a file.
Optionally we can display the concatenated image. This step is useful for visualizing the result but it's not required.
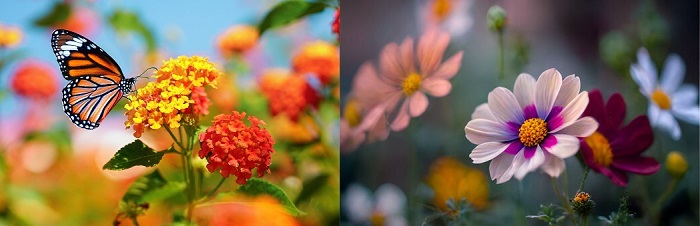
Following is the input images used in all the examples of this chapter.
Example - Concatenating Images Horizontally
In this example we are concatenating two input images horizontally.
main.py
from PIL import Image
image1 = Image.open("Images/butterfly.jpg")
image2 = Image.open("Images/flowers.jpg")
result = Image.new("RGB", (image1.width + image2.width, image1.height))
result.paste(image1, (0, 0))
result.paste(image2, (image1.width, 0))
result.save("Output_Images/horizontal_concatenated_image.png")
result.show()
Output
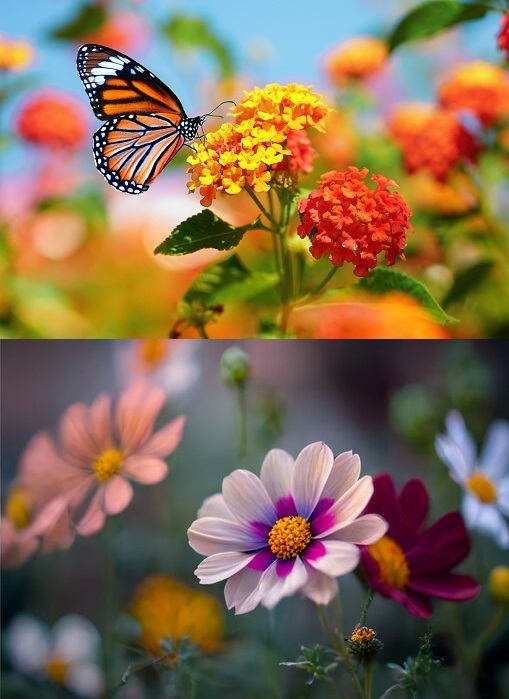
Example - Concatenating Images Vertically
Here in this example we are concatenating the given two input images vertically.
main.py
from PIL import Image
image1 = Image.open("Images/butterfly.jpg")
image2 = Image.open("Images/flowers.jpg")
result = Image.new("RGB", (image1.width, image1.height + image2.height))
result.paste(image1, (0, 0))
result.paste(image2, (0, image1.height))
result.save("Output_Images/vertical_concatenated_image.png")
result.show()
Output
Python Pillow - Creating Thumbnail of an Image
Thumbnails are typically used for displaying image previews or smaller representations of the original image. They are useful for optimizing web pages and improving the loading speed of image-heavy applications. Pillow provides a convenient way to generate thumbnails from images. Here are some key points about thumbnails in Pillow.
Preservation of Aspect Ratio − When creating a thumbnail Pillow maintains the aspect ratio of the original image. This means that the width and height of the thumbnail are adjusted in proportion to the original image so the image does not appear distorted.
Reduced File Size − Thumbnails are smaller in size compared to the original image. This reduction in size is useful for optimizing web pages or displaying images in constrained spaces such as in galleries or lists.
Convenience − It simplifies the process of creating thumbnails. It resizes the image while preserving the aspect ratio and it provides an easy way to save the resized image to a file.
Quality Control − We can control the quality of the thumbnail using various parameters such as the size, filter type for resizing and compression settings if we are saving the thumbnail in a compressed format like JPEG.
In pillow we have the method namely thumbnail() which allows us to specify the dimensions and shape for the thumbnail image. We can create the thumbnails in two different shapes one is square and the other is circle.
Creating square Thumbnails
In this chapter we are going to see how to create a square thumbnail by using the thumbnail() method of the pillow library.
The syntax and parameters for thumbnail() method is as follows.
image.thumbnail(size, resample=Image.BOX)
Where,
size (required) − This parameter specifies the dimensions i.e. width and height for the thumbnail as a tuple (width, height). We can also specify just one dimension and the other dimension will be automatically calculated to maintain the aspect ratio.
resample (optional) − This parameter defines the resampling filter to use when resizing the image. It can be one of the following constants −
Image.NEAREST (default) − Nearest-neighbor sampling.
Image.BOX − Box sampling, which is similar to the nearest-neighbor but generally gives slightly smoother results.
Image.BILINEAR − Bilinear interpolation.
Image.HAMMING − Hamming-windowed sinc interpolation.
Image.BICUBIC − Bicubic interpolation.
Image.LANCZOS − Lanczos-windowed sinc interpolation.
Example - Creating a Square Thumbnail
In this example we are creating the square thumbnail by using the thumbnail() method by specifying the width and height parameters of the thumbnail to the resize parameter.
main.py
from PIL import Image

#Open the image
image = Image.open("Images/tutorialspoint.jpg")

#Define the thumbnail size as a tuple (width, height)
thumbnail_size = (200, 200)

#Create a thumbnail
image.thumbnail(thumbnail_size, resample = Image.BOX )
image.save("Output_Images/square_thumbnail_image.jpg")
image.show()
Output

Example - Creating a Smaller Thumbnail
Here is another example of creating a square thumbnail with width 100 and height as 100 by using the thumbnail() module.
main.py
from PIL import Image

#Open the image
image = Image.open("Images/butterfly.jpg")

#Define the thumbnail size as a tuple (width, height)
thumbnail_size = (100, 100)

#Create a thumbnail
image.thumbnail(thumbnail_size, resample = Image.Resampling.BILINEAR)
image.save("Output_Images/square_thumbnail_image.png")
image.show()
Output

Creating circle Thumbnails
In the above section, we have gone through what is thumbnail and how to create the square thumbnail using the pillow thumbnail() method. Now, we are going to see the circle thumbnail creation. Circle thumbnails means the thumbnail will be in the circle shape.
The syntax and parameters of the thumbnail() method for creating the circle thumbnail are same as the square thumbnail.
Here are the steps to be followed to create the circular thumbnail.
Import the necessary modules Image and ImageDraw from the Pillow library.
Use the Image.open() method to load the original image.
Determine the dimensions of the original image using the size attribute.
Create a new object from the mask image using the ImageDraw.Draw() method.
Draw an ellipse on the mask image using the draw.ellipse() method. Centering the image to the center of the ellipse.
Create a new image with the same dimensions as the original image with a transparent background using the Image.new() method.
Use the save() method to save the circle thumbnail image.
Use the show() method to display the created circle thumbnail image.
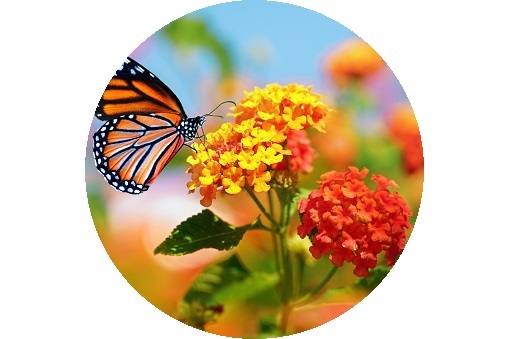
Example - Creating Circular Thumbnail
In this example we are creating the circular thumbnail by using the thumbnail() method of the pillow library.
main.py
#importing the required libraries
from PIL import Image, ImageDraw

#open image file
img = Image.open('Images/butterfly.jpg')

#resize image
img.thumbnail((2000, 2000))

#create circular mask
mask = Image.new('L', img.size, 0)
draw = ImageDraw.Draw(mask)
center = [50, 50]
radius = 10
draw.ellipse((center[0] - radius, center[1] - radius, center[0] + radius, center[1] + radius), fill = 255)

#apply mask to image
result = Image.new('RGBA', img.size, (255, 255, 255, 0))
result.paste(img, (0, 0), mask)

#save circular thumbnail image
result.save('Output_Images/circular_thumbnail1.png')

#showing the image using show() function
result.show()
Image to be used
Output
Python Pillow - Creating Watermark over Image
What is Watermark?
A watermark is a recognizable and often transparent image or text that is superimposed onto another image, document or object to indicate ownership, authorship or origin. Watermarks are typically used to protect intellectual property and content which prevent unauthorized use or distribution and provide attribution. They serve various purposes as mentioned below −
Copyright Protection − Artists, photographers and content creators often use watermarks to protect their intellectual property by marking their work with their name, logo or copyright information. This helps deter unauthorized use or distribution of their content.
Branding − Companies and organizations use watermarks to brand their images or documents with their logos, names or slogans. This reinforces their brand identity and makes it clear where the content originated.
Document Verification − Watermarks can be used on official documents such as certificates to prevent forgery or unauthorized reproduction. For example diplomas or notarized documents may have watermarks.
Security − In currency and other security documents intricate and often invisible watermarks are used to deter counterfeiting. These watermarks are difficult to reproduce accurately making it easier to detect counterfeit bills or documents.
Image Attribution − In the context of stock photography and image licensing watermarks can be used to display a preview of the image with a watermark. When a user purchases the image they receive a version without the watermark.
Digital Media − In the digital world watermarks are often used on images and videos shared online to protect content. They can also be used to give credit to the original creator.
Watermarks can take various forms such as text, logos, patterns or even invisible data embedded within the content. They are typically placed in a manner that is difficult to remove without compromising the quality of the content and their purpose is to provide a visual or digital indicator of authenticity or ownership.
Creating the text watermark
Now let's explore how to create a text watermark by using the pillow library. In pillow there is no direct method to create the watermarks but we can achieve it by using the ImageDraw, ImageFont and Image methods.
Following is the input image used in all the examples of this chapter.
Example - Adding Text as Watermark to an Image
In this example we are creating the text Tutorialspoint as the watermark by using the pillow library.
main.py
from PIL import Image, ImageDraw, ImageFont
original_image = Image.open("Images/butterfly.jpg")
draw = ImageDraw.Draw(original_image)
watermark_text = "Tutorialspoint"
font_size = 20
font = ImageFont.truetype("arial.ttf", font_size)
text_color = (255, 255, 255)

#White color (RGB)
bbox = draw.textbbox((0,0),watermark_text, font)
# bbox format - (left, top, right, bottom)
text_width = bbox[2] - bbox[0]
text_height = bbox[3] - bbox[1]
image_width, image_height = original_image.size
margin = 10

#Margin from the right and bottom edges
position = (image_width - text_width - margin, image_height - text_height - margin)
draw.text(position, watermark_text, font=font, fill=text_color)
original_image.save("Output_Images/watermarked_image.png")
original_image.show()
Output

Creating the image Watermark
Previously we created the text watermark on an image, in the same way we can create an image as the watermark by using the ImageDraw, copy and paste methods available in pillow.
Example - Creating Image as watermark
In this example we are creating the Tutoriaslpoint logo image as the watermark by the methods available in pillow.
main.py
from PIL import Image
original_image = Image.open("Images/butterfly.jpg")
watermark = Image.open("Images/tutorialspoint.jpg")
#Use the appropriate image file for your watermark

#Resize the watermark image to a specific width or height
target_width = 200

#Adjust this to our preferred size
aspect_ratio = float(target_width) / watermark.width
target_height = int(watermark.height * aspect_ratio)
watermark = watermark.resize((target_width, target_height),Image.Resampling.LANCZOS)
watermarked_image = original_image.copy()

#Adjust the position where you want to place the watermark (e.g., bottom right corner)
position = (original_image.width - watermark.width, original_image.height - watermark.height)
watermarked_image.paste(watermark, position)
watermarked_image.save("Output_Images/watermarked_image.jpg")
watermarked_image.show()
Output
Python Pillow - Image Sequences
Introduction to Image Sequences
Image sequences in Pillow (Python Imaging Library) refer to a collection of individual images displayed in a specific order to create an animation. The popular file formats of the image sequences are GIFs, APNG (Animated Portable Network Graphics), FLI/FLC, TIFF files(with more than one frame), and more.
The Python Pillow library provides the ImageSequence module to work with image sequences and animated pictures. The main feature of this ImageSequence module is, its ability to iterate over the frames of an image sequence. We can do this by using the ImageSequence.Iterator class which acts as a wrapper for image sequences and simplifies the process of accessing individual frames.
Reading Image Sequences
Reading image sequences is a fundamental operation when working with animations or multi-frame images. You can open and read an image sequences using the Image.open() method in the Python Pillow (PIL) library.
Example - Reading Image Sequences
Here's an example demonstrating how to read image sequences using the Python Pillow Image.open() method.
main.py
from PIL import Image, ImageSequence

# Open the image sequence file
image = Image.open("Images/Book_animation.gif")

# Display the opened image
image.show()
Output
While executing the above code we get the following output −
When an image sequence file is opened, PIL automatically loads the first frame. To access other frames in the sequence, we need to iterate through them using the ImageSequence.Iterator class, which provides a convenient way to loop through all the frames in the image sequence.
Accessing Frames in an Image Sequence
The ImageSequence.Iterator() class in Python Pillow allows us iterate over the frames of an image sequence. It accepts an image object as a parameter and implements an iterator object that can be used by a user to iterate over an image sequence. We can use the operator to access individual frames in the sequence or we can use the for loop to iterate over all of the frames.
The syntax for using the ImageSequence.Iterator() class is as follows −
image_object = PIL.ImageSequence.Iterator(image)
where image_object is the iterator used to loop over the frames of the image sequence, and image is our input image object (an instance of PIL.Image.)
To work with ImageSequence.Iterator in Pillow, follow these steps
Import necessary modules such as Image and ImageSequence.
Load the first image in the sequence using the Image.open() method.
Iterate through the frames using PIL.ImageSequence.Iterator() class.
Within the loop, process or manipulate each frame as needed, which can include any of the following operations such as resizing, adding text, applying filters, or other image manipulation techniques available in Pillow.
Save the processed frames as separate images, using the save() method.
Example - Iterating Image frames
Below is an example that demonstrates using ImageSequence.Iterator() class to iterate over the frames of an image sequence.
main.py
from PIL import Image, ImageSequence

# Open an image sequence file
image = Image.open("Images/Book_animation.gif")

index = 0

# Iterate through the frames
for frame in ImageSequence.Iterator(image):
    # Process or manipulate the current frame here
    frame.convert('RGB').save("Output_Images/frame % d.jpg" % index)
    index += 1

print("All frames of the ImageSequence are saved separately.")
Output
All frames of the ImageSequence are saved separately.
When you execute the above code, all frames of the image sequence are saved separately in your working directory.
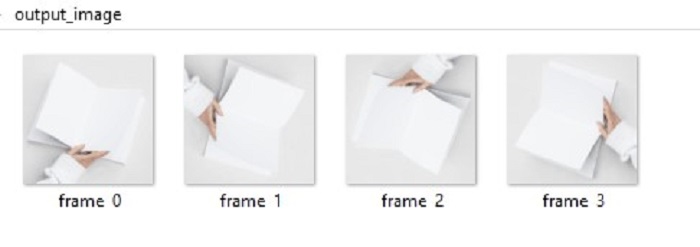
We can also access various properties of individual frames within an image sequence. For example we can retrieve the duration of each frame which determines how long it is displayed in an animation.
Example - Creating Image Sequences
While the primary use of the Image Sequence module is to extract frames from existing sequences we can also create our own image sequences. Learn more about Creating Animated GIFs here.
Here is a basic example that demonstrating how to create a GIF image sequence from a list of image.
main.py
from PIL import Image

# Create a list of image objects
images = [Image.open(f"Images/split{i}.jpg") for i in range(1,4)]

# Save the image sequence as a GIF
images[0].save(
    "Output_Images/creating_animation.gif",
    save_all=True,
    append_images=images[1:],
    duration=200,
    loop=0
)

print("Image sequence created and saved as creating_animation.gif")
Output
Image sequence created and saved as creating_animation.gif
Modifying and Saving Image Sequences
Image sequences can be manipulated and saved just like regular images. For modifying the image sequences you can use the all_frames() method from the Pillow's ImageSequence module. This method applies a specified function to all frames in the image sequence and returns a list containg the all separated frames. By using this method, we can iterate over each frame in an image sequence and apply the necessary transformations.
Following is the syntax of the ImageSequence.all_frames() method −
PIL.ImageSequence.all_frames(im,func)
Where,
im − An image sequence.
func − A function to apply to all of the image frames.
After making changes to an image sequence we can save it as a new image sequence or a different format depending on our needs.
Example - Modifying Sequences
This example demonstrates how to add text to each frame of an image sequence and save the modified sequence.
main.py
from PIL import Image, ImageSequence, ImageDraw

# Open the image sequence
im = Image.open('Images/book_animation.gif')

# Define a function to add text to each frame
def add_text(im_frame):
    draw = ImageDraw.Draw(im_frame)
    draw.text((150, 100), "Tutorialspoint", fill='green')
    return im_frame

# Apply the add_text function to all frames in the image sequence
ims = ImageSequence.all_frames(im, add_text)

# Save the modified frames as a new GIF
ims[0].convert('RGB').save('Output_Images/modified_image_sequences.gif', save_all=True, append_images=ims[1:])
print('Text added to each frame of the given ImageSequence.')
Output
Text added to each frame of the given ImageSequence.
Conclusion
Pillow's Image Sequence module is a powerful tool for working with image sequences and creating animations. We can easily iterate over frames, extract properties and apply various image operations to create dynamic visuals. Whether we are working with GIFs or creating custom animations or processing image sequences Pillow provides the necessary functions and classes to simplify the process.
Python Pillow - Colors on an Image
In Pillow (Python Imaging Library) colors on an image are defined as a combination of red (R), green (G) and blue (B) components which are commonly known as the RGB color model. This model represents colors as a mixture of these three primary colors with each component ranging from 0, i.e. minimum intensity to 255, i.e. maximum intensity. A fourth component, alpha (A) is often included for transparency with 0 representing full transparency and 255 representing full opacity.
Defining colors accurately is crucial when working with images as it determines the appearance and composition of the image. Pillow provides various ways to represent and define colors making it flexible for various image processing and manipulation tasks.
Here is a detailed explanation of these color components −
Red (R)
The red component represents the amount of red in a color.
When R is 0 which represents there is no red and resulting in a shade of cyan or green.
When R is 255 which specifies there is maximum red intensity and produces a pure red color.
Intermediate values produce varying shades of red from pink to orange.
Green (G)
The green component represents the amount of green in a color.
When G is 0 which represents there is no green and results in shades of magenta or blue.
When G is 255 which represents there is maximum green intensity and results in a pure green color.
Intermediate values produce different shades of green from lime to teal.
Blue (B)
The blue component represents the amount of blue in a color.
When B is 0 which represents there is no blue and results in shades of yellow or red.
When B is 255 which represents there is maximum blue intensity by producing a pure blue color.
Intermediate values create various shades of blue from navy to sky blue.
Alpha (A)
The alpha component is optional but essential for controlling transparency.
When A is 0 which represents the pixel is fully transparent allowing what's behind it to show through.
When A is 255 which represents the pixel is fully opaque and it completely covers what's underneath.
Intermediate alpha values create varying levels of transparency allowing a pixel to be partially see-through.
To represent a color in Pillow we typically use a tuple or list with four values in the order (R, G, B, A) to specify the color of a pixel. For example (255, 0, 0, 255) represents a fully opaque red pixel while (0, 255, 0, 128) represents a semi-transparent green pixel.
Example - Creating a image
Let's see an example of creating an image using the Python Pillow with RGBA color representation.
main.py
from PIL import Image

# Create an RGBA image with Semi-transparent green
image = Image.new('RGBA', (700, 300), (0, 255, 0, 128))

# Display the resultant Semi-transparent green image
image.show()
Output
On executing the above program you will get output RGBA like below −

Understanding the RGB color model and the alpha component is fundamental when working with image processing and manipulation in Pillow as it allows us to create, modify and combine colors and images in various ways.
Example - Hexadecimal Color Representation
Hexadecimal color codes are widely used on the web and in graphics design. In Pillow we can define a color using a hexadecimal string which represents the RGB values. The format is #RRGGBB where RR, GG and BB are two-digit hexadecimal values for red, green and blue respectively.
Here is an example of creating an image using the Python Pillow Hexadecimal color representation. In this example we are creating red colored image with 80% opacity.
main.py
from PIL import Image

# Create a red colored image with 80% opacity
image = Image.new('RGBA', (700, 300), "#ff0000cc")

# Display the resultant image
image.show()
Output
when you run the above program you will get following output −

Example - Named Colors
Pillow ImageColor module provides a set of named colors (commonly used HTML color names), allowing us to use these color names instead of numerical values. For example, the name red indicates pure red color, and it is important to note that color names are case insensitive, meaning "red" and "Red" are treated the same.
The following example demonstrates how to access and print the named colors available in Pillow's ImageColor module.
main.py
from PIL import ImageColor

# Access all the named colors
color_map = ImageColor.colormap

# Count the number of named colors
num_colors = len(color_map)

# Print the available named colors and count
print(color_map)
print(f'Total number of named colors: {num_colors}')
Output
when you run the above program you will get similar output like below −
{'aliceblue': '#f0f8ff', 'antiquewhite': '#faebd7', 'aqua': '#00ffff', ...}
Total number of named colors: 148
Example - Grayscale Colors
Grayscale colors are represented by a single intensity value ranging from 0 (black) to 255 (white). We can define grayscale colors using a single integer value.
Here is an example of creating a new grayscale image with grayscale color representation.
main.py
from PIL import Image, ImageDraw, ImageFont

# Create a greyscale image with color intensity value
image = Image.new('L', (700, 300), 100)

#Create a drawing object
draw = ImageDraw.Draw(image)

#Define text attributes
text = "Welcome to Tutorialspoint..."
font = ImageFont.truetype("arial.ttf", size=35)
text_position = (150, 130)

# Specify the text color using the single integer value
text_color = 255

#Add text to the image
draw.text(text_position, text, fill=text_color, font=font)
image.show()
Output
Following is the output of the above program −

Python Pillow - Colors on an Image
What is creating Images with colors?
Creating images with color in Pillow (Python Imaging Library, now known as Pillow) involves creating new images filled with specific colors. Creating images with color in Pillow involves generating an image of a specific size and filling it with a desired color. This process allows us to generate solid-colored images which can be useful for various purposes such as creating backgrounds, placeholders or simple graphics.
In pillow we have the method namely new() which is used to create the images with colors. At the beginning we have seen the syntax and parameters of the new() method available in the Image module.
There are few steps to be followed to create the image with the defined color. Let's see them one by one.
Import the necessary modules
To use Pillow we need to import the required modules typically Image and ImageDraw. The Image module provides functions for creating and manipulating images and ImageDraw is useful for drawing shapes and text on the images.
Define the image size and color
Determine the dimensions i.e. width and height of the image we want to create and specify the color we want to use. Colors can be defined in various ways such as RGB tuples or color names.
Create a new image with the specified size and color
Use the Image.new() method to create a new image. We can specify the image mode which can be "RGB," "RGBA," "L" (grayscale) and others depending on our needs. We can also provide the size and color for the image.
Optionally draw on the image
If we want to add shapes, text or other elements to the image then we can use the ImageDraw module. This allows us to draw on the image using various methods like draw.text(), draw.rectangle() and so on.
Save or display the image
We can save the created image to a file in a specific format (e.g., PNG, JPEG) using the save() method. Alternatively we can display the image using the show() method which opens the image in the default image viewer.
Example - Creating a Solid Red Image
Here in this example we are creating the solid red color image by using the new() method of the Image module.
main.py
from PIL import Image, ImageDraw

#Define image size (width and height)
width, height = 400, 300

#Define the color in RGB format (e.g., red)
color = (255, 0, 0)

#Red
#Create a new image with the specified size and color
image = Image.new("RGB", (width, height), color)

#Save the image to a file
image.save("Output_Images/colored_image.png")

#Show the image (opens the default image viewer)
image.show()
Output

Example - Adding Text to Image
In this example we are using the optional feature i.e adding the text by using the ImageDraw module Draw() method.
main.py
from PIL import Image, ImageDraw

#Define image size (width and height)
width, height = 400, 300

#Define the color in RGB format (e.g., red)
color = (255, 0, 0)

#Red
#Create a new image with the specified size and color
image = Image.new("RGB", (width, height), color)

#Optional: If you want to draw on the image, use ImageDraw
draw = ImageDraw.Draw(image)
draw.text((10, 10), "Hello, Welcome to Tutorialspoint", fill=(255, 255, 255))

#Draw white text at position (10, 10)
#Save the image to a file
image.save("Output_Images/colored_image.png")

#Show the image (opens the default image viewer)
image.show()
Output
Python Pillow - Converting Color String to RGB Color Values
Converting a color string to RGB color values is the process of taking a textual representation of a color and converting it into the numerical values that represent the color in the Red, Green and Blue (RGB) color model. In the RGB color model colors are specified by three numbers each ranging from 0 to 255 in which,
The first number represents the amount of red in the color.
The second number represents the amount of green in the color.
The third number represents the amount of blue in the color.
For example, the color red is typically represented as (255, 0, 0) in RGB values which means it has maximum red (255) and no green (0) or no blue (0).
Converting color string to RGB Color values
To perform the conversion of color string into RGB values we can use the getrgb() function in the ImageColor module of the Python Pillow library.
Syntax
The below is the syntax and parameters of the ImageColor.getrgb() method −
ImageColor.getrgb(color)
Where,
color − This is a string representing the color we want to convert to RGB values. It can be a color name (e.g., "red", "blue") or a hexadecimal color code (e.g., "#00FF00") or other color representations that Pillow supports.
Example - Converting Blue Color to RGB Tuple
In this example the ImageColor.getrgb() function takes a color string blue as an argument and returns a tuple of RGB values.
main.py
from PIL import ImageColor

#Define a color string
color_string = "blue"

#Convert the color string to RGB values
rgb_color = ImageColor.getrgb(color_string)

#Print the RGB values
print("The conversion of the color string",color_string,":",rgb_color)
Output
The conversion of the color string blue: (0, 0, 255)
Example - Converting Yellow Color to RGB Tuple
Here, in this example we are converting the yellow color string into the RGB values. We are passing the color string argument as a hexadecimal value to the ImageColor.getrgb() method.
main.py
from PIL import ImageColor

#Define a color string
color_string = "#FFFF00"

#Convert the color string to RGB values
rgb_color = ImageColor.getrgb(color_string)

#Print the RGB values
print("The conversion of the color string",color_string,":",rgb_color)
Output
The conversion of the color string "#FFFF00": (255, 255, 0)
Python Pillow - Converting Color String to Grayscale Color Values
The ImageColor.getcolor() function in the Python Pillow (PIL) library is same as the ImageColor.getrgb() which allows us to retrieve the color value of a given color name or hexadecimal code.
Syntax
The following is the syntax and parameters as follows −
ImageColor.getcolor(color, mode)
color − This is a string representing the color you want to retrieve the value for. It can be a color name (e.g., "red", "blue") or a hexadecimal color code (e.g., "#00FF00") or other color representations that Pillow supports.
mode − This parameter specifies the color mode in which we want to retrieve the color value. The default value is "RGB" which means the color value will be returned as an RGB tuple. We can also specify other modes like "RGBA," "CMYK," "HSV" etc., depending on our needs.
Example - Converting Blue Color to Grayscale
In this example we use ImageColor.getcolor() to retrieve the RGB value of the color blue and the RGBA value of the color green in RGBA mode. We can adjust the color and mode parameters to suit our specific requirements.
main.py
from PIL import ImageColor

#Get the RGB value of the color "blue"
blue_rgb = ImageColor.getcolor("blue", mode = "RGB")

#Get the RGBA value of the color "green" in RGBA mode
green_rgba = ImageColor.getcolor("green", mode="RGBA")
print("Blue (RGB):", blue_rgb)
print("Green (RGBA):", green_rgba)
Output
Blue (RGB): (0, 0, 255)
Green (RGBA): (0, 128, 0, 255)
Example - Converting Hexadecimal Color Value to Grayscale
Here, in this example we are giving the hexadecimal value as the color string argument to the ImageColor.getcolor() method.
main.py
from PIL import ImageColor

#Get the RGB value of the color "blue"
blue_rgb = ImageColor.getcolor("#8A2BE2", mode = "RGB")

#Get the RGBA value of the color "green" in RGBA mode
green_rgba = ImageColor.getcolor("#008000", mode="RGB")
print("Violet (RGB):", blue_rgb)
print("Green (RGB):", green_rgba)
Output
Violet (RGB): (138, 43, 226)
Green (RGB): (0, 128, 0)
Python Pillow - Change the Color by Changing the Pixel Values
Changing the color of an image by changing the pixel values in Pillow (PIL) involves manipulating the individual pixel values of an image to achieve the desired color transformation. We can perform various color operations by altering the RGB values of each pixel.
Modifying Pixel Values using the getdata() Method
We have the method namely, getdata() in pillow. It can used to retrieve the pixel data of an image. It returns a sequence of pixel values typically as a one-dimensional list or iterable where each pixel value represents the color of a pixel in the image. By using the getdata() method, you can access and modify the pixel values of an image.
The below is the syntax and parameters of the Image.getdata() method −
Image.getdata(band=None)
Where,
band − This specifies that what the band has to return. The default value is to return all bands. For returning a single band pass in the index value. For example 0 to get the Rband from an RGBimage.
The below are the steps to be followed for changing the color pixels of an image.
Open the image that we want to modify using Pillow's Image.open() method.
Access the image data as a pixel-by-pixel list using image.getdata().
Create a new list of pixel values by changing the color as we desire.
Create a new image with the modified pixel values using Image.new().
Save or display the modified image using save().
Example - Getting Pixels of an Image
In this example we are getting the list of pixel data of the given input image by using the Image.getdata() method.
main.py
from PIL import Image

#Open the image you want to modify
image = Image.open("Images/python_logo.jpg")

#Access the pixel data of the image
pixels = list(image.getdata())
print(pixels)
Input Image
Output
[(255, 255, 255, 255), (255, 255, 255, 255), ...]
Example - Modifying the pixel of Image
Here in this example we are modifying the pixel of the given input image into red by using the Image.getdata() method.
main.py
from PIL import Image

#Open the image you want to modify
image = Image.open("Images/three.jpg")

#Access the pixel data of the image
pixels = list(image.getdata())

#Define the new color you want (e.g., red)
new_color = (255, 0, 0)
#Red

#Create a new list of pixel values with the new color
modified_pixels = [new_color if pixel != (255, 255, 255) else pixel for pixel in pixels]

#Create a new image with the modified pixel values
modified_image = Image.new("RGB", image.size)
modified_image.putdata(modified_pixels)

#Save the modified image to a file
modified_image.save("Output_Images/modified_image.jpg")

#Display the modified image
modified_image.show()
Input Image
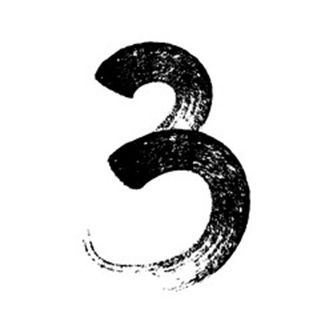
Output

Python Pillow - Reducing Noise
Reducing noise in Pillow refers to the process of applying various techniques and filters to an image to remove or decrease unwanted artifacts or irregularities that can degrade the image quality. Image noise is random variations in brightness or color in images typically caused by factors such as low light conditions, electronic interference or imperfections in the image sensor. Reducing noise is an important step in image processing to improve the overall quality of images.
Pillow (PIL) provides several built-in filters and methods for reducing noise in images. Some common techniques and filters for noise reduction in Pillow include −
- Gaussian Blur − Applying a Gaussian blur filter to the image can help smooth out reduce noise by averaging the pixel values in the vicinity of each pixel. This creates a smoother appearance and can reduce the impact of noise. The degree of blurring can be adjusted to control the level of noise reduction.
- Median Filter − Median filtering replaces each pixel's value with the median value of the neighboring pixels. The median filter is effective for removing salt-and-pepper noise where isolated pixels have extreme values. It replaces each pixel's value with the median value of neighboring pixels.
- Bilateral Filter − The bilateral filter smooths the image while preserving edges. It can be effective at reducing noise while maintaining image details.
- Denoising Algorithms − Pillow supports various denoising algorithms such as the bilateral filter, Total Variation (TV) denoising algorithm or the Non-Local Means (NLMeans) filter which can be used to reduce noise while preserving image details.
- Thresholding − We can apply a threshold to an image to remove noise by converting pixel values below a certain threshold to black and values above the threshold to white effectively binarizing the image.
Python Pillow - Image.filter() Method
Image.filter() is a method in the Python Imaging Library (PIL) or its fork. Pillow used to apply various image filters and enhancements to an image. Filters are image processing operations that can be used to modify an image in different ways such as blurring, sharpening or enhancing certain features. This method allows us to apply various predefined filters to an image.
Pillow provides a variety of predefined filters that we can use with Image.filter(), including −
ImageFilter.BLUR − Applies a simple blur to the image.
ImageFilter.CONTOUR − Enhances the contours of objects in the image.
ImageFilter.DETAIL − Enhances the image's details.
ImageFilter.EDGE_ENHANCE − Emphasizes the edges in the image.
ImageFilter.EMBOSS − Adds a 3D embossing effect to the image.
ImageFilter.SHARPEN − Sharpens the image.
Syntax
The syntax and parameters for using Image.filter() is as follows −
output_image = input_image.filter(filter_name, filter_parameters)
Where,
input_image − This is the source image to which we want to apply the filter.
filter_name − This is a string specifying the name of the filter we want to apply. Pillow provides a variety of built-in filters and we can use one of these filter names as a string. For example "GaussianBlur," "MedianFilter," "Sharpen", etc. We can also define our custom filters by providing a kernel (a list of values) as a filter.
filter_parameters (optional) − Some filters may accept additional parameters that control the behavior of the filter. These parameters are specific to the particular filter being used. If the filter we are applying requires parameters we would pass them as arguments in the filter_parameters part.
Example - Blurring an Image
In this example we are trying to blur the image by passing the ImageFilter.BLUR as the input parameter to the Image.filter() method.
main.py
from PIL import Image, ImageFilter

#Open an image
input_image = Image.open("Images/flowers.jpg")

#Apply Gaussian blur to the image
output_image = input_image.filter(ImageFilter.BLUR())

#Save the resulting image
output_image.save("Output_Images/blur.jpg")
output_image.show()
Image to be used
Output
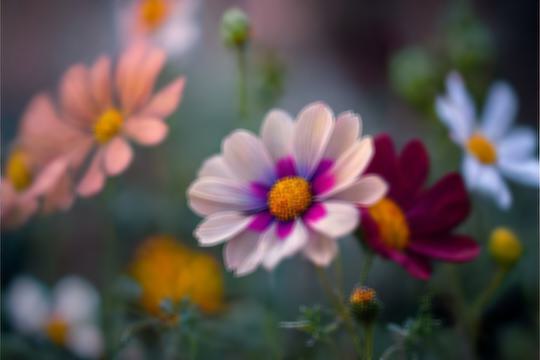
Example - Blurring a specific part of an Image
Here in this example we are blurring a specified part of the image by using the ImageFilter.BoxBlur() method.
main.py
from PIL import Image, ImageFilter

#Open an image
input_image = Image.open("Images/rose.jpg")

#Apply Gaussian blur to the image
output_image = input_image.filter(ImageFilter.BoxBlur(20))

#Save the resulting image
output_image.save("Output_Images/blur.jpg")
output_image.show()
Image to be used
Output
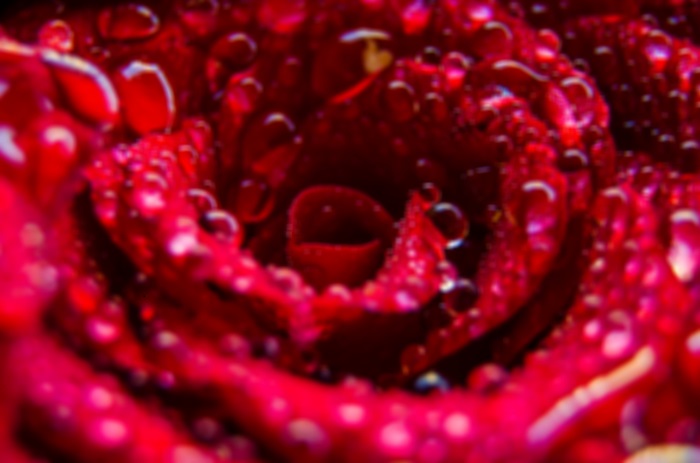
Python Pillow - Changing Image Modes
What is Changing Image Modes?
In Pillow changing image modes refers to the process of converting an image from one color representation to another. Each mode represents a different way of encoding and interpreting color information in an image.
Changing image modes is useful for various purposes such as preparing images for specific applications like printing, display or analysis. It allows us to adapt the color representation of an image to better suit our needs.
In Pillow the Image class provides a method called convert() that allows us to change the mode of an image. The mode of an image determines the type and depth of pixel values it can contain.
The following is the syntax and parameters of the convert() method of the Image class.
original_image.convert(mode)
Where,
original_image This is the source image whose mode we want to change.
mode This is a string specifying the desired mode for the new image.
The below are the common changing Image modes.
L − 8-bit pixels represent black and white
RGB − 3x8-bit pixels represent true color
RGBA − 4x8-bit pixels represent true color with transparency
CMYK − 4x8-bit pixels represent color separation
HSV − Hue, saturation, value color space
1 − 1-bit pixels, black and white which stored with one pixel per byte
Following is the input image used in all the examples of this chapter.
Example - Changing Image to Black and White
In this example we are changing the image mode into black and white by passing the mode argument as L to the convert() method.
main.py
from PIL import Image

#Open an image
original_image = Image.open("Images/rose.jpg")

#Convert the image to grayscale (mode 'L')
grayscale_image = original_image.convert("L")

#Save the resulting image
grayscale_image.save("Output_Images/output_grayscale.jpg")
grayscale_image.show()
Output
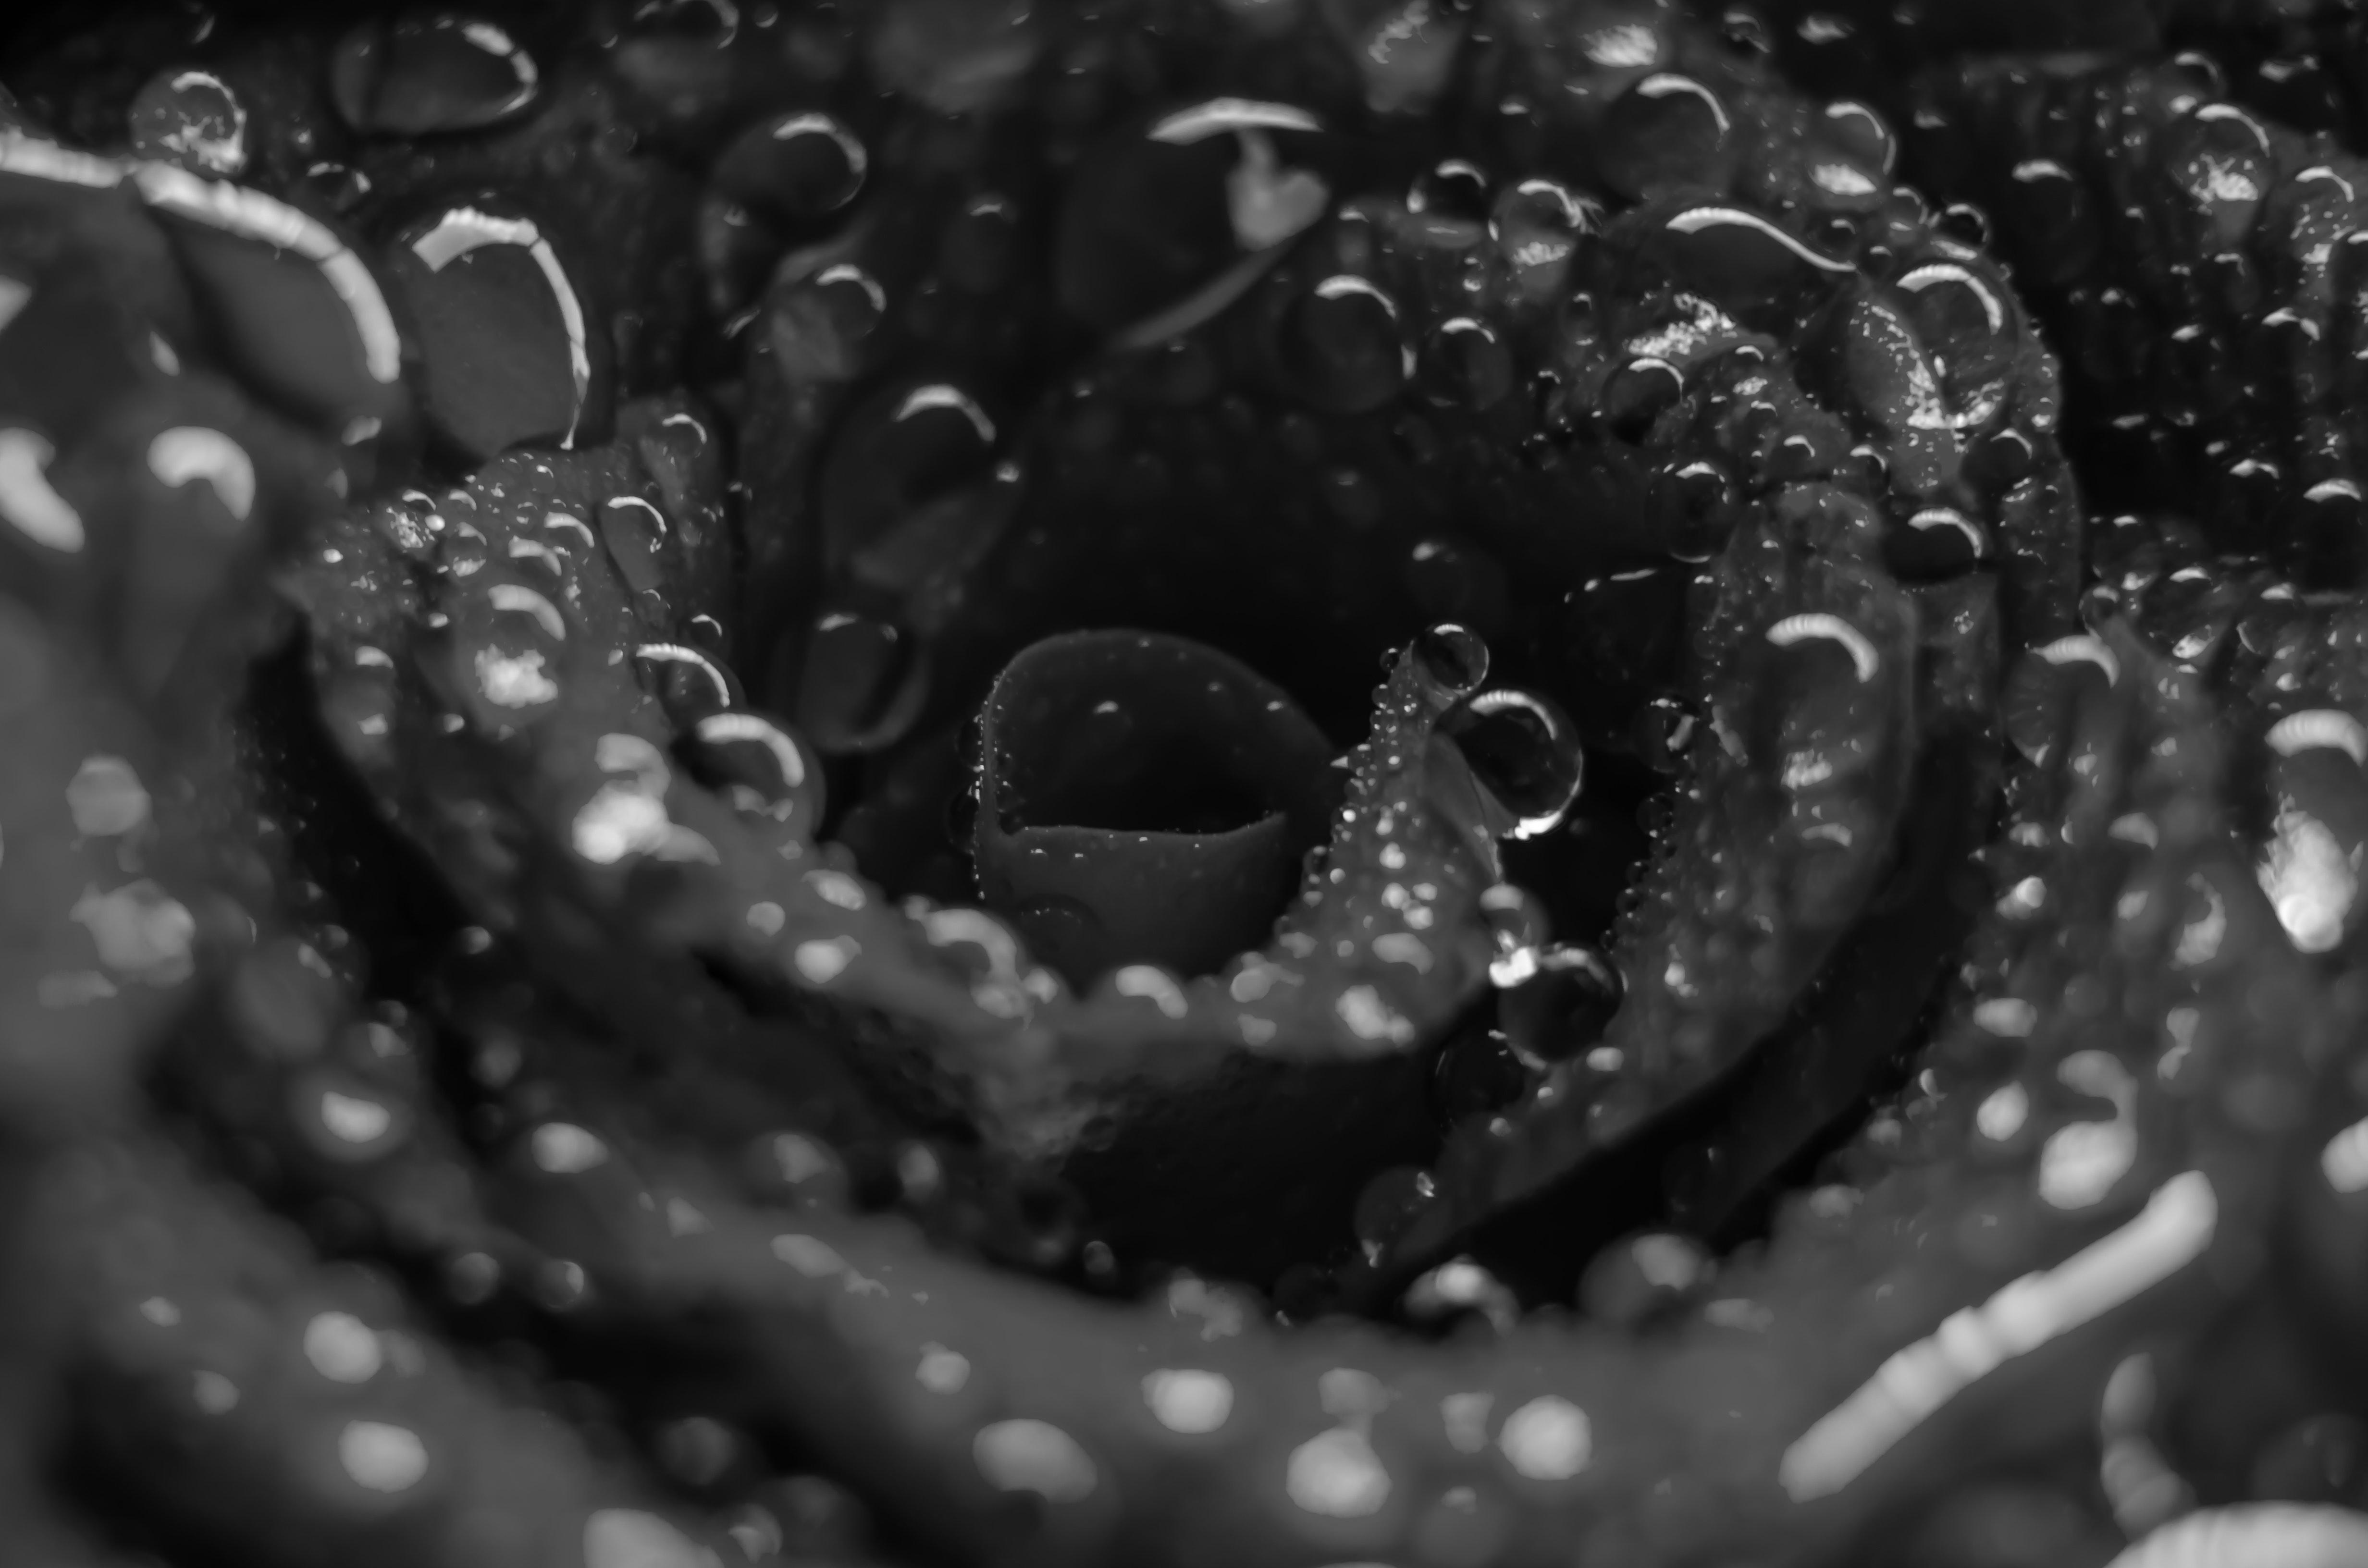
Example - Changing Image to 1 mode
Here is the another example of changing the image mode to 1 by using the convert() method.
main.py
from PIL import Image

#Open an image
original_image = Image.open("Images/rose.jpg")

#Convert the image to RGBA mode
single_image = original_image.convert("1")

#Save the resulting image
single_image.save("Output_Images/output_single_image.jpg")
single_image.show()
Output
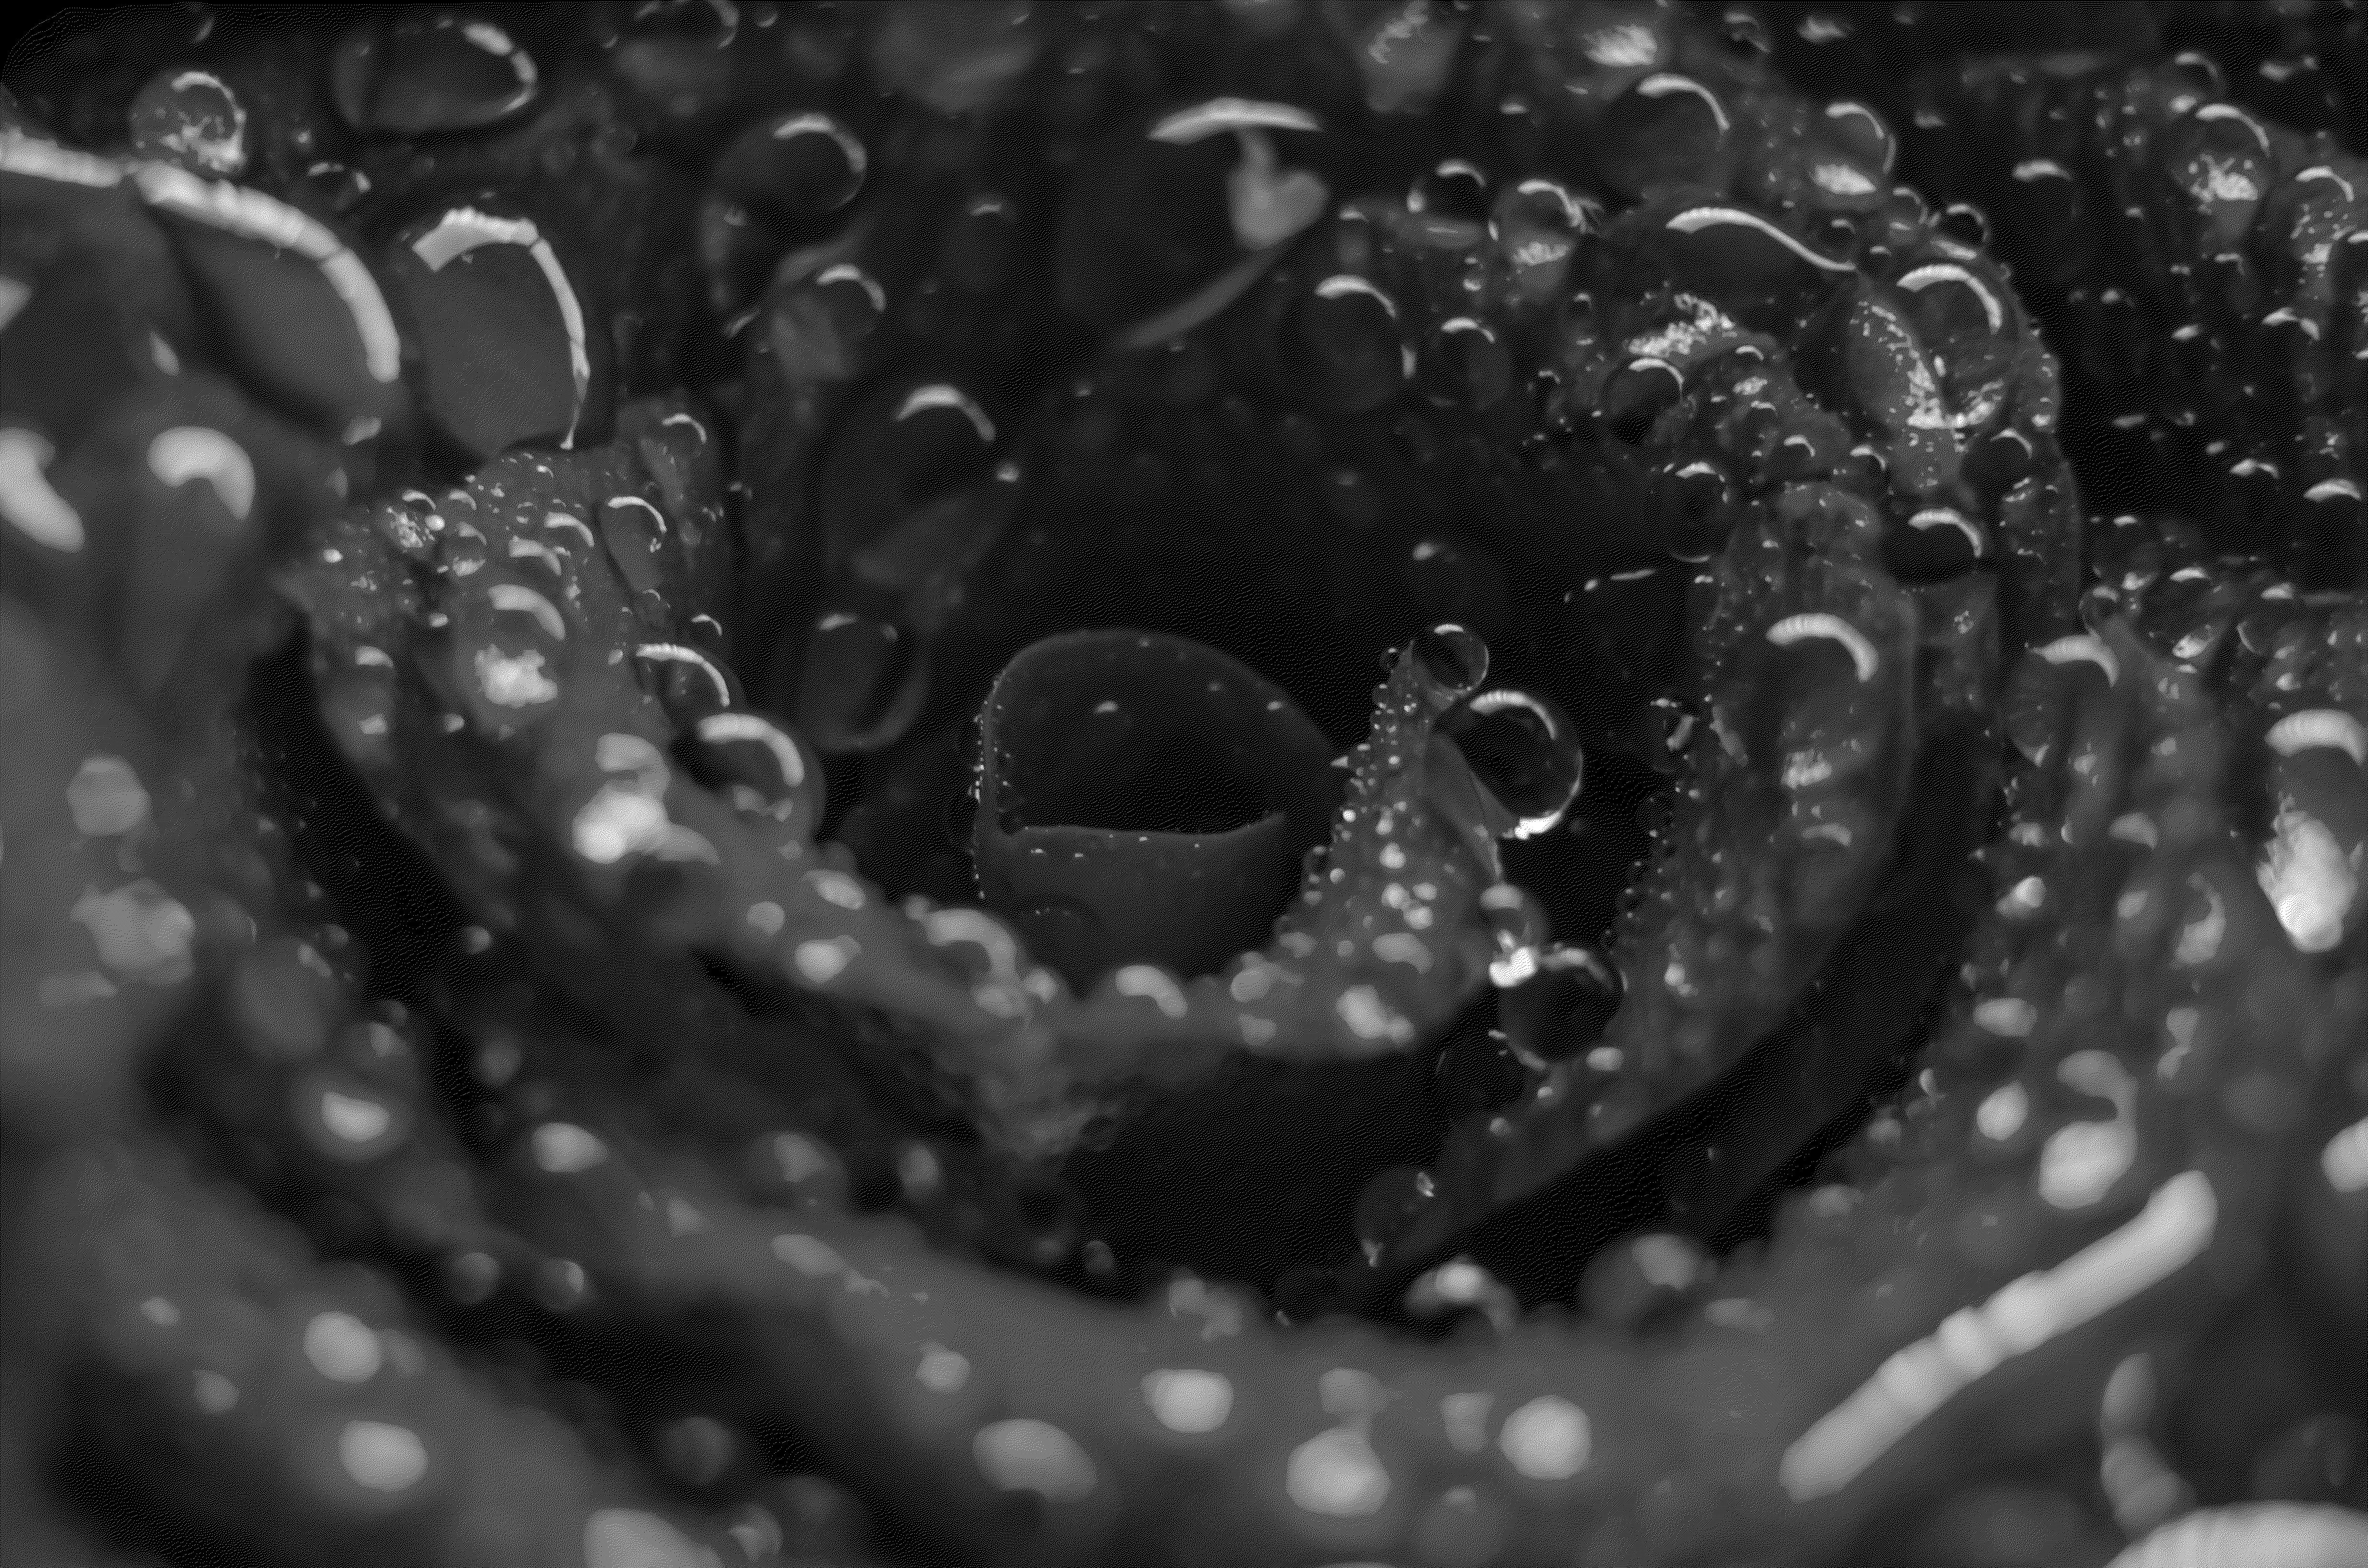
Python Pillow - Compositing Images
What is compositing Image?
Compositing images in Pillow involve combining two or more images to create a new image. This process often includes blending the pixel values of one image with another based on certain criteria such as transparency or specific blending modes.
Pillow provides the Image.alpha_composite() method for compositing images especially when dealing with alpha (transparency) channels. It is commonly used for overlaying one image onto another adding watermarks or creating special effects.
Here are the key concepts related to compositing images in Pillow −
Image Composition
Combining images to create a new image by overlaying one image onto another.
The image composting is commonly used for adding watermarks or creating special effects.
Alpha Channel
The alpha channel represents the transparency of each pixel in an image.
Images with an alpha channel can be composited more seamlessly allowing for smooth blending.
The Image.alpha_composite() Method
The Image.alpha_composite() method in Pillow is used for compositing two images using their alpha channels. It takes two Image objects as input and returns a new Image with the composited result.
Here is the syntax and parameters of the Image.alpha_composite() method −
PIL.Image.alpha_composite(image1, image2)
Where,
image1 − The background image onto which the second image will be composited.
image2 − The foreground image that will be composited onto the background.
Example - Compositing Two Images
This example shows how to composite two images using Image.alpha_composite() method.
main.py
from PIL import Image

#Open or create the background image
background = Image.open("Images/decore.jpg").convert('RGBA')

#Open or create the foreground image with transparency
foreground = Image.open("Images/library_banner.jpg").convert('RGBA')

#Ensure that both images have the same size
if background.size != foreground.size:
    foreground = foreground.resize(background.size)

#Perform alpha compositing
result = Image.alpha_composite(background, foreground)

# Display the resulting image
result.show()
Image to be used
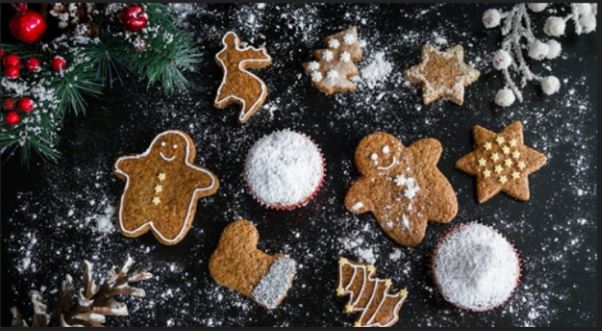

Output

Adding Watermarks Using Compositing Images
Adding a watermark to an image is one of the applications in image compositing tasks. You can overlay a watermark onto an image at a specific position and transparency. This is achieved by creating a new layer for the watermark and blending it with the base image using the Image.alpha_composite() method.
Example - Adding Watermark to Image
This example demonstrates how to to add a watermark onto an image using the Image.alpha_composite() method. The watermark image is placed on top of the base image with adjustable transparency.
main.py
from PIL import Image

# Load the images and convert them to RGBA
image = Image.open('Images/yellow_car.jpg').convert('RGBA')
watermark = Image.open('Images/reading_img2.png').convert('RGBA')

# Create an empty RGBA layer with the same size as the image
layer = Image.new('RGBA', image.size, (0, 0, 0, 0))
layer.paste(watermark, (20, 20))

# Create a copy of the layer and adjust the alpha transparency
layer2 = layer.copy()
layer2.putalpha(128)

# Merge the layer with its transparent copy using the alpha mask
layer.paste(layer2, (0, 0), layer2)

# Composite the original image with the watermark layer
result = Image.alpha_composite(image, layer)

# Display the resulting image
result.show()
Image to be used
Watermark Image

Output

Python Pillow - Working With Alpha Channels
An alpha channel in an image is a component that represents the level of transparency or opacity for each pixel. It is commonly used in RGBA images, where each pixel is defined by its Red, Green, Blue, and Alpha values. This channel determines how much of the background shows through an image. In simple terms we can say a pixel with an alpha value of 0 is fully transparent and while a pixel with an alpha value of 255 is fully opaque.
Here are visual representations of an image with different transparency levels −
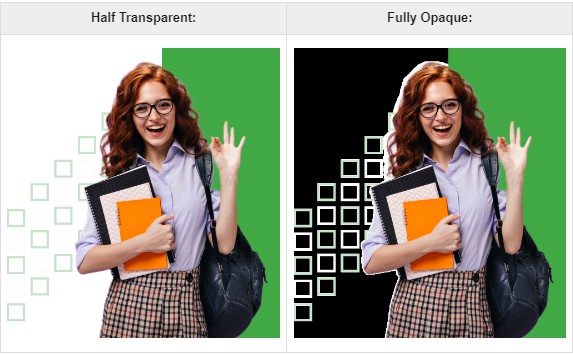
The following are the breakdown of key concepts related to alpha channels in Pillow −
RGBA Mode
Images with an alpha channel are often represented in the RGBA mode.
Each pixel in an RGBA image has four components i.e. Red, Green, Blue and Alpha.
Transparency Levels
The alpha channel values typically range from 0 to 255.
0 indicates complete transparency i.e. fully see-through or invisible.
255 indicate complete opacity i.e. fully opaque or not see-through.
Accessing Alpha Channel
We can access the alpha channel using the split() function of the Pillow Image module. This function is used to separate the individual color channels of an image. It breaks down an image into its constituent channels by allowing us to access and manipulate each channel separately.
Splitting channels with split() function provides the flexibility to work with and manipulate individual color or alpha channels separately by enabling precise image adjustments and processing.
When the split() function is called on an image object, it returns a tuple of individual channel images. For an RGBA image, the tuple includes the Red, Green, Blue, and Alpha channels. For grayscale or single-channel images split() function still returns four identical copies of the same channel. By accessing the alpha channel specifically, you can manipulate the transparency of an image directly.
The following is the syntax and parameters of the of the split() function −
r,g,b,a = image.split()
Where,
image − This is the image object opened using Image.open() function.
r, g, b, a − These variables receive the separate bands representing Red, Green, Blue and Alpha i.e. transparency of channels respectively.
Example - Accessing Alpha Channel
In this example we are using the split() function to split and access the alpha channel.
main.py
from PIL import Image

# Open an image
img_obj = Image.open('Images/colordots.png')

#Split the image into RGBA channels
red, green, blue, alpha = img_obj.split()

# Alpha (transparency) channel
alpha.show()
Input RGBA Image to be used
Output alpha channel
Creating an Image with Alpha Channel
To create an image with an alpha channel, we can use the new() function. This function provides options like mode, width, height and the RGBA values for customizing the image. The last argument's last value defines the transparency i.e. alpha of the image.
Example - Creating Image with Alpha Channel
In this example we will create an image with alpha channel using the new() funtion.
main.py
from PIL import Image

# Create an RGBA image with Semi-transparent green
image = Image.new('RGBA', (700, 300), (10, 91, 51, 100))

# Display the resultant image with alpha channel
image.show()
Output
On executing the above program you will get output RGBA like below −

Modifying Alpha Channels
The individual alpha values for pixels can be set using the putpixel() function to apply modifications to the alpha channel of an image.
The putpixel() function of the Python Pillow is used to change the color of a single pixel at a specified position within an image. This function allows us to directly modify the color of a specific pixel by providing its coordinates and the desired color.
The below is the syntax and parameters of the putpixel() function.
image.putpixel((x, y), color)
image − This is the image object opened using Image.open() function.
(x, y) − These are the coordinates of the pixel where we want to set the color. x represents the horizontal position and y represents the vertical position.
color − The color value that we want to assign to the specified pixel. The format of the color value depends on the image mode.
Example - Modifying Alpha Channel
In this example we are using the putpixel() function of the pillow library for modifying the alpha values for pixels of the given input image.
main.py
from PIL import Image

# Open an image
image = Image.open("Images/colordots.png")
width, height = image.size

# Modify alpha values of pixels
for y in range(height):
    for x in range(width):
        r, g, b, a = image.getpixel((x, y))
        image.putpixel((x, y), (r, g, b, int(a * 0.5)))  # Reduce alpha by 50%

# Display the modified image
image.show()
Input Image
Output modified image
Note
The putpixel() function directly modifies the image in memory. It is useful for making small modifications to individual pixels.
For large-scale pixel operations or more complex manipulations we have to consider using other Pillow functions that operate on larger regions or entire images for better performance.
Example - Composite Images with Alpha Channel
The Image.alpha_composite() function is used to composite two images with alpha channels. This function blends the images based on their alpha channels.
In this example we are using the Image.alpha_composite() function for blending two images based on their alpha channels.
main.py
from PIL import Image

# Open two images
img1 = Image.open('Images/tp_logo.png')
img2 = Image.open('Images/colordots_2.png')

# Composite the images
composite = Image.alpha_composite(img1, img2)

# Display the result
composite.show()
Input Images −

Output alpha composited image −
Example - Saving Images with Alpha Channel
To preserve transparency, save the image in a format that supports alpha channels such as PNG. Formats like JPEG do not support alpha channels and will discard transparency information. We can use the save() function available in pillow.
In this example we are using the Image.save() function for saving an image with alpha channel.
main.py
from PIL import Image

# Create a new image with alpha channel
new_img = Image.new('RGBA', (700, 300), (255, 0, 0, 128))

# Save the image with alpha channel
new_img.save("Output_Images/new_img.png", "PNG")
print("The image with alpha channel is saved.")
Output
After executing the above code, you will find the resulting PNG file 'new_img.png' saved in the current working directory −
The image with alpha channel is saved.
Python Pillow - Applying Perspective Transforms
In Pillow applying perspective transforms involves altering the perspective or viewpoint of an image. This transformation modifies the position of the image's points in a way that simulates a change in perspective such as rotating, skewing or distorting the image.
Perspective Transformation in Pillow
The Pillow's transform() method allows you to apply differenyt types of transformations to an image. For perspective transforms a 3x3 transformation matrix is used to define the transformation. This matrix can represent operations like rotations, translations, scaling and shearing. For perspective transformation the matrix elements control how each pixel's coordinates change.
Matrix Elements for Perspective Transform
The matrix elements (a, b, c, d, e, f, g, h) define the transformation −
a and d represent scaling in the x and y directions.
b and c represent shearing or skewing.
e and f are translations along the x and y axes.
g and h are perspective coefficients.
Applying Perspective Transforms
We can use transform() directly with Image.PERSPECTIVE and pass four source points and four destination points to specify the transformation.
Perspective transformations can distort images significantly. So carefully choose the transformation matrix or points to achieve the desired effect without excessive distortion.
Applying perspective transforms in Pillow involves using transformation matrices or defining source and destination points to alter the image's perspective, simulating changes in angles, orientations or viewpoints. Understanding transformation matrices and point mappings is crucial for achieving the desired visual effects while avoiding excessive distortion or unwanted transformations in the image.
The following are the syntax and parameters of the transform() method.
transformed_image = image.transform(size, method, data, resample=0, fill=0)
Where,
image − The Pillow Image object we want to transform.
size − A tuple representing the output size (width, height) of the transformed image.
method − Defines the type of transformation to be applied Image.AFFINE, Image.PERSPECTIVE or Image.QUAD, etc.
data − Transformation of data required based on the method used.
resample (optional) − The resampling method to use such as Image.BILINEAR, Image.NEAREST and Image.BICUBIC. Default value is 0 i.e. nearest neighbor.
fill (optional) − Fill color for areas outside the transformed image boundaries. Default is 0 i.e. black.
Prepare data based on the Transformation method, for the Image.AFFINE transformation it requires a 6-element tuple that represents the affine transformation matrix. For perspective transformations, Image.PERSPECTIVE is used, which requires an 8-element tuple to represent the perspective transformation matrix. Additionally, Image.QUAD involves providing source and destination quadrilateral points for accurate perspective mapping.
Example - Transforming an Image
In this example we are performing the perspective transformation on the given input image by using the transform() method.
main.py
from PIL import Image
import numpy

def find_data(source, target):
    matrix = []
    for s, t in zip(source, target):
        matrix.append([t[0], t[1], 1, 0, 0, 0, -s[0]*t[0], -s[0]*t[1]])
        matrix.append([0, 0, 0, t[0], t[1], 1, -s[1]*t[0], -s[1]*t[1]])
    A = numpy.matrix(matrix, dtype=float)
    B = numpy.array(source).reshape(8)
    res = numpy.dot(numpy.linalg.inv(A.T * A) * A.T, B)
    return numpy.array(res).reshape(8)

#Open an image
image = Image.open("Images/logo_w.png")
# image.show()

#Define the transformation matrix for perspective transform
coeffs = find_data(
    [(0, 0), (225, 0), (225, 225), (0, 225)],
    [(15, 115), (140, 20), (140, 340), (15, 250)])

#Applying the perspective transformation
transformed_image = image.transform((300, 400), Image.PERSPECTIVE, coeffs, Image.BICUBIC)

#Save or display the transformed image
transformed_image.save("Output_Images/transform.png")
transformed_image.show()
Output
Following is the input image −
On executing the above code, the following transformed image is displayed −

Example - Applying Perspective Transformation to an Image
Here this is another example of performing the perspective transformation to the another image with the matrix elements (a, b, c, d, e, f, g, h).
main.py
from PIL import Image

#Open an image
image = Image.open("Images/flowers.jpg")
image.show()

#Define the transformation matrix for perspective transform
matrix = (10, 4, 11, -1, 5, 2, 1, -1)

#Apply the perspective transformation
transformed_image = image.transform(image.size, Image.PERSPECTIVE, matrix)

#Save or display the transformed image
transformed_image.save("Output_Images/transform_image.jpg")
transformed_image.show()
Output
On executing the above code you will get the following output −
Input image:
Output perspective transformed image:
Note
The transform() method supports various transformation types and the transformation data required varies based on the chosen method.
It's crucial to provide the correct transformation data i.e. matrix or points based on the chosen transformation method to achieve the desired effect.
The transform() method in Pillow is versatile and allowing us to perform different types of geometric transformations on images offering flexibility in image manipulation and perspective alterations.
Python Pillow - Adding Filters to an Image
Image filtering is a fundamental technique for modifying and enhancing images. In image processing, filters are mathematical operations applied to an image to improve its quality, extract specific information, or alter its appearance. They work at the pixel level, applying mathematical operations to pixels within a defined neighborhood, often determined by structuring elements or footprints. These filters are used for a wide range of tasks, including smoothing, sharpening, and enhancing specific image features. They can be implemented through techniques like convolution and frequency domain manipulation.
Python Pillow library provides the ImageFilter module with a predefined set of filters that can be applied to images using the Image.filter() method. These filters allow you to change the look and feel of images.
The current version of the Python Pillow library offers a range of predefined image enhancement filters. Some of the filters include −
- BLUR
- CONTOUR
- DETAIL
- EDGE_ENHANCE
- EDGE_ENHANCE_MORE
- EMBOSS
- FIND_EDGES
- SHARPEN
- SMOOTH
- SMOOTH_MORE
Applying Filter to an Image
By using the Image.filter() method you can apply a specific filter to an image object. This method takes a filter kernel as a parameter and returns an Image object with the applied filter effect.
Following is the syntax of the Image.filter() method −
Image.filter(filter)
This Image.filter() method accept only one parameter which is described below −
- filter − The filter kernel to be applied.
Example - Applying the BLUR Filter
Here's an example of how to blur an input image using the ImageFilter.BLUR filter from the ImageFilter module.
main.py
from PIL import Image, ImageFilter

# Open the input image
image = Image.open('Images/tp_logo_image.jpg')

# Apply the BLUR filter to the image
blurred_image = image.filter(filter=ImageFilter.BLUR)

# Display the original and blurred images
image.show()
blurred_image.show()
Input Image
Output Image
Example - Applying Predefined Image Enhancement Filters
The following example demonstrates how to apply pillow predefined image enhancement filters to an input image.
main.py
from PIL import Image, ImageFilter
import matplotlib.pyplot as plt

# Open the input image
image = Image.open('Images/flower1.jpg')

# Apply CONTOUR filter to the image
image_contour = image.filter(filter=ImageFilter.CONTOUR)

# Apply DETAIL filter to the image
image_detail = image.filter(filter=ImageFilter.DETAIL)

# Apply EDGE_ENHANCE filter to the image
image_edge = image.filter(filter=ImageFilter.EDGE_ENHANCE)

# Apply EDGE_ENHANCE_MORE filter to the image
image_edge_more = image.filter(filter=ImageFilter.EDGE_ENHANCE_MORE)

# Apply EMBOSS filter to the image
image_emboss = image.filter(filter=ImageFilter.EMBOSS)

# Apply FIND_EDGES filter to the image
image_edges = image.filter(filter=ImageFilter.FIND_EDGES)

# Apply SMOOTH filter to the image
image_smooth = image.filter(filter=ImageFilter.SMOOTH)

# Apply SMOOTH_MORE filter to the image
image_smooth_more = image.filter(filter=ImageFilter.SMOOTH_MORE)

# Apply SHARPEN filter to the image
image_sharpen = image.filter(filter=ImageFilter.SHARPEN)

# Create a subplot for each filtered image and display it using Matplotlib
fig, ax = plt.subplots(3, 3, figsize=(12, 10))

# Original Image
ax[0, 0].imshow(image)
ax[0, 0].set_title("Original Image")

# CONTOUR filter
ax[0, 1].imshow(image_contour)
ax[0, 1].set_title("CONTOUR")

# DETAIL filter
ax[0, 2].imshow(image_detail)
ax[0, 2].set_title("DETAIL")

# EDGE_ENHANCE filter
ax[1, 0].imshow(image_edge)
ax[1, 0].set_title("EDGE_ENHANCE")

# EDGE_ENHANCE_MORE filter
ax[1, 1].imshow(image_edge_more)
ax[1, 1].set_title("EDGE_ENHANCE_MORE")

# EMBOSS filter
ax[1, 2].imshow(image_emboss)
ax[1, 2].set_title("EMBOSS")

# FIND_EDGES filter
ax[2, 0].imshow(image_edges)
ax[2, 0].set_title("FIND_EDGES")

# SMOOTH filter
ax[2, 1].imshow(image_smooth)
ax[2, 1].set_title("SMOOTH")

# SMOOTH_MORE filter
ax[2, 2].imshow(image_smooth_more)
ax[2, 2].set_title("SMOOTH_MORE")

# Turn off ax for all subplots
for a in ax.flatten():
   a.axis('off')

plt.tight_layout()
plt.show()
Input Image

Output
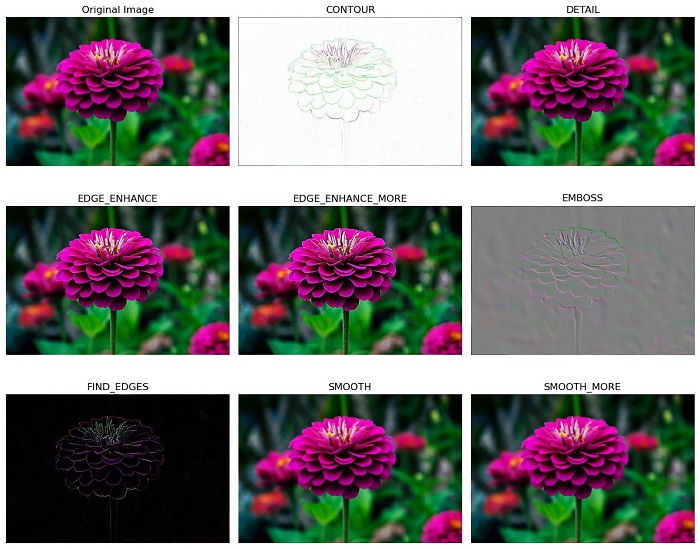
Python Pillow - Convolution Filters
In the context of image processing, Convolution involves applying a small matrix (known as convolution kernel) of values to an image. This process results in various filtering effects such as blurring, sharpening, embossing, and edge detection. Each value in the kernel represents a weight or coefficient. This kernel is applied to a corresponding neighborhood of pixels in the image to produce the output pixel value at the corresponding position in the output image.
Python's Pillow library provides a specific class known as "kernel" within its ImageFilter module. This class is used to create convolution kernels of sizes that extend beyond the conventional 5x5 matrices.
Creating the Convolution kernel
To create a convolution kernel you can use the Kernel() class from the ImageFilter module.
It's important to note that the current version of Pillow supports 33 and 55 integer and floating-point kernels. And these kernels apply exclusively to images in "L" and "RGB" modes.
Following is the syntax of this ImageFilter.Kernel() class −
class PIL.ImageFilter.Kernel(size, kernel, scale=None, offset=0)
Here are the details of the class parameters −
size − Represents the kernel size, specified as (width, height). In the current version, the valid sizes are (3,3) or (5,5).
kernel − A sequence containing the kernel weights. The kernel is vertically flipped before applying it to the image.
scale − Denotes the scale factor. If provided, the result for each pixel is divided by this value. The default value is the sum of the kernel weights.
offset − Signifies an offset value. If provided, this value is added to the result after being divided by the scale factor.
Example - Applying a Convolution Kernel Filter
This example demonstrates how to apply a convolution kernel filter to an image using the Image.filter() method.
main.py
from PIL import Image, ImageFilter

# Create an image object
original_image = Image.open('Images/yellow_car.jpg')

# Apply the Kernel filter
filtered_image = original_image.filter(ImageFilter.Kernel((3, 3), (0, -1, 0, -1, 5, -1, 0, -1, 0)))

# Display the original image
original_image.show()

# Display the filtered image
filtered_image.show()
Input Image
Output
Output of the convolution kernel filter −
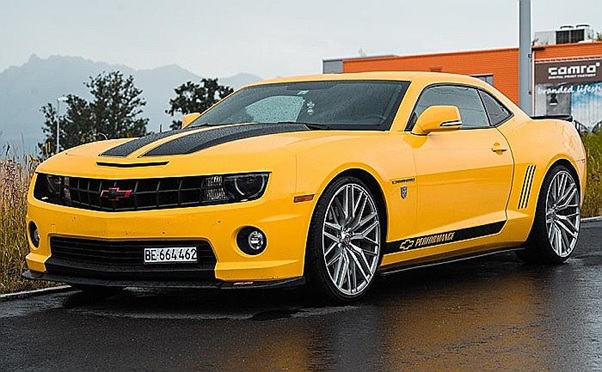
Example - Applying an Emboss Convolution Filter
Here's an example of applying a 5x5 emboss convolution kernel filter to an image.
main.py
from PIL import Image, ImageFilter

# Create an image object
original_image = Image.open('Images/yellow_car.jpg')

# Define a 5x5 convolution kernel
kernel_5x5 = [-2,  0, -1,  0,  0,
   0, -2, -1,  0,  0,
   -1, -1,  1,  1,  1,
   0,  0,  1,  2,  0,
   0,  0,  1,  0,  2]

# Apply the 5x5 convolution kernel filter
filtered_image = original_image.filter(ImageFilter.Kernel((5, 5), kernel_5x5, 1, 0))

# Display the original image
original_image.show()

# Display the filtered image
filtered_image.show()
Input Image
Output Image
Output of the convolution kernel filter of size 5X5 −
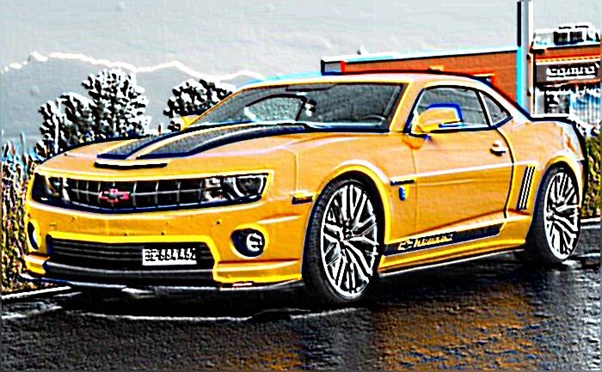
Python Pillow - Blurring an Image
Blurring an Image is a fundamental concept in image processing, used to reduce the level of detail or sharpness in an image. The primary purpose of blurring is to make an image appear smoother or less sharp. Blurring can be achieved through various mathematical operations, convolution kernels, or filters.
Python's Pillow library offers several standard image filters within the ImageFilter module to perform the different blurring operations on the image by calling the image.filter() method. In this tutorial we will see different image blurring filters provided by the ImageFilter module.
Applying Blur Filter to an Image
Blurring an image can be done by using the ImageFilter.BLUR filter, which is one of the built-in filter options available in the current version of the Pillow library and is used to create a blurred effect in the image.
Following are the steps for applying image blurring −
Load the input image using the Image.open() function.
Apply the filter() function to the loaded Image object and provide ImageFilter.BLUR as an argument to the function. The function will return the blurred image as a PIL.Image.Image object.
Following is the input image used in all the examples of this chapter.
Example - Blurring an Image
Here is the example using the Image.filter() method with ImageFilter.BLUR kernel filter.
from PIL import Image, ImageFilter

# Open an existing image
original_image = Image.open('Images/yellow_car.jpg')

# Apply a blur filter to the image
blurred_image = original_image.filter(ImageFilter.BLUR)

# Display the original image
original_image.show()

# Display the blurred mage
blurred_image.show()
Output Image
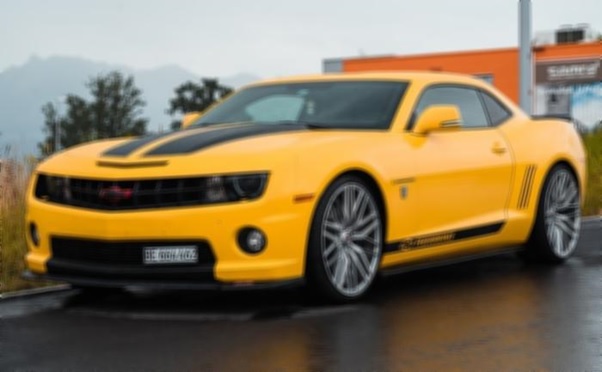
Applying the BoxBlur Filter
The BoxBlur filter is used to blur an image by setting each pixel's value to the average value of the pixels within a square box that extends a specified number of pixels in each direction. For this yo can use the BoxBlur() class from the Pillow's ImageFilter module.
Following is the syntax of the ImageFilter.BoxBlur() class −
class PIL.ImageFilter.BoxBlur(radius)
The PIL.ImageFilter.BoxBlur() class accepts a single parameter −
radius − This parameter specifies the size of the square box used for blurring in each direction. It can be provided as either a sequence of two numbers (for the x and y directions) or a single number that applies to both directions.
If radius is set to 1, it takes the average of the pixel values within a 3x3 square box (1 pixel in each direction, resulting in 9 pixels in total). A radius value of 0 doesn't blur the image and returns an identical image.
Example - Box Blur an Image
Here's an example that demonstrates how to use the BoxBlur() filter for image blurring.
main.py
from PIL import Image, ImageFilter

# Open an existing image
original_image = Image.open('Images/yellow_car.jpg')

# Apply a Box Blur filter to the image
box_blurred_image = original_image.filter(ImageFilter.BoxBlur(radius=3))

# Display the Box Blurred image
box_blurred_image.show()
Output Image

Applying the Gaussian Blur to an Image
The GaussianBlur filter is used to blur an image by applying a Gaussian blur, which is a specific type of blur that approximates a Gaussian distribution. This can be done by using the Pillow's ImageFilter.GaussianBlur() class.
Below is the syntax of the ImageFilter.GaussianBlur() class −
class PIL.ImageFilter.GaussianBlur(radius=2)
The ImageFilter.GaussianBlur() class accepts a single parameter −
radius − This parameter specifies the standard deviation of the Gaussian kernel. The standard deviation controls the extent of blurring. You can provide it as either a sequence of two numbers (for the x and y directions) or a single number that applies to both directions.
Example - Applying Gaussian Blur to an Image
Here's an example that demonstrates how to use the GaussianBlur() class for image blurring.
main.py
from PIL import Image, ImageFilter

# Open an existing image
original_image = Image.open('Images/yellow_car.jpg')

# Apply a Gaussian Blur filter to the image
gaussian_blurred_image = original_image.filter(ImageFilter.GaussianBlur(radius=2))

# Display the Gaussian Blurred image
gaussian_blurred_image.show()
Output Image

Python Pillow - Detecting Edges
Edge detection is the process of identifying these boundaries or contours in an image using mathematical algorithms. The edge detection aims to locate the points in the image where the intensity changes suddenly, which usually corresponds to an edge or a boundary between two regions. In general, an edge defined as a boundary or a contour between two distinct regions in an image. These regions can differ in intensity, color, texture, or any other visual feature. Edges can represent important features in an image, such as object boundaries, shapes, and textures.
Edge detection is an essential step in many image-processing applications, such as object recognition, segmentation, tracking, and enhancement. In this tutorial, we will see different approaches to detect edges in an image using the Python pillow library.
Applying Edge Detection Filter to an Image
Detecting edges in an image can be done by using the ImageFilter.FIND_EDGES filter, which is one of the built-in filter options available in the current version of the Pillow library to detect edges in the image.
Following are the steps for detecting the edges in the image −
Load the input image using the Image.open() function.
Apply the filter() function to the loaded Image object and provide ImageFilter.FIND_EDGES as an argument to the function. The function will return the Output detected edges as a PIL.Image.Image object.
Example - Finding Edges
The following example demonstrates how to use the ImageFilter.FIND_EDGES filter kernel with the filter() method to detect the edges in an image.
main.py
from PIL import Image, ImageFilter

# Open the image
image = Image.open('Images/compass.jpg')

# Apply edge detection filter
edges = image.filter(ImageFilter.FIND_EDGES)

# Display the original image
image.show()

# Display the edges-detected image
edges.show()
Input Image
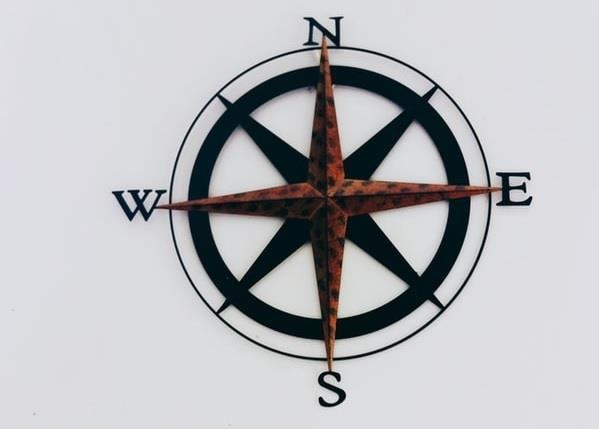
Output Image
Output detected edges −
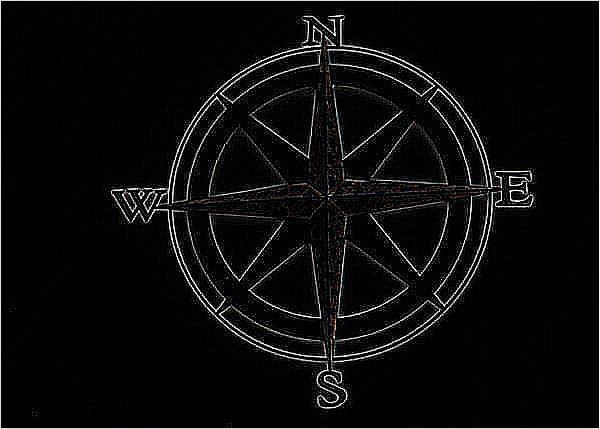
Example - Flattening the Edges
Here is an example that uses the ImageFilter.FIND_EDGES filter kernel to detect edges in the image. And then it applies ImageFilter.MaxFilter() class to flatten the detected edges.
main.py
import matplotlib.pyplot as plt
from PIL import Image, ImageFilter

# Open the image and convert it to grayscale
im = Image.open('Images/compass.jpg').convert('L')

# Detect edges
edges = im.filter(ImageFilter.FIND_EDGES)

# Make fatter edges
fatEdges = edges.filter(ImageFilter.MaxFilter)

# Make very fat edges
veryFatEdges = edges.filter(ImageFilter.MaxFilter(7))

# Create subplots for displaying the images
fig, axes = plt.subplots(2, 2, figsize=(12, 10))
ax = axes.ravel()

# Original image
ax[0].imshow(im, cmap='gray')
ax[0].set_title('Original')

# Detected edges
ax[1].imshow(edges, cmap='gray')
ax[1].set_title('Edges')

# Fatter edges
ax[2].imshow(fatEdges, cmap='gray')
ax[2].set_title('Fatter Edges')

# Very fat edges
ax[3].imshow(veryFatEdges, cmap='gray')
ax[3].set_title('Very Fat Edges')

for ax in axes.flatten():
   ax.axis('off')

# Display the images
plt.tight_layout()
plt.show()
Output Image
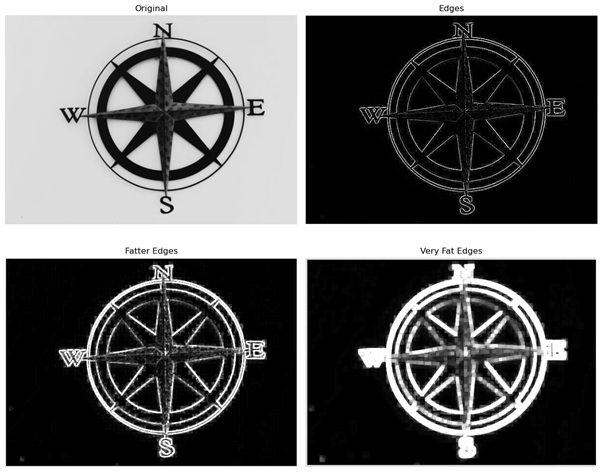
Example - Detecting Edges using the ImageFilter.Kernel() Class
This class is used to create a convolution kernel.
In this approach we will define a 3X3 convolution kernel with some specified kernel values (-1, -1, -1, -1, 8, -1, -1, -1, -1). We will perform edge detection on an image.
The following example demonstrates how to perform edge detection on an image using the convolution matrix and the ImageFilter.kernel() class.
main.py
from PIL import Image, ImageFilter

# Open the image and convert it to grayscale
image = Image.open('Images/compass.jpg').convert('L')

# Calculate edges using a convolution matrix
kernel = ImageFilter.Kernel((3, 3), (-1, -1, -1, -1, 8, -1, -1, -1, -1), scale=1, offset=0)
edges = image.filter(kernel)

# Display the original image
image.show()

# Display the edges
edges.show()
Input Image
Output Image
Output detected edges −
Python Pillow - Embossing Images
In general, embossing used for creating raised relief images on paper or cardstock to achieve a three-dimensional appearance, was notably used by the British postal service during the 19th century to add an elegant touch to stamps. This process involves raising certain parts of the image, design, or text to create a three-dimensional effect.
In image processing and computer graphics, image embossing is a technique where each pixel in an image is transformed into either a highlighted or shadowed version, depending on the original image's light and dark boundaries. Areas with low contrast are replaced by a gray background. The resulting embossed image effectively represents the rate of color change at each location within the original image. Applying an embossing filter to an image can often produce an output resembling a paper or metal-embossed rendition of the original image, hence its name.
Python's Pillow library offers several standard image filters within the ImageFilter module to perform the different filter operations on the image by calling the image.filter() method. In this tutorial, we will see the working of the embossing filter provided by the ImageFilter module.
Applying ImageFilter.EMBOSS kernel filter with the Image.filter() method
The ImageFilter.EMBOSS filter is one of the built-in filter options available in the current version of the Pillow library and is used to create an embossed effect in the image.
Following are the steps for applying image embossing −
Load the input image using the Image.open() function.
Apply the filter() function to the loaded Image object and provide ImageFilter.EMBOSS as an argument to the function. The function will return the embossed image as a PIL.Image.Image object.
Example - Apply Embossing Effect
Here is an example using the Image.filter() method with ImageFilter.EMBOSS kernel filter.
main.py
from PIL import Image, ImageFilter

# Load an input image
input_image = Image.open("Images/tp_logo_image.jpg")

# Apply an emboss effect to the image
embossed_result = input_image.filter(ImageFilter.EMBOSS)

# Display the input image
input_image.show()

# Display the modified image with the emboss effect
embossed_result.show()
Input Image
Output Image
Output filtered image with emboss effect −
Customizing the EMBOSS filter to add depth and azimuth to the embossed image
In the source code of the pillow library, we can observe the EMBOSS class in the "ImageFilter.py," module. This class represents the embossing filter and provides a basic way to create an embossed effect on an image.
# Embossing filter.
class EMBOSS(BuiltinFilter):
   name = "Emboss"
   # fmt: off
   filterargs = (3, 3), 1, 128, (
      -1, 0, 0,
      0,  1, 0,
      0,  0, 0,
   )
The filter operates by applying a matrix to the image pixel by pixel. The matrix contains values that determine the transformation applied to each pixel. By modifying the matrix, you can control the azimuth and strength of the embossing effect.
The matrix is a 3x3 grid where each element corresponds to the current pixel and its surrounding pixels. The central value represents the current pixel being processed. The filter combines these values based on their weights in the matrix to create the transformed pixel. You can customize the filter by adjusting the scale and offset parameters, which influence the overall strength of the effect.
Example - Custom Emboss Effect
Here is an example that demonstrates how to apply a custom emboss filter to an image, allowing you to control the appearance of the emboss effect by adjusting various parameters.
main.py
from PIL import Image, ImageFilter

# Open the input image
image = Image.open('Images/tp_logo_image.jpg')

# modify the filterargs such as scale, offset and the matrix
ImageFilter.EMBOSS.filterargs=((3, 3), 2, 150, (0, 0, 0, 0, 1, 0, -2, 0, 0))

# Apply an emboss effect to the image
embossed_result = image.filter(ImageFilter.EMBOSS)

# Display the input image
image.show()

# Display the modified image with the emboss effect
embossed_result.show()
Input Image
Output Image
Output filtered image with custom emboss effect −
Python Pillow - Enhancing Edges of an Image
Enhancing edges is a commonly used technique in image processing and computer vision to improve the interpretation and analysis of images. It refers to the process of emphasizing or highlighting the boundaries between different objects or regions in an image. And it aims to improve the visibility of edges, making them more distinct and prominent.
Python Pillow library provides the ImageFilter module with a predefined set of filters that can be applied to images using the Image.filter() method. The current version of the library offers two predefined image enhancement filters namely EDGE_ENHANCE and EDGE_ENHANCE_MORE to enhance edges in an image.
Enhancing Edges using the ImageFilter.EDGE_ENHANCE Kernel
This ImageFilter.EDGE_ENHANCE kernel filter is designed to Enhance the edges in the image.
Following are the steps for enhancing the edges in the image −
Load the input image using the Image.open() function.
Apply the filter() function to the loaded Image object and Provide ImageFilter.EDGE_ENHANCE as an argument to the Image.filter() function, then it returns a PIL.Image.Image object with enhanced edges.
Example - Enhancing Edges
Here's an example that demonstrates how to use the ImageFilter.EDGE_ENHANCE filter kernel to enhance edges in an image.
main.py
from PIL import Image, ImageFilter

# Open the input image
image = Image.open('Images/flower1.jpg')

# Apply edge enhancement filter
enhanced_image = image.filter(ImageFilter.EDGE_ENHANCE)

# Display the original and enhanced images
image.show()
enhanced_image.show()
Input Image

Output Image
Output image with enhanced edges −

Enhancing Edges using the EDGE_ENHANCE_MORE Kernel
This approach works similar to the EDGE_ENHANCE filter, but it applies a stronger enhancement to edges.
Example - Applying EDGE_ENHANCE_MORE filter
Here's an example that demonstrates how to use the EDGE_ENHANCE_MORE filter kernel to enhance edges in an image more aggressively.
from PIL import Image, ImageFilter

# Open the input image
image = Image.open('Images/flower1.jpg')

# Apply the EDGE_ENHANCE_MORE filter to the image
enhanced_image = image.filter(ImageFilter.EDGE_ENHANCE_MORE)

# Display the original and enhanced images
image.show()
enhanced_image.show()
Input Image
Output Image
Output image after applying the EDGE_ENHANCE_MORE filter to the input image −
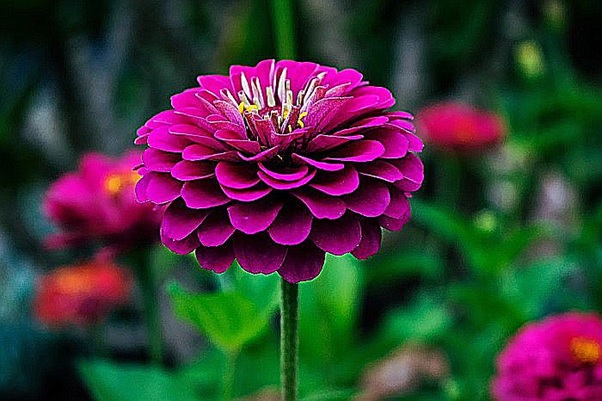
Python Pillow - Unsharp Mask Filter
Unsharp masking is a widely used image sharpening technique in image processing. The fundamental concept behind unsharp masking involves using a softened or unsharp version of a negative image to create a mask for the original image. This unsharp mask is subsequently merged with the original positive image, resulting in a less blurry version of the original image, making it clearer.
The Python pillow(PIL) library provides a class called UnsharpMask() within its ImageFilter module for the application of the Unsharp Masking filter to images.
The UnsharpMask Filter
The ImageFilter.UnsharpMask() class represents an unsharp mask filter, which is used to enhance image sharpness.
Following is the syntax of the ImageFilter.UnsharpMask() class −
class PIL.ImageFilter.UnsharpMask(radius=2, percent=150, threshold=3)
Where,
radius − This parameter controls the blur radius. Radius affects the size of the edges to be enhanced. A smaller radius sharpens smaller details, while a larger radius can create light halos around objects. Adjusting the radius and amount affects each other; decreasing one allows the other to have a greater impact.
percent − It determines the strength of the unsharp mask in percentage. Percentage controls the strength or magnitude of the sharpening effect. It determines how much contrast is added at the edges of objects. A higher amount results in a more pronounced sharpening effect, making edge borders darker and lighter. It does not impact the width of the edge rims.
threshold − Threshold controls the minimum change in brightness that gets sharpened. It decides how different adjacent tonal values need to be for the filter to take action. A higher threshold prevents smooth areas from becoming speckled. Lower values sharpen more, while higher values spare lower-contrast areas.
Example - Using Unsharp Mask
The following example applies the unsharp mask filter to an image using the ImageFilter.UnsharpMask() class and the Image.filter() method with default values.
main.py
from PIL import Image, ImageFilter

# Open the image
original_image = Image.open('Images/flower1.jpg')

# Apply the Unsharp Mask filter with default parameter values
sharpened_image = original_image.filter(ImageFilter.UnsharpMask())

# Display the original image
original_image.show()

# Display the sharpened image
sharpened_image.show()
Output
Input image −
Output image after applying the unsharp mask filter with default parameter values −
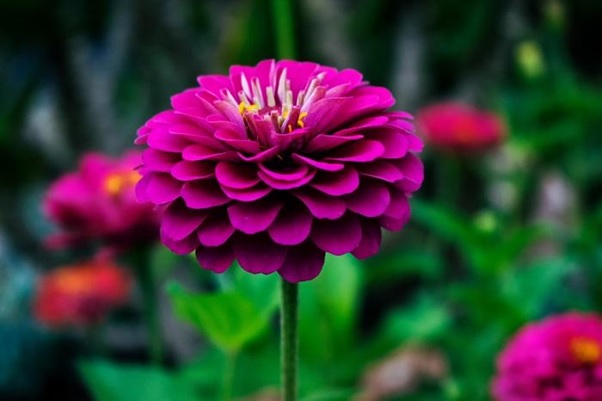
Example - Using Custom Unsharp Mask
Here's another example that applies the Unsharp Mask filter to an image using different parameter values.
main.py
from PIL import Image, ImageFilter

# Open the image using Pillow
original_image = Image.open('Images/flower1.jpg')

# Apply the Unsharp Mask filter with custom parameters
sharpened_image = original_image.filter(ImageFilter.UnsharpMask(radius=4, percent=200, threshold=3))

# Display the original image
original_image.show()

# Display the sharpened image
sharpened_image.show()
Output
Input image −
Output image after applying the unsharp mask filter with custom parameter values −
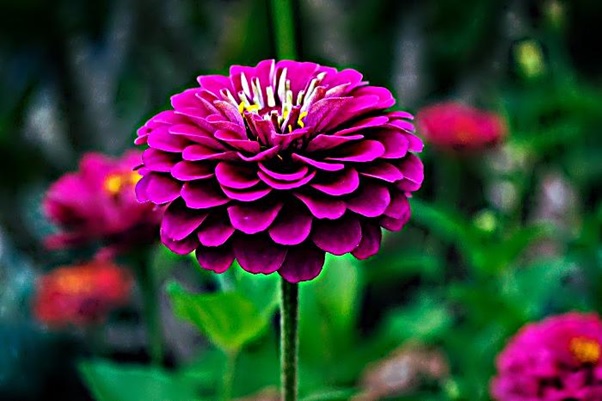
Python Pillow - Enhancing Constract
Enhancing contrast refers to the process of improving the visibility and quality of an image. It is an image processing technique that involves increasing the difference between the various elements within an image, such as objects, shapes, edges, and textures, by adjusting the distribution of intensity values or colors. This technique is widely used in fields such as medical imaging, computer vision, remote sensing, and photography to improve image quality and obtain more detailed visual information.
The Python Pillow (PIL) library offers the Contrast() class within its ImageEnhance module, for the application of contrast enhancement to images.
Enhancing Contrast of an Image
To adjust the contrast of an image, you can apply ImageEnhance.Contrast() class to an image object with the enhancment factor. It controls the contrast of an image, much like adjusting the contrast on a television set.
Below is the syntax of the ImageEnhance.Contrast() class −
class PIL.ImageEnhance.Contrast(image)
Following are the steps to achieve contrast enhancement of an image −
Create a contrast object using the ImageEnhance.Contrast() class.
Then apply the enhancement factor with the help of contrast_object.enhance() method.
An enhancement factor is a floating-point value passed to the common single interface method, enhance(factor), which plays an important role in adjusting image contrast. When a factor of 0.0 is used, it will produce a solid grey image. A factor of 1.0 will give the original image, and when greater values are used, the contrast of the image is increased, making it visually more distinct.
Example
The following example demonstrates how to achieve a highly contrasted image using the PIL.ImageEnhance module.
main.py
from PIL import Image, ImageEnhance

# Open the input image
image = Image.open('Images/flowers.jpg')

# Create an ImageEnhance object for adjusting contrast
enhancer = ImageEnhance.Contrast(image)

# Display the original image
image.show()

# Enhance the contrast by a factor of 2 and display the result
enhancer.enhance(2).show()
Input Image
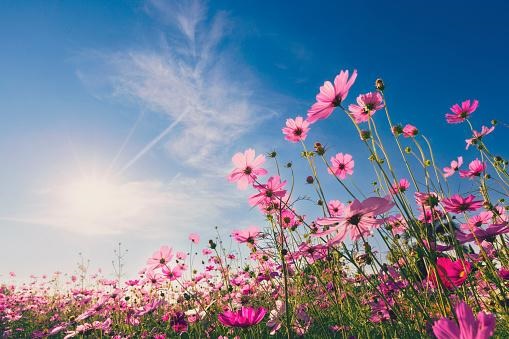
Output Image
Output a highly contrasted version of the input image −
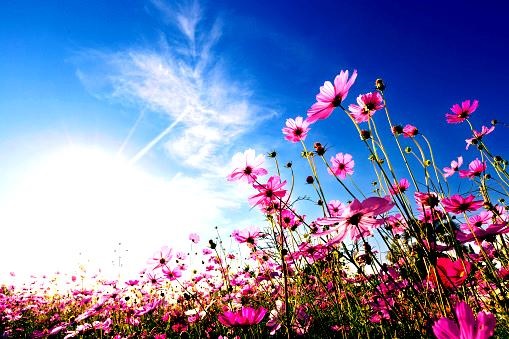
Example - Reducing Contract of an Image
To reduce the contrast of an image, you can use a contrast enhancement factor less than 1. Here's an example illustrating the creation of a low-contrast version of the input image using the PIL.ImageEnhance.Contrast class.
main.py
from PIL import Image, ImageEnhance

# Open the input image
image = Image.open('Images/flowers.jpg')

# Create an ImageEnhance object for adjusting contrast
enhancer = ImageEnhance.Contrast(image)

# Display the original image
image.show()

# Reduce the contrast by a factor of 0.5 and display the result
enhancer.enhance(0.5).show()
Input Image
Output Image
Output a low contrasted version of the input image −
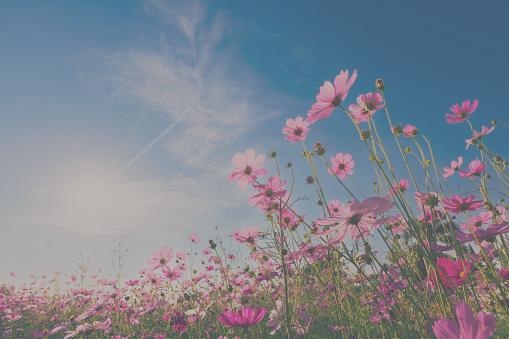
Python Pillow - Enhancing Sharpness
Sharpness is a key factor in defining the clarity and detail in a photograph, and it serves as a valuable tool for emphasizing texture and visual impact.
Enhancing Sharpness is an image processing technique used to enhance an image's edges, details, and contrast, resulting in a clearer and more vivid appearance. This process can significantly enhance the quality and visibility of images that are blurry, noisy, or distorted because of factors such as camera shake, low resolution, or compression.
Enhancing Sharpness of an Image
In Python Pillow library, enhancing and adjusting the sharpness of an image can be achived by using the ImageEnhance.Sharpness() class. It allows you to adjust the sharpness of an image by applying the enhancement factor.
Below is the syntax of the ImageEnhance.Sharpness() class −
class PIL.ImageEnhance.Sharpness(image)
An enhancement factor represented as a floating-point value, is passed as an argument to the common single interface method, enhance(factor). This factor plays an important in adjusting the image's sharpness. Using a factor of 0.0 can lead to a completely blurred image, while a factor of 1.0 gives the original image. And higher values enhance the image's sharpness.
Following are the steps to achieve Sharpness Enhancement of an image −
Create a Sharpness enhancer object using the ImageEnhance.Sharpness() class.
Then apply the enhancement factor to the enhancer object using the enhance() method.
Example - Enhancing Sharpness of an Image
Here's an example that demonstrates how to adjust the sharpness of an image by specifying a factor.
main.py
from PIL import Image, ImageEnhance

# Open an image file
image = Image.open('Images/butterfly_and_flowers.jpg')

# Create a Sharpness object
Enhancer = ImageEnhance.Sharpness(image)

# Display the original image
image.show()

# Enhance the sharpness with a factor of 4.0
sharpened_image = enhancer.enhance(4.0)

# Display the sharpened image
sharpened_image.show()
Output
The Input image −
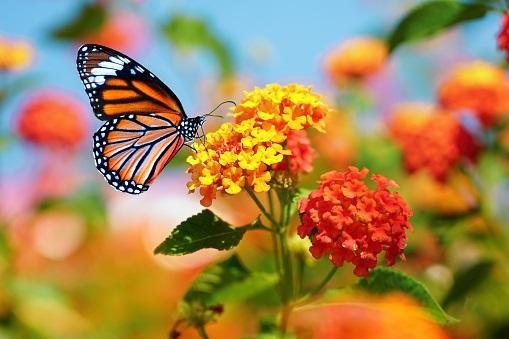
The output sharpness enhanced image −

Example - Blurring an Image
In this example, you can obtain a blurred version of the input image by setting the enhancement factor to a value close to zero.
main.py
from PIL import Image, ImageEnhance

# Open an image file
image = Image.open('Images/butterfly.jpg')

# Create a Sharpness object
enhancer = ImageEnhance.Sharpness(image)

# Display the original image
image.show()

# Decrease the sharpness by using a factor of 0.05
sharpened_image = enhancer.enhance(0.05)

# Display the sharpened image
sharpened_image.show()
Output
The input image −
The output blurred version of the input image −

Python Pillow - Enhancing Color
Enhancing color is an image processing technique that focuses on improving the visual appeal and quality of a digital image by fine-tuning the balance and saturation of its colors. The objective of image color enhancement is to get finer image details while highlighting the useful information. This technique is especially useful in scenarios where images have poor illumination conditions, resulting in darker and low-contrast appearances that require refinement. This technique is widely used in various fields, including graphic design, photography, and digital art, to enhance the visual impact of images.
The Python Pillow library (PIL) offers the Color() class within its ImageEnhance module, which enables you to apply color enhancement to images.
Enhancing Color of an Image
To enhance the color of an image using the Python Pillow library, you can use the ImageEnhance.Color() class, which allows you to adjust the color balance of an image, just as controls on a color TV set.
Following is the syntax of the ImageEnhance.Color() class −
class PIL.ImageEnhance.Color(image)
An enhancement factor represented as a floating-point value, is passed as an argument to the common single interface method, enhance(factor). This factor plays an important role in adjusting the color balance. A factor of 0.0 will give a black and white image. A factor of 1.0 gives the original image.
Following are the steps to achieve color enhancement of an image −
Create a color enhancer object using the ImageEnhance.Color() class.
Then apply the enhancement factor to the enhancer object using the enhance() method.
Example - Enhancing Color by 3.0
Here is an example that enhances the color of an image with a factor of 3.0.
main.py
from PIL import Image, ImageEnhance

# Open an image file
image = Image.open('Images/tajmahal.jpg')

# Create a Color object
color_enhancer = ImageEnhance.Color(image)

# Display the original image
image.show()

# Enhance the color with a factor of 3.0
colorful_image = color_enhancer.enhance(3.0)

# Display the enhanced color image
colorful_image.show()
Output
Input image −
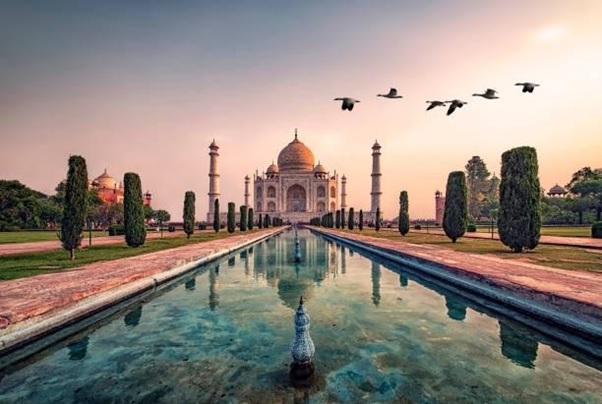
Output highly color enhanced image −
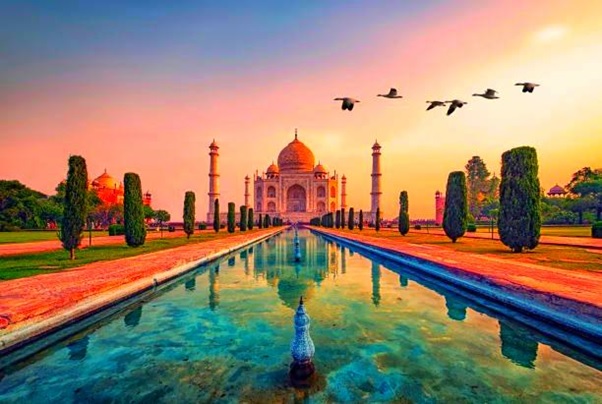
Example - Enhancing Image by 0.0
Here is an example that enhances the color of an image with a lower enhancement factor(0.0).
main.py
from PIL import Image, ImageEnhance

# Open an image file
image = Image.open('Images/tajmahal.jpg')

# Create a Color object
color_enhancer = ImageEnhance.Color(image)

# Display the original image
image.show()

# Enhance the color with a factor of 0.0
colorful_image = color_enhancer.enhance(0.0)

# Display the enhanced color image
colorful_image.show()
Output
Input image −
Output color enhanced image with a factor of 0.0 −
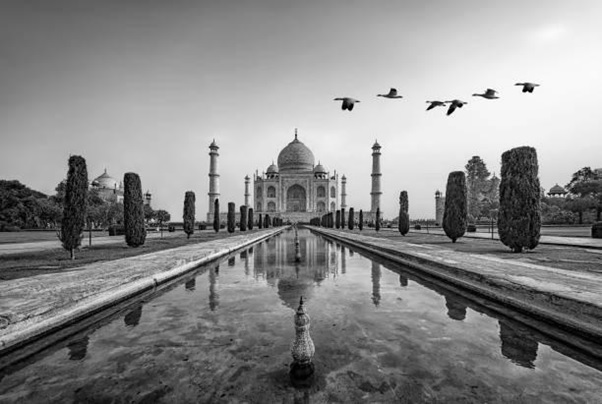
Python Pillow - Enhancing Color Balance
Correcting color balance, in the context of image processing, refers to the adjustment of the intensities of different colors within an image to achieve a desired visual outcome. This adjustment typically involves the primary colors of red, green, and blue and is aimed at rendering specific colors, especially neutral colors like white or gray, correctly. Correct color balance ensures that the colors in an image appear as they would in the real world, making it look more naturalistic and pleasing to the human eye.
The Python pillow library provides several options to correct the color balance of an image. Let's explore them below.
Correcting Color Balance of an Image
Correcting or adjusting an image's color balance can simply be done by using the PIL.ImageEnhance.Color() class. This class provides the ability to fine-tune the color balance of an image by changing the enhancement factor.
Below is the syntax of the ImageEnhance.Color() class −
class PIL.ImageEnhance.Color(image)
An enhancement factor is a floating-point value passed to the common single interface method, enhance(factor), which plays an important role in adjusting image color balance. When a factor of 0.0 is used, it will produce a solid grey image. A factor of 1.0 will give the original image.
Following are the steps to adjust the color balance of an image −
- Create a color enhancer object using the ImageEnhance.Color() class.
- Then apply the enhancement factor using the enhancer_object.enhance() method.
Example - Adjusting Color Balance of an Image
Here is an example that uses the PIL.ImageEnhance.Color class to adjust the color balance of an image.
from PIL import Image, ImageEnhance

# Open the image
input_image = Image.open("Images/tajmahal.jpg")

# Create a ColorEnhance object
color_enhancer = ImageEnhance.Color(input_image)

# Adjust the color balance by setting the enhancement factor
enhancement_factor = 1.5
color_balanced_image = color_enhancer.enhance(enhancement_factor)

# Display the original and color balanced images
input_image.show()
color_balanced_image.show()
Input Image
Output Color Balanced Image
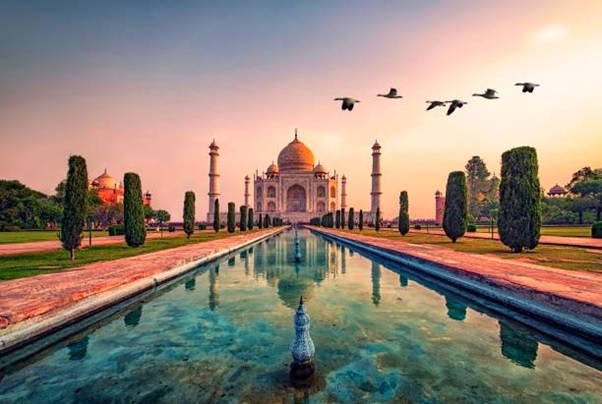
Correcting Color Balance using the Point Transforms
Here is another approach of applying point transforms to color channels of an image for adjusting the color balance of an image. Point transforms can generally be used to adjust various aspects of an image, including color balance, brightness, and contrast. This can be done by using the point() method, it helps to Process the individual bands/ channels of an image.
Example - Point Transformations
Here is an example that demonstrates the application of point transforms to correct the color balance of an image.
main.py
from PIL import Image
# Open the image
input_image = Image.open("Images/tree.jpg")
# Extract the red (R), green (G), and blue (B) channels
red_channel, green_channel, blue_channel = input_image.split()
# Adjust the color balance by scaling the intensity of each channel
# Increase green intensity
green_channel = green_channel.point(lambda i: i * 1.2)
# Decrease blue intensityPython Pillow - Removing Noise
Removing noise, also referred to as denoising, involves the process of reducing unwanted artifacts in an image. Noise in an image typically appears as random variations in brightness or color that are not part of the original scene or subject being photographed. The goal of image denoising is to enhance the quality of an image by eliminating or reducing these unwanted and distracting artifacts, making the image cleaner, and more visually appealing.
The Python pillow library offers a range of denoising filters, allowing users to remove noise from noisy images and recover the original image. In this tutorial, we will explore GaussianBlur and Median filters as effective methods for noise removal.
Removing the noise using the GaussianBlur filter
Removing the noise from an image using the gaussian blur filter is a widely used technique. This technique is works by applying a convolution filter to the image to smooth out the pixel values.
Example - Using Gaussian Blur Filter
Here is an example that uses the ImageFilter.GaussianBlur() filter to remove the noise from an RGB image.
main.py
from PIL import Image, ImageFilter
# Open a Gaussian Noised Image
input_image = Image.open("Images/GaussianNoisedImage.jpg").convert('RGB')
# Apply Gaussian blur with some radius
blurred_image = input_image.filter(ImageFilter.GaussianBlur(radius=2))
# Display the input and the blurred image
input_image.show()
blurred_image.show()
Input Noised Image

Output Noise Removed Image

Example - Removing the noise using the Median Filter
The median filter is an alternative approach for noise reduction, particularly useful for the images where the noise points are like small and scattered. This function operates by replacing each pixel value with the median value within its local neighborhood. the Pillow library provides the ImageFilter.MedianFilter() filter for this purpose.
Following example removes the noice from an image using the ImageFilter.MedianFilter().
main.py
from PIL import Image, ImageFilter
# Open an image
input_image = Image.open("Images/balloons_noisy.jpg")
# Apply median filter with a kernel size
filtered_image = input_image.filter(ImageFilter.MedianFilter(size=3))
# Display the input and the filtered image
input_image.show()
filtered_image.show()
Input Noisy Image
Output Median Filtered Image
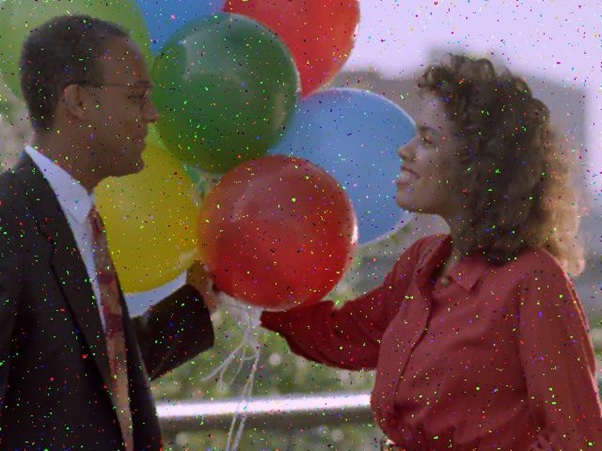
Exampl - Reducing Noise in Grayscale Image
This example demonstrates the reduction of salt-and-pepper noise in a grayscale image. This can be done by using a median filter, enhancing the contrast to improve visibility, and subsequently converting the image to binary mode for display.
main.py
from PIL import Image, ImageEnhance, ImageFilter, ImageOps
# Open the image and convert it to grayscale
input_image = ImageOps.grayscale(Image.open('Images/salt-and-pepper_noise.jpg'))
# Apply a median filter with a kernel size of 5 to reduce noise
filtered_image = input_image.filter(ImageFilter.MedianFilter(5))
# Enhance the contrast of the filtered image
contrast_enhancer = ImageEnhance.Contrast(filtered_image)
high_contrast_image = contrast_enhancer.enhance(3)
# Convert the image to binary
binary_image = high_contrast_image.convert('1')
# Display the input and processed images
input_image.show()
binary_image.show()
Input Noisy Image
Output Median Filtered Image
 blue_channel = blue_channel.point(lambda i: i * 0.8)
# Merge the channels back into an RGB image
corrected_image = Image.merge("RGB", (red_channel, green_channel, blue_channel))
# Display the input and corrected images
input_image.show()
corrected_image.show()
blue_channel = blue_channel.point(lambda i: i * 0.8)
# Merge the channels back into an RGB image
corrected_image = Image.merge("RGB", (red_channel, green_channel, blue_channel))
# Display the input and corrected images
input_image.show()
corrected_image.show()
Input Image
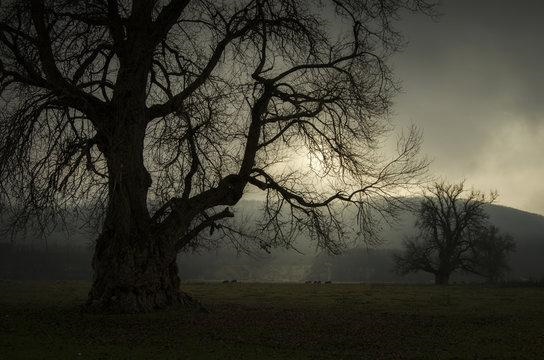
Output Image
Output Color Balanced Image −
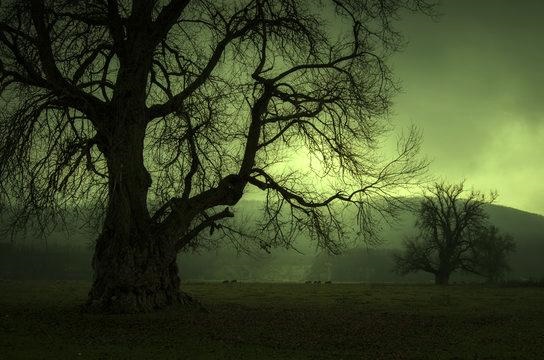
Example - Using Transformation Matrix
The following example adjusts the color balance of an image by applying a transformation matrix to its color channels.
main.py
from PIL import Image

# Open the input image
input_image = Image.open("Images/tajmahal.jpg")

# Define a transformation matrix to adjust color channels
# Multiply R (red) by 1.2, leaving G (green) and B (blue) unchanged
transformation_matrix = (1.5, 0, 0, 0,
   0, 1, 0, 0,
   0, 0, 1, 0)

# Apply the color channel transformation and create the corrected image
corrected_image = input_image.convert("RGB", transformation_matrix)

# Show the original and corrected images
input_image.show()
corrected_image.show()
Input Image
Output Image
Output Color Balanced Image −
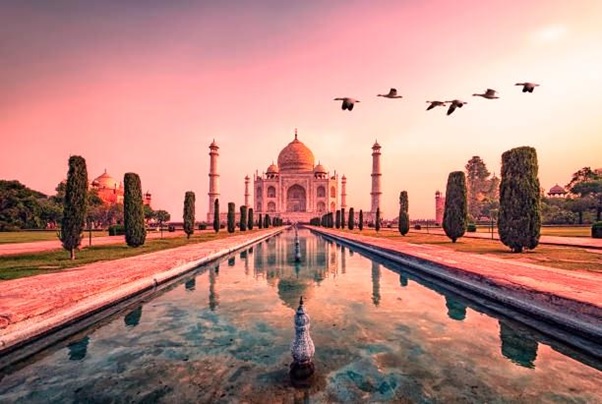
Python Pillow - Removing Noise
Removing noise, also referred to as denoising, involves the process of reducing unwanted artifacts in an image. Noise in an image typically appears as random variations in brightness or color that are not part of the original scene or subject being photographed. The goal of image denoising is to enhance the quality of an image by eliminating or reducing these unwanted and distracting artifacts, making the image cleaner, and more visually appealing.
The Python pillow library offers a range of denoising filters, allowing users to remove noise from noisy images and recover the original image. In this tutorial, we will explore GaussianBlur and Median filters as effective methods for noise removal.
Removing the noise using the GaussianBlur filter
Removing the noise from an image using the gaussian blur filter is a widely used technique. This technique is works by applying a convolution filter to the image to smooth out the pixel values.
Example - Using Gaussian Blur Filter
Here is an example that uses the ImageFilter.GaussianBlur() filter to remove the noise from an RGB image.
main.py
from PIL import Image, ImageFilter

# Open a Gaussian Noised Image
input_image = Image.open("Images/GaussianNoisedImage.jpg").convert('RGB')

# Apply Gaussian blur with some radius
blurred_image = input_image.filter(ImageFilter.GaussianBlur(radius=2))

# Display the input and the blurred image
input_image.show()
blurred_image.show()
Input Noised Image
Output Noise Removed Image
Example - Removing the noise using the Median Filter
The median filter is an alternative approach for noise reduction, particularly useful for the images where the noise points are like small and scattered. This function operates by replacing each pixel value with the median value within its local neighborhood. the Pillow library provides the ImageFilter.MedianFilter() filter for this purpose.
Following example removes the noice from an image using the ImageFilter.MedianFilter().
main.py
from PIL import Image, ImageFilter

# Open an image
input_image = Image.open("Images/balloons_noisy.jpg")

# Apply median filter with a kernel size
filtered_image = input_image.filter(ImageFilter.MedianFilter(size=3))

# Display the input and the filtered image
input_image.show()
filtered_image.show()
Input Noisy Image
Output Median Filtered Image
Exampl - Reducing Noise in Grayscale Image
This example demonstrates the reduction of salt-and-pepper noise in a grayscale image. This can be done by using a median filter, enhancing the contrast to improve visibility, and subsequently converting the image to binary mode for display.
main.py
from PIL import Image, ImageEnhance, ImageFilter, ImageOps

# Open the image and convert it to grayscale
input_image = ImageOps.grayscale(Image.open('Images/salt-and-pepper_noise.jpg'))

# Apply a median filter with a kernel size of 5 to reduce noise
filtered_image = input_image.filter(ImageFilter.MedianFilter(5))

# Enhance the contrast of the filtered image
contrast_enhancer = ImageEnhance.Contrast(filtered_image)
high_contrast_image = contrast_enhancer.enhance(3)

# Convert the image to binary
binary_image = high_contrast_image.convert('1')

# Display the input and processed images
input_image.show()
binary_image.show()
Input Noisy Image
Output Median Filtered Image
Python Pillow - Extracting Image Metadata
Image metadata refers to information associated with a digital image. This metadata can include various details, such as camera model, date and time of capture, location information (GPS coordinates), and keywords.
In this context, extracting image metadata retrieves this underlying information from an image. One widely used type of image metadata is EXIF data, short for "Exchangeable Image File Format." This standardized format, established by organizations like Canon, Minolta/Sony, and Nikon, encapsulates a comprehensive set of specifics related to the image, including camera settings, exposure parameters, and more.
It's important to note that all EXIF data is metadata, but not all metadata is EXIF data. EXIF is a specific type of metadata, and the data you're seeking might also fall under other metadata types, such as IPTC or XMP data.
Example - Extracting Basic Image Metadata
The Python Pillow Image object offers a straightforward way of accessing the basic image metadata, including the filename, dimensions, format, mode, and more.
The example demonstrates how to extract various basic metadata from an image using attributes of the Pillow Image object.
main.py
from PIL import Image

# Path to the image
image_path = "Images/dance-cartoon.gif"

# Read the image data using Pillow
image = Image.open(image_path)

# Access and print basic image metadata
print("Filename:", image.filename)
print("Image Size:", image.size)
print("Image Height:", image.height)
print("Image Width:", image.width)
print("Image Format:", image.format)
print("Image Mode:", image.mode)

# Check if the image is animated (for GIF images)
if hasattr(image, "is_animated"):
   print("Image is Animated:", image.is_animated)
   print("Frames in Image:", image.n_frames)
Output
Filename: Images/dance-cartoon.gif
Image Size: (370, 300)
Image Height: 300
Image Width: 370
Image Format: GIF
Image Mode: P
Image is Animated: True
Frames in Image: 12
Extracting Advanced Image Metadata
The Python Pillow library offers tools to access and manage image metadata, specifically through the Image.getexif() function and the ExifTags module.
The Image.getexif() function retrieves EXIF data from an image, which includes a wealth of valuable information about the image. The syntax for using this function is −
Image.getexif()
The function returns an Exif object, This object provides read and write access to EXIF image data.
The PIL.ExifTags.TAGS dictionary is used to interpret EXIF data. This dictionary maps 16-bit integer EXIF tag enumerations to human-readable descriptive string names, making the metadata easier to understand. The syntax for this dictionary is −
PIL.ExifTags.TAGS: dict
Example - Getting EXIF metadata
The following example demonstrates how to access and print EXIF metadata from an image file using Pillow's getexif() method. It also shows how to use the TAGS dictionary to map tag IDs to human-readable tag names.
main.py
from PIL import Image
from PIL.ExifTags import TAGS

# The path to the image
image_path = "Images/flowers_canon.JPG"

# Open the image using the PIL library
image = Image.open(image_path)

# Extract EXIF data
exif_data = image.getexif()

# Iterate over all EXIF data fields
for tag_id, data in exif_data.items():

   # Get the tag name, instead of the tag ID
   tag_name = TAGS.get(tag_id, tag_id)
   print(f"{tag_name:25}: {data}")
Output
GPSInfo                  : 10628
ResolutionUnit           : 2
ExifOffset               : 360
Make                     : Canon
Model                    : Canon EOS 80D
YResolution              : 72.0
Orientation              : 8
DateTime                 : 2020:10:25 15:39:08
YCbCrPositioning         : 2
Copyright                : CAMERAMAN_SAI
XResolution              : 72.0
Artist                   : CAMERAMAN_SAI
Python Pillow - Identifying Colors
In the context of image processing and analysis, identifying colors refers to the process of recognizing, categorizing, and extracting information about the different Colors on an Image. It involves the analysis of pixel data to determine the specific colors or color patterns within the image.
The Python Pillow library offers valuable tools for this purpose. This tutorial explores two fundamental functions, namely, getcolors() and getdata(), which play a crucial role in efficiently analyzing the color information present within images.
Identifying Colors with the getcolors() function
The getcolors() function returns a list of colors used within the image, with the colors represented in the image's mode. For example, in an RGB image, the function returns a tuple containing red, green, and blue color values. For a palette-based (P) image, it returns the index of the color in the palette. The syntax for using this function is −
Image.getcolors(maxcolors=256)
Where, maxcolors parameter is used to specify the maximum number of colors to retrieve. And it returns an unsorted list of tuples, each containing a count of occurrences and the corresponding color pixel value. If this maxcolors limit is exceeded, the method returns None (default limit: 256 colors).
Example - Extracting Colors from an Image
This example identifies the most frequent colors in an image using the Image.getcolors() function. It extracts the top 10 most common colors from the image and creates a color palette to visualize and display these colors along with their respective counts.
main.py
from PIL import Image, ImageDraw

# Open an image
input_image = Image.open('Images/colorful_shapes.jpg')

# Get the palette of the top 10 most common colors
palette = sorted(input_image.getcolors(maxcolors=100000), reverse=True)[:10]

cols = 2
rows = ((len(palette) - 1) // cols) + 1
cellHeight = 70
cellWidth = 200
imgHeight = cellHeight * rows
imgWidth = cellWidth * cols

result_image = Image.new("RGB", (imgWidth, imgHeight), (0, 0, 0))
draw = ImageDraw.Draw(result_image)

for idx, (count, color) in enumerate(palette):
   y0 = cellHeight * (idx // cols)
   y1 = y0 + cellHeight
   x0 = cellWidth * (idx % cols)
   x1 = x0 + (cellWidth // 4)

   draw.rectangle([x0, y0, x1, y1], fill=color, outline='black')
   draw.text((x1 + 1, y0 + 10), f"Count: {count}", fill='white')

# Display the input image
input_image.show('Input Image')

# Display the color chart
result_image.show('Output identified Colors')
Input Image

Output identified Colors
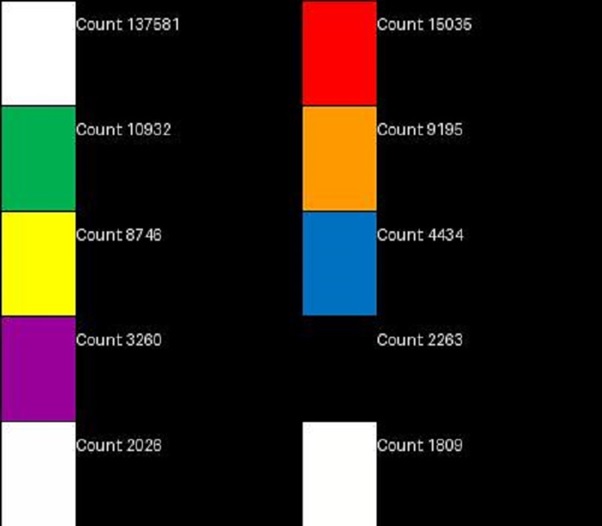
It is important to note that the getcolors() function returns None when the number of colors in the image is greater than the maxcolors argument. And it primarily works with 'RGB' images, which may not be ideal for all use cases.
For scenarios where you need more flexibility or when working with images of different color modes, using the Image.getdata() function in combination with other Python libraries can be a more convenient
Identifying Colors with the getdata() function
The getdata() function is another function within Pillow Image module that allows users to access the contents of an image as a sequence object containing pixel values. The sequence object is flattened, meaning values for each line follow directly after the values of the zero line, and so on. While the sequence object returned by this method is an internal Pillow data type, it can only support certain sequence operations, such as a Python list, for more convenient manipulation and printing. Here is the syntax of the function −
Image.getdata(band=None)
The parameters band is used to specify the band to return (default: all bands). To retrieve a single band, provide the index value (e.g., 0 to obtain the "R" band from an "RGB" image). And the function returns a sequence-like object that can be converted into more familiar data structures for further processing.
Example - Counting Colors of an Image
Here is an example that identifies the colors in an image and counts the occurrences of each color using the Image.getdata() function.
main.py
from PIL import Image
from collections import defaultdict

# Open an imagefrom PIL import Image
from collections import defaultdict

# Open an image
im = Image.open('Images/sea1.jpg')

# Create a defaultdict to store color counts
colors = defaultdict(int)

# Iterate through the image pixels and count each color
for pixel in im.getdata():
    colors[pixel] += 1

# Sort the colors by count in descending order
ordered_colors = sorted(colors.items(), key=lambda x: x[1], reverse=True)

# Print the top 10 colors and their counts
for color, count in ordered_colors[:10]:
    print(f"Color: {color}, Count: {count}")
from PIL import Image
from collections import defaultdict

# Open an image
im = Image.open('Images/sea1.jpg')

# Create a defaultdict to store color counts
colors = defaultdict(int)

# Iterate through the image pixels and count each color
for pixel in im.getdata():
    colors[pixel] += 1

# Sort the colors by count in descending order
ordered_colors = sorted(colors.items(), key=lambda x: x[1], reverse=True)
# Print the top 10 colors and their counts
for color, count in ordered_colors[:10]:
    print(f"Color: {color}, Count: {count}")

im = Image.open('Images/sea1.jpg')

# Create a defaultdict to store color counts
colors = defaultdict(int)

# Iterate through the image pixels and count each color
for pixel in im.getdata():
   colors[pixel] += 1

# Sort the colors by count in descending order
ordered_colors = sorted(colors.items(), key=lambda x: x[1], reverse=True)

# Print the top 10 colors and their counts
for color, count in ordered_colors[:10]:
   print(f"Color: {color}, Count: {count}")
Output
Color: (255, 255, 255), Count: 82
Color: (0, 33, 68), Count: 73
Color: (0, 74, 139), Count: 71
Color: (0, 78, 144), Count: 69
Color: (0, 77, 143), Count: 62
Color: (0, 63, 107), Count: 59
Color: (0, 34, 72), Count: 56
Color: (0, 36, 72), Count: 52
Color: (0, 30, 58), Count: 51
Color: (1, 26, 56), Count: 51
Example - Counting Most Frequent Color
The following example identifies the most frequent color in an image and counts the occurrences of the color using the Image.getdata() function together with Python collections library.
main.py
from PIL import Image
from collections import Counter

# Open an image
image = Image.open('Images/Road.jpg')

# Get a Counter dictionary of colors and their frequencies
colors = Counter(image.getdata())

# Get a set of unique colors
unique_colors = set(colors)

# Get the number of unique colors
num_unique_colors = len(unique_colors)

# Get the color with the highest frequency
most_frequent_color = max(colors, key=colors.get)

print(f"Unique Colors: {num_unique_colors}")
print(f"Most Frequent Color: {most_frequent_color} with a frequency of {colors[most_frequent_color]}")
Output
Unique Colors: 18323
Most Frequent Color: (26, 27, 31) with a frequency of 5598
Python Pillow - Creating Animated GIFs
The GIF (Graphics Interchange Format), is a bitmap image format developed by a team at CompuServe, an online services provider, under the leadership of American computer scientist Steve Wilhite. GIF ware not designed as an animation medium. However, its ability to store multiple images within a single file made it a logical choice for representing the frames of an animation sequence. To support the presentation of animations, the GIF89a specification introduced the Graphic Control Extension (GCE). This extension enables the specification of time delays for each frame, effectively allowing the creation of a video clip from a series of images.
In an animated GIF, each frame is introduced by its own GCE, specifying the time delay that should occur after the frame is drawn. Additionally, global information defined at the beginning of the file applies as the default setting for all frames, simplifying the management of animation settings and behaviors.
Python's Pillow library can read GIF files in both GIF87a and GIF89a formats. By default, it writes GIF files in GIF87a format unless GIF89a features are used or the input file is already in GIF89a format. The saved files use LZW encoding.
Creating Animated GIFs with Python Pillow
It is possible to create animated GIFs using Pillow's Image.save() function. Below are the syntax and the available options when calling save() function to save a GIF file −
Syntax:
Image.save(out, save_all=True, append_images=[im1, im2, ...])
Options:
save_all − If set to true, it saves all frames of the image. Otherwise, it saves only the first frame of a multi-frame image.
append_images − This option allows appending a list of images as additional frames. The images in the list can be single or multi-frame images. This feature is supported for GIF, PDF, PNG, TIFF, and WebP formats, as well as for ICO and ICNS formats. When images of relevant sizes are provided, they will be used instead of scaling down the main image.
include_color_table − Determines whether or not to include a local color table.
interlace − Specifies whether the image is interlaced. By default, interlacing is enabled, unless the image's width or height is less than 16 pixels.
disposal − Indicates how the graphic should be treated after being displayed. It can be set to values like 0 (no disposal specified), 1 (do not dispose), 2 (restore to the background color), or 3 (restore to previous content). You can pass a single integer for a constant disposal or a list/tuple to set disposal for each frame separately.
palette − This option allows you to use a specified palette for the saved image. The palette should be provided as a bytes or bytearray object containing the palette entries in RGBRGB... form. It should be no more than 768 bytes. Alternatively, you can pass the palette as a PIL.ImagePalette.ImagePalette object.
optimize − If set to true, it attempts to compress the palette by eliminating unused colors. This optimization is useful when the palette can be compressed to the next smaller power of 2 elements.
Additional options like transparency, duration, loop, and comment can be provided to control specific aspects of the animated GIF.
Example - Creating an Animated GIF image
Here is an example that demonstrates how to create a GIF animation by generating individual frames with different colors and saving them.
main.py
import numpy as np
from PIL import Image

# Function to create a new image with a specified width, height, and color
def create_image(width, height, color):
   return Image.new("RGBA", (width, height), color)

# Set the width and height of the images
width, height = 300, 300

# Define the colors for the images
colors = [(64, 64, 3), (255, 0, 0), (255, 255, 0), (255, 255, 255), (164, 0, 3)]

# Create a list of images using a list comprehension
images = [create_image(width, height, color) for color in colors]

# Save the images as a GIF with specified parameters
images[0].save("Output.gif", save_all=True, append_images=images[1:], duration=1000/2, loop=0)
Output
The animated GIFs file is saved successfully...
Below you can see the saved animated GIFs in your working directory −

Example - Creating GIF using multiple Images
The following example takes a list of existing image files to create an animated GIF by saving these images in sequence.
main.py
from PIL import Image

# List of file paths for existing images
image_paths = ['Images/book_1.jpg', 'Images/book_2.jpg', 'Images/book_3.jpg', 'Images/book_4.jpg']

# Create a list of image objects from the provided file paths
image_list = [Image.open(path) for path in image_paths]

# Save the first image as an animated GIF
output_path = \Book_Animation.gif'

image_list[0].save(
   output_path,
   save_all=True,
   append_images=image_list[1:],  # Append the remaining images
   duration=1000,  # Frame duration in milliseconds
   loop=0
)

print('The animated GIF file has been created and saved successfully...')
Output
The animated GIF file has been created and saved successfully...
The following image represents the saved animated GIFs in your working directory −
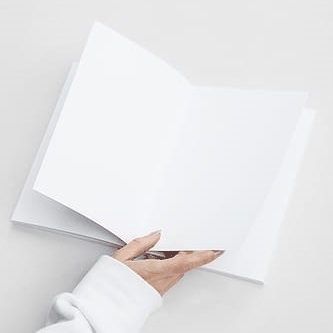
Example - Modifying an Existing GIF file
This example modifies an existing GIF file by duplicating its last frame a few times and then saves it as a new GIF file. In this example we will use the ImageSequence module to iterate each frames from the input GIF file.
main.py
from PIL import Image, ImageSequence

# Open the existing GIF file
input_image = Image.open("Book_Animation.gif")

# Create an empty list to store the frames of the GIF
frames = []

# Iterate over the frames of the GIF and append them to the frames list
for frame in ImageSequence.Iterator(input_image):
   frames.append(frame)

# Duplicate the last frame three times to extend the animation
for i in range(3):
   frames.append(frames[-1])

# Save the frames as a new GIF file ("newGif.gif"):
output_path = "newGif.gif"
frames[0].save(
   output_path,
   save_all=True,
   append_images=frames[1:],
   optimize=False,
   duration=40,  # Set the frame duration to 40 milliseconds
   loop=0
)
Output
The following image represents the saved animated GIFs in your working directory −
Python Pillow - Batch Processing of Images
Batch processing images in Python Pillow allows you to efficiently apply the same edits or operations to multiple images simultaneously. This approach is valuable for tasks like resizing, cropping, renaming, watermarking, or formatting images, as it enhances workflow efficiency and optimizes output.
This is particularly useful when working with a large number of images, as it can significantly impact the speed and efficiency of your computer. It allows you to apply the same operation to each image, saving time and effort.
Steps for Batch Processing Images
The steps involved in batch processing images with Python Pillow are as follows −
Create a List of Image Files: Generate a list of file paths to the images you want to process.
Iterate Through the List of Images: Use loops to traverse the list of image files. You can use 'for' or 'while' loops to handle each image one at a time.
Perform Image Processing Operations: Within the loop, apply the desired image processing operations to each image. This may include resizing, cropping, applying filters, adding text or watermarks, or any other operation necessary.
Save Processed Images: After performing the processing operations on each image, save the processed image to the desired location.
Example - Resizing Images using Batch Processing
Resizing images using Python Pillow batch processing is one of the common tasks in image processing. It involves adjusting the dimensions of multiple images to a specific size or aspect ratio.
Here is an example that demonstrates the resizing multiple images at once using the Python Pillow batch processing. In this example, a collection of JPG images in a specified folder is resized to a specific size (e.g., 700x400).
main.py
from PIL import Image
import glob
import os

# Get a list of image files in the 'Images' directory
input_directory = "Images"
output_directory = "Output_Images"

image_files = [f for f in glob.glob(os.path.join(input_directory, "*.jpg"))]

for file in image_files:
   image = Image.open(file)

   # Resize the image to a specific size (e.g., 700x400)
   image = image.resize((700, 400))

   # Save the resized image to the 'Output directory for Batch Operation' directory
   output_path = os.path.join(output_directory, os.path.basename(file))
   image.save(output_path)
Output
Following image represents the list of image files available in the input directory −
If we navigate to the directory where the output image was saved (i.e, "Output directory for Batch Operation"), we will be able to observe resized images as shown below −
Example - Renaming Images using the Batch Processing
Renaming images is another frequently performed task in batch processing. It involves changing the filenames of multiple images according to a specified pattern.
The following example adds the prefix "New_" to the names of a batch of PNG images located in the specified input_directory. It renames these images and saves them in the output_directory with the new names.
main.py
from PIL import Image
import glob
import os

# Get a list of image files in the 'Images' directory
input_directory = "Images"
output_directory = "Output_Images"

image_files = [f for f in glob.glob(os.path.join(input_directory, "*.png"))]

for file in image_files:
   image = Image.open(file)

   # Save the image with the new name to the 'Output directory for Batch Operation' directory
   output_path = os.path.join(output_directory, 'New_'+os.path.basename(file))
   image.save(output_path)
Output
Following image represents the list of image files available in the input directory −
If we navigate to the directory where the output image was saved (i.e, "Output directory for Batch Operation"), we will be able to observe renamed images as shown below −
Python Pillow - Converting Image Formats
Converting image file formats with Python Pillow is a straightforward process. You can open an image in one format and save it in another, specifying the desired output format. This process typically involves the following steps −
Open the Source Image: Use the Image.open() function to open the source image.
Save the Image: Use the save() method to save the image in the desired format, specifying the new file format and destination.
Pillow can recognize and read over 30 different formats. When using the open() function, Pillow determines the format based on the image content, not just the file name. However, when saving images with the save() method, it usually looks at the file name to decide the format unless you specifically tell which format to use.
Pillow Supported File Formats
Pillow supports various image formats for both reading and writing. Some formats are fully supported, meaning you can both read from and write to images in those formats. These include popular formats like JPEG, PNG, BMP, BLP, DDS, EPS, GIF, ICNS, ICO, MSP, PCX, PNG, PPM, SGI, TGA, TIFF, WebP, and XBM.
Additionally, it provides read-only and write-only support for a range of other formats.
- Read-Only Formats: CUR, DCX, FITS, FLI, FLC, FPX, GBR, GD, IMT, IPTC/NAA, MCIDAS, MIC, MPO, PCD, PIXAR, PSD, QOI, SUN, WAL, and WMF/EMF.
- Write-Only Formats: PALM, PDF, and XV Thumbnails.
The library can also identify the format of images in formats such as BUFR, GRIB, HDF5, and MPEG. Let's see the exmaples of converting image file formats with Python Pillow.
Example - Converting JPG to PNG Format
This example converts the image from JPEG to PNG format.
main.py
from PIL import Image

# Open the source image in JPEG format
image = Image.open("Images/logo.jpg")

# Convert and save the image in PNG format
image.save("output_image_PNG_format.png")
print("Image saved successfully in PNG format...")
Output
Image saved successfully in PNG format...
Example - Converting BMP to GIF Format
This example converts the image from BMP to GIF format.
main.py
from PIL import Image

# Open the source image in BMP format
image = Image.open("Images/lena.bmp")

# Convert and save the image in GIF format
image.save("output_image.gif")
print("Image saved successfully in GIF format...")
Output
Image saved successfully in GIF format...
Example - Converting GIF to TIFF Format
This example converts the image from GIF to TIFF format.
main.py
from PIL import Image

# Open the source image in GIF format
image = Image.open("Images/Book_Animation.gif")

# Convert and save the image in TIFF format
image.save("output_image.tiff")
print("Image saved successfully in TIFF format...")
Output
Image saved successfully in TIFF format...
Example - Converting BPM to JPG Format
This example converts the image from .bpm file format to .jpg format.
main.py
from PIL import Image

# Open the source image in BMP format
image = Image.open("Images/lena.bmp")

# Convert and save the image in JPEG format
image.save('lena_new.jpg')
print("Image saved successfully in JPEG format...")
Output
Image saved successfully in JPEG format...
If you visit the folder where the output images are saved you can observe resultant images.
Python Pillow - Adding Padding to Image
Adding padding to an image involves adding a border around it. This is a useful technique while adjusting the image's size without changing its aspect ratio or trimming it. Padding can be added to the top, bottom, left, and right sides of the image. This is particularly important when working with images that have important information at the edges, which you want to retain for tasks like segmentation.
The Pillow (PIL) library provides two functions, pad() and expand(), within its ImageOps module for adding padding to images.
Padding Images with ImageOps.pad() function
The pad() function is used to resize and pad an image to a specified size and aspect ratio. It allows you to specify the output size, resampling method, background color, and positioning of the original image within the padded area. Syntax of this function as follows −
PIL.ImageOps.pad(image, size, method=Resampling.BICUBIC, color=None, centering=(0.5, 0.5))
Where,
image − The image to resize and pad.
size − A tuple specifying the requested output size in pixels, in the format (width, height). The function will resize the image to this size while maintaining the aspect ratio.
method − This parameter determines the resampling method used during resizing. The default method is BICUBIC, which is a type of interpolation. You can specify other resampling methods supported by PIL. Common options include NEAREST, BILINEAR, and LANCZOS.
color − This parameter specifies the background color of the padded area. It supports the RGBA tuple also, like (R, G, B, A). If not specified, the default background color is black.
centering − This parameter controls the position of the original image within the padded version. It's specified as a tuple with two values between 0 and 1.
Example - Adding Padding To an Image
Here is an example that adds padding to an image using the ImageOps.pad() function.
main.py
from PIL import Image
from PIL import ImageOps

# Open the input image
input_image = Image.open('Images/elephant.jpg')

# Add padding to the image
image_with_padding = ImageOps.pad(input_image, (700, 300), color=(130, 200, 230))

# Display the input image
input_image.show()

# Display the image with the padding
image_with_padding.show()
Input Image
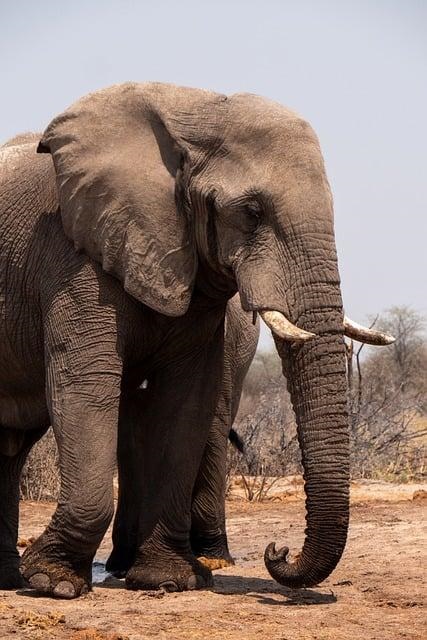
Output Image
Output image After resizing with padding −
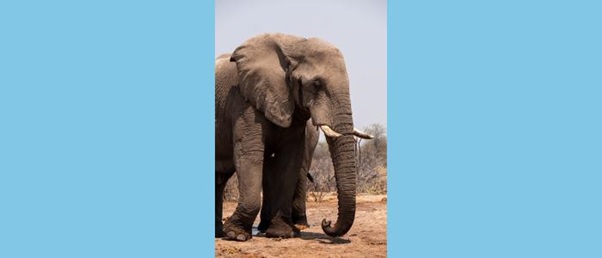
Adding Borders with the ImageOps.expand() function
The expand() function adds a border of a specified width and color around the image. It is useful for creating a decorative frame or emphasizing the content of the image. Its syntax is as follows −
PIL.ImageOps.expand(image, border=0, fill=0)
image − The image to expand the border.
border − The width of the border to add, specified in pixels. It determines how wide the border will be around the image. The default value is (0).
fill − The pixel fill value, which represents the color of the border. The default value is 0, which corresponds to black. You can specify the fill color using an appropriate color value.
Example - Adding Borders to an Image
Here is an example that adds padding to an image using the ImageOps.expand() function.
main.py
from PIL import Image, ImageOps

# Open the input image
input_image = Image.open('Images/yellow_car.jpg')

# Add padding of 15-pixel border
image_with_padding = ImageOps.expand(input_image, border=(15, 15, 15, 15), fill=(255, 180, 0))

# Display the input image
input_image.show()

# Display the output image with padding
image_with_padding.show()
Input Image
Output Image
Output image with padding −
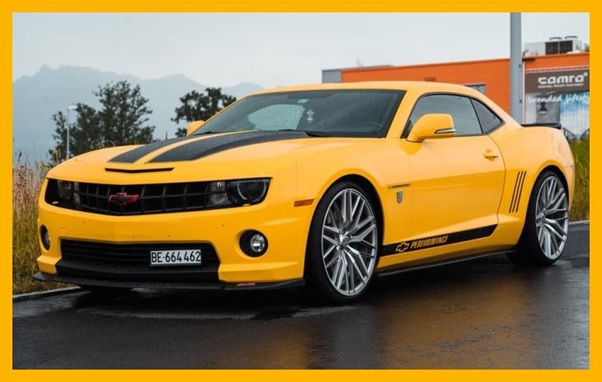
Python Pillow - Color Inversion
Color inversion in Python Pillow is a popular photo effect, that transforms an image by reversing the colors to their complementary hues on the color wheel. It results in changes such as black becoming white, white becoming black, and other color shifts.
This technique, also referred to as image inversion or color negation, is a method in image processing that systematically alters the colors within an image. In a color-inverted image, the colors are transformed in such a way that light areas become dark, dark areas become light, and colors are inverted across the color spectrum.
Applying the Color Inversion to an Image
In Python Pillow, color inversion is achieved through the inversion of colors across the image spectrum. The library offers the invert() function within its ImageOps module, allowing you to apply color inversion to the images. This function is designed to negate the colors of a given image, effectively applying the color inversion effect. The syntax of the method is as follows −
PIL.ImageOps.invert(image)
Where,
image − This is the input image to invert.
Example - Getting an Inverted Image
The following example creates an inverted version of an input image using the PIL.ImageOps.invert() function.
main.py
from PIL import Image
import PIL.ImageOps

# Open an image
input_image = Image.open('Images/butterfly.jpg')

# Create an inverted version of the image
inverted_image = PIL.ImageOps.invert(input_image)

# Display the input image
input_image.show()

# Display the inverted image
inverted_image.show()
Input Image
Output inverted image
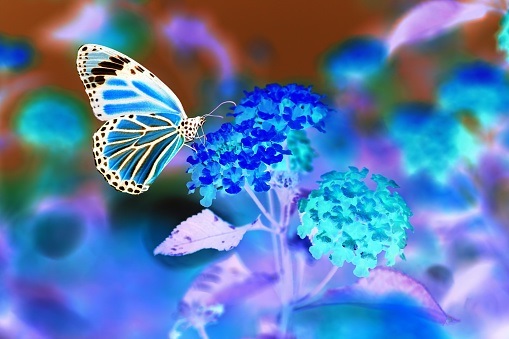
Example - Applying the Color Inversion to RGBA Images
While most functions in the ImageOps module are designed to work with L (grayscale) and RGB images. When you attempt to apply this invert function to an image with RGBA mode (which includes an alpha channel for transparency), it will indeed raise an OSError stating that it is not supported for that image mode.
Here is an example that demonstrates how to work with RGBA images while handling transparency.
main.py
from PIL import Image
import PIL.ImageOps

# Open an image
input_image = Image.open('Images/python_logo_input.jpg')

# Display the input image
input_image.show()

# Check if the image has an RGBA mode
if input_image.mode == 'RGBA':

   # Split the RGBA image into its components
   r, g, b, a = input_image.split()

   # Create an RGB image by merging the red, green, and blue components
   rgb_image = Image.merge('RGB', (r, g, b))

   # Invert the RGB image
   inverted_image = PIL.ImageOps.invert(rgb_image)

   # Split the inverted image into its components
   r2, g2, b2 = inverted_image.split()

   # Merge the inverted RGB image with the original alpha channel to maintain transparency
   final_transparent_image = Image.merge('RGBA', (r2, g2, b2, a))

   # Show the final transparent image
   final_transparent_image.show()
else:
   # Invert the image for non-RGBA images
   inverted_image = PIL.ImageOps.invert(input_image)
   inverted_image.show()
Input Image
Output inverted image
Python Pillow - M L with Numpy
Image manipulation with NumPy is a common practice in image processing tasks. NumPy provides a powerful array manipulation library that complements Pillow's image processing capabilities. This tutorial demonstrates how to use Pillow with NumPy for efficient image processing.
Installation
Before proceeding, ensure we have NumPy installed. Open the command prompt in administrator mode and execute the following command −
pip install numpy
Note − This command works only if you have PIP installed and updated.
Creating image from Numpy Array
When working with NumPy arrays as images, we can use the Image.fromarray() function to create an image memory from an object that exports the array interface, typically using the buffer protocol. If the input array (obj) is contiguous in memory, Pillow can use the array interface directly. If the array is not contiguous, Pillow will use the tobytes method, and frombuffer() will be used to create the image. Here's the syntax of the fromarray() function −
PIL.Image.fromarray(obj, mode=None)
Where,
obj − The object exporting the array interface. This is usually a NumPy array, but it can be any object that exposes the required interface.
mode (optional) − The mode parameter specifies the color mode or pixel format of the resulting image. If not provided, the mode is inferred from the type of the input array.
It's important to note that Pillow modes (color modes) do not always correspond directly to NumPy data types (dtypes). Pillow modes include options for 1-bit pixels, 8-bit pixels, 32-bit signed integer pixels, and 32-bit floating-point pixels. The mode is either explicitly specified or inferred from the dtype of the input array.
Example - Creating Image using NumPy Array
In this example, a NumPy array is created, and then Image.fromarray() is used to create a Pillow Image from the NumPy array. The resulting image is a Pillow Image object that can be further processed or saved.
main.py
from PIL import Image
import numpy as np

# Create a NumPy array
arr = np.zeros([150, 250, 3], dtype=np.uint8)
arr[:,:100] = [255, 128, 0]
arr[:,100:] = [0, 0, 255]

# Create a Pillow Image from the NumPy array
image = Image.fromarray(arr)

# Display the created image
image.show()
Output
Example - Creating Image with Mode
Here is another example that create a Pillow Image from the NumPy array by explicitly specifying the mode.
main.py
from PIL import Image
import numpy as np

# Create a NumPy array
arr = np.zeros([250, 350, 3], dtype=np.uint8)
arr[:100, :200] = 250

# Create a Pillow Image from the NumPy array by explicitly specifying the mode
image = Image.fromarray(arr, mode='RGB')

# Display the created image
image.show()
Output
Example - Creating a Grayscale
This example creates a grayscale image from a numpy 2-dimensional array by explicitly specifying the mode equal to "L".
main.py
from PIL import Image
import numpy as np

# Create a NumPy array
arr = np.zeros([300, 700], dtype=np.uint8)
arr[100:200, 100:600] = 250

# Create a Pillow grayscale Image from the NumPy array
# by explicitly specifying the mode
image = Image.fromarray(arr, mode='L')
print("Pixel values of image at (150, 150) of the grayscale image is:", image.getpixel((150, 150)))

# Display the created image
image.show()
Output
Pixel values of image at (150, 150) of the grayscale image is: 250
Example - Creating numpy array from a Pillow Image
The numpy.asarray() function can be used to convert a Pillow image to a NumPy array. However, it's important to note that when converting Pillow images to arrays, only the pixel values are transferred. This means that certain image modes, like P and PA, will lose their palette information during the conversion.
The following example demonstrates how to convert a Pillow image to a NumPy array.
main.py
from PIL import Image
import numpy as np

# Open an image as a pillow image object
image = Image.open("Images/tutorialspoint.jpg")

# Convert the Pillow image to a NumPy array
result = np.asarray(image)

# Display the type, shape and dtype of the NumPy array
print("Type:", type(result))
print("Shape:", result.shape)
print("Dtype:", result.dtype)
Output
Type: <class 'numpy.ndarray'>
Shape: (225, 225, 3)
Dtype: uint8
Python Pillow with Tkinter BitmapImage and PhotoImage objects
The ImageTk module in the python pillow library provides functionality to create and manipulate Tkinter BitmapImage and PhotoImage objects from PIL images. This tutorial discusses the descriptions of the key classes and methods within the ImageTk module.
These classes and methods provide convenient ways to work with Tkinter images using PIL in Python, allowing for integration of images into graphical user interfaces.
Tkinter BitmapImage class in Python Pillow
The ImageTk.BitmapImage class represents a Tkinter-compatible bitmap image that can be utilized wherever Tkinter expects an image object.
Here are the key details about the class −
The provided image must have a mode of "1".
Pixels with a value of 0 are considered transparent.
Additional options, if provided, are forwarded to Tkinter.
A commonly used option is foreground, allowing specification of the color for non-transparent parts.
Following is the syntax of the ImageTk.BitmapImage() class −
class PIL.ImageTk.BitmapImage(image=None, **kw)
Where,
image − A PIL image with mode "1". Pixels with value 0 are treated as transparent.
**kw − Additional options passed on to Tkinter. The most commonly used option is foreground, which specifies the color for the non-transparent parts.
Following are the list of methods provided by the BitmapImage class −
height() − Returns the height of the image in pixels.
width() − Returns the width of the image in pixels.
Example - Creating Image in Tkinter Window
Here is an example demonstrating creating Tkinter windows, loading images with PIL, and then using ImageTk.BitmapImage to create Tkinter-compatible image objects for display in a Tkinter Label.
main.py
from tkinter import *
from PIL import ImageTk, Image

# Create a Tkinter window
root = Tk()

# Create a sample image 1-bit mode image (black and white)
pil_image = Image.new("1", (700, 300), color=1)

# Create a BitmapImage from the PIL image
bitmap_image = ImageTk.BitmapImage(pil_image, background='', foreground='gray')

# Display the BitmapImage in a Tkinter Label
label = Label(root, image=bitmap_image)
label.pack()

# Run the Tkinter event loop
root.mainloop()
Output
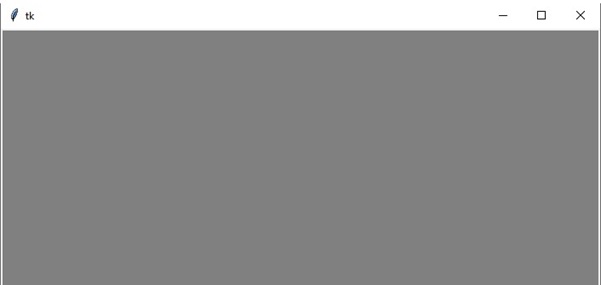
The PhotoImage class in Python Pillow
The ImageTk.PhotoImage() class represents a Tkinter-compatible photo image in Pillow, it suitable for use wherever Tkinter expects an image object.
Here are the key details about the class −
If the image is in RGBA format, pixels with an alpha value of 0 are treated as transparent.
The constructor can be initialized with either a PIL image, or a mode and size. Alternatively, you have the option to use the file or data parameters to initialize the photo image object.
Here is the syntax of the ImageTk.PhotoImage() class −
class PIL.ImageTk.PhotoImage(image=None, size=None, **kw)
Where,
image − Represents either a PIL image or a mode string. If a mode string is used, a size must also be given.
size − If the first argument is a mode string, this defines the size of the image.
file − A filename to load the image from using Image.open(file).
data − An 8-bit string containing image data, as loaded from an image file.
Following are the list of methods provided by the PhotoImage() class −
height() − Get the height of the image in pixels.
width() − Get the width of the image in pixels.
paste(im) − Paste a PIL image into the photo image. Note that this can be slow if the photo image is displayed.
Parameters − im - A PIL image. The size must match the target region. If the mode does not match, the image is converted to the mode of the bitmap image.
Example - Loading Image in Tkinter Window
Here is an example demonstrating creating Tkinter windows, loading images with PIL, and then using ImageTk.PhotoImage to create Tkinter-compatible image objects for display in a Tkinter Label.
main.py
from tkinter import *
from PIL import ImageTk, Image

# Create a Tkinter window
root = Tk()

# Create a canvas widget
canvas = Canvas(root, width=700, height=400, bg='white')
canvas.grid(row=2, column=3)

# Load an image using PIL and create a PhotoImage
pil_image = Image.open("Images/pillow_logo_w.jpg")
tk_image = ImageTk.PhotoImage(pil_image)

# Draw the image on the canvas
canvas.create_image(20, 20, anchor=NW, image=tk_image)

# Start the Tkinter event loop
mainloop()
Output
Python Pillow - Image Blending
Image blending is a process of combining or mixing two images to create a new image. One common method for image blending is to use alpha blending. In alpha blending, each pixel in the result is computed based on a weighted sum of the corresponding pixels in the input images. The alpha channel, representing transparency, is used as the weight factor.
This technique is commonly used in graphics, image processing, and computer vision to achieve various visual effects.
The Python Pillow library provides the blend() function within its Image module to perform the blending operation on images.
The Image.blend() function
This function provides a convenient way to create a smooth transition between two images by specifying a blending factor (alpha). The function creates a new image by interpolating between two input images using a constant alpha value. The interpolation is performed according to the formula −
out=image1×(1.0alpha)+image2×alpha
Following is the syntax of the function −
PIL.Image.blend(im1, im2, alpha)
Where −
im1 − The first image.
im2 − The second image. It must have the same mode and size as the first image.
alpha − The interpolation alpha factor. If alpha is 0.0, a copy of the first image is returned. If alpha is 1.0, a copy of the second image is returned. There are no restrictions on the alpha value. If necessary, the result is clipped to fit into the allowed output range.
Example - Blending Images
Let's see a basic example of blending two images using the Image.blend() method.
main.py
from PIL import Image

# Load two images
image1 = Image.open("Images/ColorDots.png")
image2 = Image.open("Images/pillow-logo-w.png")

# Blend the images with alpha = 0.5
result = Image.blend(image1, image2, alpha=0.5)

# Display the input and resultant iamges
image1.show()
image2.show()
result.show()
Input Images
Output
Example - Blending Images with alpha as 2
Here is an example that demonstrates the use of PIL.Image.blend() with alpha values 2.
main.py
from PIL import Image

# Load two images
image1 = Image.open("Images/ColorDots.png")
image2 = Image.open("Images/pillow-logo-w.png")

# Blend the images with alpha = 2
result = Image.blend(image1, image2, alpha=2)

# Display the input and resultant iamges
image1.show()
image2.show()
result.show()
Input Images
Output
Example - Blending Images with alpha as 1
Here is an example that demonstrates the use of PIL.Image.blend() with alpha value 1.0. It will return a copy of the second image.
main.py
from PIL import Image

# Load two images
image1 = Image.open("Images/ColorDots.png")
image2 = Image.open("Images/pillow-logo-w.png")

# Blend the images with alpha = 2
result = Image.blend(image1, image2, alpha=1.0)

# Display the input and resultant iamges
image1.show()
image2.show()
result.show()
Input Images