Basic Image Operations
- Python Pillow - Working with Images
- Python Pillow - Resizing an Image
- Python Pillow - Flip and Rotate Images
- Python Pillow - Cropping an Image
- Python Pillow - Adding Borders to Images
- Python Pillow - Identifying Image Files
- Python Pillow - Merging Images
- Python Pillow - Cutting and Pasting Images
- Python Pillow - Rolling an Image
- Python Pillow - Writing text on image
- Python Pillow - ImageDraw Module
- Python Pillow - Concatenating two Images
- Python Pillow - Creating Thumbnails
- Python Pillow - Creating a Watermark
- Python Pillow - Image Sequences
Python Pillow Color Conversions
- Python Pillow - Colors on an Image
- Python Pillow - Creating Images With Colors
- Python Pillow - Converting Color String to RGB Color Values
- Python Pillow - Converting Color String to Grayscale Values
- Python Pillow - Change the Color by Changing the Pixel Values
Image Manipulation
- Python Pillow - Reducing Noise
- Python Pillow - Changing Image Modes
- Python Pillow - Compositing Images
- Python Pillow - Working with Alpha Channels
- Python Pillow - Applying Perspective Transforms
Image Filtering
- Python Pillow - Adding Filters to an Image
- Python Pillow - Convolution Filters
- Python Pillow - Blur an Image
- Python Pillow - Edge Detection
- Python Pillow - Embossing Images
- Python Pillow - Enhancing Edges
- Python Pillow - Unsharp Mask Filter
Image Enhancement and Correction
- Python Pillow - Enhancing Contrast
- Python Pillow - Enhancing Sharpness
- Python Pillow - Enhancing Color
- Python Pillow - Correcting Color Balance
- Python Pillow - Removing Noise
Image Analysis
Advanced Topics
- Python Pillow - Creating Animated GIFs
- Python Pillow - Batch Processing Images
- Python Pillow - Converting Image File Formats
- Python Pillow - Adding Padding to an Image
- Python Pillow - Color Inversion
- Python Pillow - M L with Numpy
- Python Pillow with Tkinter BitmapImage and PhotoImage objects
Python Pillow Useful Resources
- Python Pillow - Quick Guide
- Python Pillow - Function Reference
- Python Pillow - Useful Resources
- Python Pillow - Discussion
Python Pillow - Working With Images
Opening, writing, displaying and saving images are the fundamental operations while working with images using python pillow library. The Python Pillow library provides a wide range of tools for image processing tasks, providing straightforward methods and customizable options for these basic operations.
In this tutorial, you will lean essential aspects of working with images using the Pillow library including reading, displaying,writting, and saving images.
Reading Images
Reading images, refers to the process of opening and reading image files and making them accessible for manipulation and processing within a Python program.
In Pillow the Image module provides the function open() to perform loading of the given input image. When we call Image.open() it reads the specified image file, decodes the image and creates a Pillow Image object representing the image. This object can then be used for various image processing tasks.
Reading images using open() function
The Image.open() function is capable of loading different image formats such as JPEG, PNG, GIF, BMP, TIFF, ICO and so on.
The below is the syntax and parameters of this function.
PIL.Image.open(fp, mode='r', formats = None)
Where,
fp − A filename or path or URL of an image within the string format.
mode (optional) − The mode parameter is used to set the image into open mode and it should be assigned as r.
formats (optional) − A list or tuple of formats which to be loaded. This can be used as the restriction of the file formats to be loaded.
This function returns the image as the output. Here for displaying the image we have to use the show() function of the Image module.
Example - Loading an Image
In this example we are loading an image by specifying the path of the image in the string format and defining the mode as r.
main.py
from PIL import Image
#Load an image
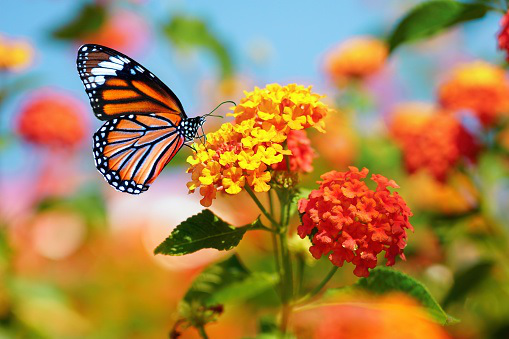
loaded_image = Image.open("Images/butterfly.jpg", mode = 'r')
loaded_image.show()
#Saving the image
loaded_image.save("Output_Images/reading.png")
Image to be used

Output
Example - Loading Image using URL
In this example we are loading the image from the image url. So to perform that we have to use urllib.request() module for reading the image url.
We use the urlretrieve() function of the urllib.request module to download the image from the URL and save it to the local filesystem with the specified filename.
main.py
import urllib.request
from PIL import Image
url = "https://www.tutorialspoint.com/images/logo.png"

#Download the image using urllib
urllib.request.urlretrieve(url, "image.png")

#Open the downloaded image in PIL
loading_image = Image.open("image.png", mode = 'r')

#Show the image
loading_image.show()
Output
Example - Loading Image without format
In this example we are passing the image name and the formats = None as the input parameters.
from PIL import Image
#load the image
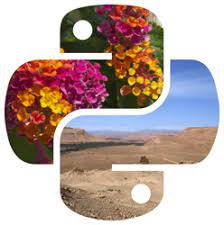
loading_image = Image.open("Images/pillow.jpg", formats = None)
#Show the image
loading_image.show()
Output
Writing Images
Writing images are nothing but creating new image files from scratch or modifying existing ones such as drawing, pixel manipulation and compositing. The resulting image can then be further processed or saved to disk using other Pillow functions and methods.
Writing images using new() method
You can use the new() method from the Image module to create a blank image with a specified mode and size. It's a way to generate a blank or uninitialized image with the desired characteristics.
The following is the syntax for Image.new() −
PIL.Image.new(mode, size, color)
Where,
mode − This parameter specifies the color mode for the image such as "RGB" for full-color images or "L" for grayscale. The available modes depend on the version of Pillow and the capabilities of the underlying image libraries (e.g., "RGB," "RGBA," "L," "CMYK," etc.).
size − This parameter is a tuple specifying the width and height of the image in pixels. For example to create a 300x200-pixel image we can use '(300, 200)'.
color' (optional) − This parameter specifies the initial color of the image. It's an optional parameter and can be a single color value or a tuple for multi-channel images. The default color is black for most modes.
Example - Creating Image
In this example we are creating a new image with black using the new() method in Image module in pillow library.
from PIL import Image

#Create a new 300x200 pixel RGB image filled with white
img = Image.new('RGB', (300, 200), color='black')
img.show()
Output

Example - Creating Blue Box
Here, in this example we are creating a new image with blue color of width 600 and height 600 using the new() method in Image module of the pillow.
main.py
from PIL import Image

#Create a new 300x200 pixel RGB image filled with white
img = Image.new('RGB', (500, 200), color='blue')
img.show()
Output

Displaying Image
Displaying images is about rendering the image on the screen so you can view it. Pillow provides the show() method to display an image using the default image viewer of the system.
Displaying images using the show() method
The show() method in Image module does not require any parameters or arguments. This is a straightforward.
Syntax
The below is the syntax of show() function −
PIL.Image.show()
Example - Displaying Image
In this example we are displaying the output of the open() function using the show() function of Image module.
main.py
from PIL import Image

#Open an image
image = Image.open("Images/handwriting.jpg")

#Display the image using the default image viewer
image.show()
Output

Example - Displaying Images in the Jupyter Notebook Environment
If we are working in a Jupyter Notebook environment then we can display images directly in the notebook using the IPython display() function.
The following is the syntax and parameters of the display() function −
IPython.display.display(image_name)
Where,
image_name − This is the name of the image to be displayed.
Example - Displaying Image in Notebook
In this example we are displaying the image using the display() function of the IPython.display module.
from PIL import Image
from IPython.display import display

#Load the image
loading_image = Image.open("Images/tutorialspoint.png")

#Show the image
display(loading_image)
Output
Example - Displaying in a GUI Application
If we are building a graphical user interface (GUI) application then we can use a GUI toolkit like Tkinter for desktop applications or a web framework like Flask or Django for web applications to display images in the user interface.
main.py
In this example we are using the ImageTk method of the PIL module to display the image output.
import tkinter as tk
from PIL import Image, ImageTk

def display_image(image_path):
   root = tk.Tk()
   root.title("Image Viewer")

   image = Image.open(image_path)
   photo = ImageTk.PhotoImage(image)

   label = tk.Label(root, image=photo)
   label.image = photo
   label.pack()

   root.mainloop()

display_image("Images/tutorialspoint.png")
Output

Saving Images
Saving images in pillow refers to save the opened image into the memory and making them accessible for manipulation and processing within a Python program.
The Image module of the pillow library provides the save() method, allowing you to to save the specified image object into the specified location of the memory or local system.
Saving images using save() function
The save() method allow us to save the opened image in different file formats such as JPG, PNG, PDF and so on. This function specifies various options for saving the image including the format, quality and other parameters.
The following is the syntax and parameters of this function.
PIL.Image.save(file, format=None, **params)
Where,
file − The file path or a file-like object to which the image will be saved.
format(optional) − The format to save the image in. If not specified Pillow will try to determine the format from the file extension.
params(optional) − Additional parameters that depend on the format we are saving the image in.
This function saves the image in the specified location with the specified file name.
Example - Saving Image
In this example we are opening the specified image using the open() function of the Image module of pillow library. Then saving the opened image in the specified location by passing the path as the input parameter to the save() function.
main.py
from PIL import Image
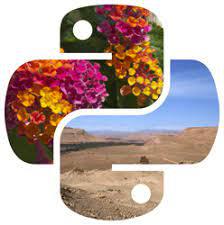
loading_image = Image.open("pillow.jpg")
#Show the image
loading_image.show()
#Save the image
loading_image.save("Images/saved_image.jpg")
print("Image saved")
Output
Loaded Image −

Saved Image −
Example - Using various parameters
Here in this example are using the other optional parameters for saving the image in the specified location.
main.py
from PIL import Image
#Load the image
loading_image = Image.open("Images/tutorialspoint.png")

#Show the image
loading_image.show()

#Save the image
loading_image.save("Output_Images/save_outputimg.png", format = "PNG", quality = 200)
print("Image saved")
Output
Loaded Image −

Saved Image −
We can use the save() method to save images in various formats and control the quality and other format-specific options as needed for our specific use case.